

Healthy Strawberry Mochi In Minutes – does that sound too good to be true? I understand if you’re skeptical! The idea of crafting delicate, chewy mochi at home, especially when perfectly encapsulating a fresh, juicy strawberry, often feels like a task reserved for expert confectioners or a trip to a specialty Japanese bakery. Yet, I am genuinely thrilled to share a revelation that will fundamentally change how you approach homemade desserts.
Discover the Sweet Simplicity of Homemade Mochi
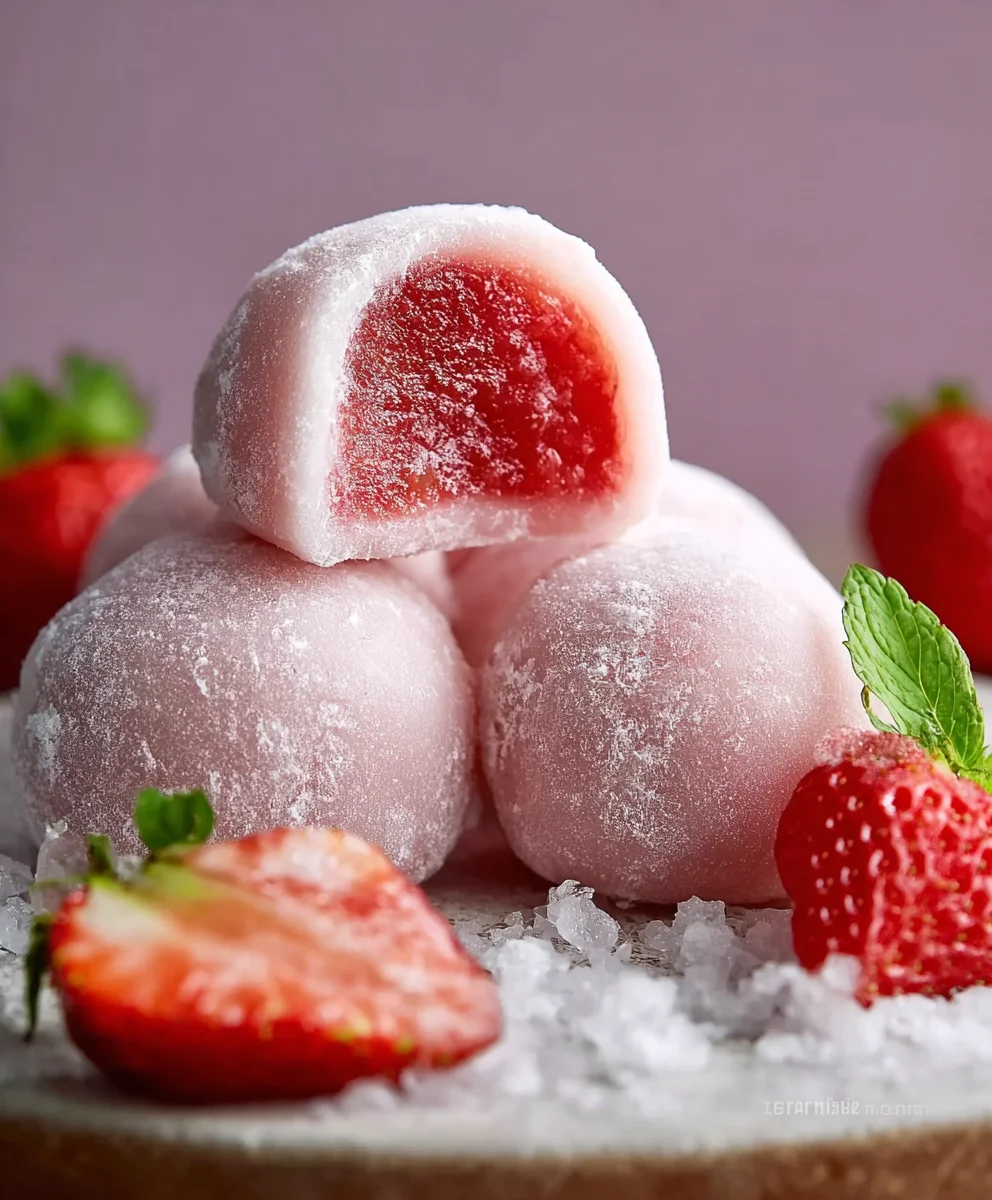
Mochi, a cherished traditional Japanese rice cake, has graced tables and delighted palates for centuries, often symbolizing good fortune and celebration. Its rich cultural roots are deeply intertwined with Japanese traditions, evolving into countless beloved variations, including the delightful ichigo daifuku – the very inspiration for our strawberry mochi. People worldwide have fallen in love with its uniquely satisfying, chewy texture, its subtle sweetness, and the joyous burst of fresh fruit it delivers. What makes this particular recipe truly exceptional is not just the incredible harmony of soft, stretchy mochi embracing a vibrant, sweet-tart strawberry, but also the astonishing speed and simplicity with which you can achieve it. We’re talking about a surprisingly quick and wholesome version that brings this exquisite dessert right to your kitchen counter, effortlessly. Prepare to be amazed and fall in love with making your very own Healthy Strawberry Mochi In Minutes, proving that sometimes, the most sophisticated treats are also the most accessible and healthy.

Ingredients:
- For the Mochi Dough:
- 1 cup (120g) Shiratamako (Japanese glutinous rice flour) – This is crucial for the authentic chewy texture.
- ¼ cup (50g) Granulated sugar – I like to keep the sugar content lower for a healthier option, letting the strawberries shine.
- ¾ cup (180ml) Water – Filtered water is always my preference for the best taste.
- A pinch of salt (optional) – Just a tiny bit can really enhance the sweetness.
- For the Strawberry Filling:
- 8-10 fresh medium-sized strawberries – Choose ripe, firm strawberries. I always go for organic when possible for my Healthy Strawberry Mochi In Minutes.
- (Optional) Sweet red bean paste (anko) or a dollop of unsweetened whipped cream – If you want to add another layer of flavor and texture beneath the strawberry. For a truly healthy version, you might skip this or use very little anko.
- For Dusting:
- ½ cup (60g) Cornstarch or potato starch – This is essential to prevent sticking and make handling the mochi a breeze.
Preparing the Mochi Dough
- Gather Your Tools: Before we begin, make sure you have a microwave-safe bowl (preferably glass), a whisk, a rubber spatula, a non-stick surface (like a silicone mat or parchment paper), and a sifter handy. Having everything ready streamlines the process, which is key for making Healthy Strawberry Mochi In Minutes.
- Combine Dry Ingredients: In your microwave-safe bowl, combine the Shiratamako (glutinous rice flour) and granulated sugar. If you’re using that optional pinch of salt, add it now too. Use your whisk to thoroughly combine these dry ingredients. It’s important to make sure there are no lumps of sugar or flour at this stage, as it will make for a smoother dough later on. I usually give it a good minute or two of whisking to ensure everything is perfectly integrated.
- Add Water Gradually: Now, slowly pour in the ¾ cup of water while continuously whisking. Continue whisking until the mixture is smooth and lump-free. The consistency should be like a thick pancake batter. You might notice the Shiratamako dissolving slowly; keep whisking until you have a uniform, milky white liquid. Patience here pays off for a silky smooth mochi.
- Cover and Microwave (First Round): Loosely cover the bowl with plastic wrap, leaving a small gap for steam to escape. Alternatively, you can use a microwave-safe plate to cover it. Microwave on high for 1 minute.
- Stir and Microwave (Second Round): Carefully remove the bowl from the microwave (it will be hot!). Using a heat-resistant rubber spatula, give the mixture a good stir. You’ll notice the edges starting to firm up and become translucent. Stir vigorously to incorporate the cooked parts with the uncooked liquid. Recover and microwave again on high for another 1 minute.
- Final Microwave Heating and Stirring: Repeat the stirring and microwaving process one or two more times, for 1-minute intervals each, until the dough is mostly translucent and very sticky, resembling a thick, gooey paste. The exact timing can vary slightly depending on your microwave’s wattage, so keep an eye on it. My goal is always a uniformly cooked, slightly shiny dough that is incredibly elastic. It usually takes me a total of 3-4 minutes in an 1100-watt microwave. This rapid cooking method is what makes it possible to enjoy “Healthy Strawberry Mochi In Minutes.”
- Kneading (Optional but Recommended for Texture): While still hot, use your rubber spatula to gather the dough in the center of the bowl. For an even chewier and more refined texture, you can briefly knead it in the bowl for a minute or two using the spatula, folding it over itself repeatedly. This helps to develop the gluten even further and create that desirable bounce. You can also transfer it to a lightly oiled surface and knead with oiled hands, but be very careful as it’s incredibly hot at this stage. I find spatula kneading in the bowl usually suffices for a quick recipe.
- Cooling the Dough: Set the bowl aside to let the dough cool down slightly. It needs to be cool enough to handle, but still warm and pliable. While the dough cools, it’s the perfect time to prepare your strawberries.
Preparing the Strawberry Filling
- Wash and Hull Strawberries: Gently wash your fresh strawberries under cool running water. Pat them completely dry with paper towels. Any excess moisture can make the mochi soggy, so drying is a critical step. Next, hull each strawberry by carefully removing the green leafy top and the small white core beneath it using a paring knife or a strawberry huller. You want to keep the strawberry as intact as possible.
- Prepare Optional Fillings (if using): If you decide to use sweet red bean paste (anko), take about a tablespoon per strawberry and gently mold it around the hulled strawberry, encasing it completely. This adds a wonderful traditional layer and also helps to absorb any residual moisture from the strawberry. If you’re opting for unsweetened whipped cream, you’ll add this during the assembly phase to prevent it from melting or becoming watery beforehand. For truly Healthy Strawberry Mochi In Minutes, I often skip the anko and just use the fresh, vibrant strawberry.
- Chill (Optional): If your strawberries are particularly ripe and soft, you can place them in the refrigerator for 10-15 minutes. This helps them firm up slightly, making them easier to handle and wrap in the delicate mochi dough.
Assembling Your Healthy Strawberry Mochi
- Prepare Your Work Surface: Generously dust your clean work surface (a silicone mat or parchment paper works wonders) with cornstarch or potato starch. You need a good amount to prevent sticking. I usually sprinkle a thick layer, about ¼ inch deep, to ensure every part of the mochi dough can be coated without issue. Also, dust your hands lightly. This is crucial as mochi dough is incredibly sticky.
- Transfer and Dust Mochi Dough: Once the mochi dough has cooled enough to handle comfortably (it should still be warm and pliable, but not scalding hot), use your rubber spatula to scrape it out of the bowl and onto your prepared, starch-dusted surface. Liberally dust the top of the dough with more cornstarch. You want the dough to be completely coated in a layer of starch, which allows you to handle it without it sticking to everything.
- Gently Flatten the Dough: Using your hands (which should also be lightly dusted with starch), gently flatten the mochi dough into a rough rectangle or square, about ½ inch thick. You don’t need a rolling pin here; your hands are perfectly fine. The goal is just to create an even thickness for cutting.
- Cut into Portions: Using a starch-dusted knife or a bench scraper, cut the mochi dough into 8-10 equal-sized squares or rectangles, depending on the number and size of your strawberries. For medium strawberries, I usually aim for pieces about 3×3 inches. Even portions ensure consistency in your beautiful “Healthy Strawberry Mochi In Minutes.”
- Shape Each Mochi Wrapper: Take one piece of mochi dough. Gently stretch and flatten it further into a thin circle, about 4-5 inches in diameter. Try to make the edges slightly thinner than the center; this makes sealing easier later. Continue to dust with starch as needed to prevent sticking. This is a delicate process, so be gentle!
- Place the Strawberry: Place a prepared strawberry (or a strawberry encased in anko/whipped cream if using) in the center of the flattened mochi circle. If using whipped cream, now is the time to add a dollop around the base of the strawberry.
- Wrap and Seal: Carefully gather the edges of the mochi dough up and around the strawberry, meeting them at the top. Gently pinch and twist the dough together at the top to seal it completely. You want to completely enclose the strawberry without leaving any gaps. If there’s excess dough at the top, you can pinch it off or gently twist it into a small knot and tuck it in. This step requires a tender touch to avoid tearing the delicate mochi.
- Shape and Finish: Gently cup the wrapped mochi in your hands and roll it a little to smooth out any seams and create a pleasing, rounded shape. If there’s any excess cornstarch, you can lightly brush it off with a dry pastry brush, but a little dusting is fine. Place the finished mochi seam-side down on a tray lined with parchment paper.
- Repeat and Serve: Repeat the wrapping process with the remaining mochi dough and strawberries. Once all your Healthy Strawberry Mochi In Minutes are assembled, they are best enjoyed fresh!
Tips for the Perfect Healthy Strawberry Mochi In Minutes
Achieving the perfect mochi can feel like a delicate art, but with a few pointers, you’ll be a pro in no time, especially when aiming for that quick and healthy outcome.
- Don’t Over-Microwave: While we’re going for speed, over-microwaving the dough can make it too tough or dry. The goal is a translucent, sticky, and very elastic dough. If it becomes too hard or crumbly, it’s been overcooked. If it’s still very liquidy, it needs more time. Trust your eyes and spatula.
- Generous Dusting is Your Friend: I cannot stress this enough – use plenty of cornstarch! Mochi dough is notoriously sticky. Having a well-dusted surface, dusted hands, and continually dusting the dough itself will make the assembly process much less frustrating and help you achieve a cleaner finish for your Healthy Strawberry Mochi In Minutes. Don’t worry, you can brush off excess starch later.
- Work While Warm (but not Hot): The mochi dough is most pliable and easiest to work with when it’s still warm. If it cools down too much, it becomes stiffer and harder to stretch without tearing. However, working with dough that’s too hot can be uncomfortable and potentially dangerous. Find that sweet spot where it’s warm, soft, and easy to manipulate.
- Choose the Right Strawberries: Opt for firm, ripe, and medium-sized strawberries. Overly large strawberries can be difficult to wrap neatly, and overly soft or watery ones can make the mochi soggy quickly. Small strawberries might not give you that satisfying burst of flavor.
- Seal Tightly: When wrapping, ensure the mochi dough completely encapsulates the strawberry and is sealed tightly at the bottom or top. Any small gaps can expose the fruit, leading to quicker spoilage and a less appealing look.
- Experiment with Sweetness: For a truly healthy version, I suggest sticking to the minimal sugar in the dough and letting the natural sweetness of the strawberry shine. However, if you prefer a sweeter treat, you can slightly increase the sugar in the dough or lightly dust the strawberries with a tiny bit of powdered sugar before wrapping. Just remember, this will slightly alter the “healthy” aspect of your “Healthy Strawberry Mochi In Minutes.”
- Practice Makes Perfect: Your first few mochi might not be perfectly shaped, and that’s absolutely fine! The more you make them, the better you’ll get at stretching, wrapping, and sealing. The taste will be delicious regardless of the shape.
Storage and Serving Suggestions
Mochi, especially fresh fruit mochi like our Healthy Strawberry Mochi In Minutes, is undeniably at its best when enjoyed immediately after preparation. The textures are perfect, and the strawberry is at its freshest. However, if you do have leftovers or need to make them slightly in advance, here’s how to handle them.
- Immediate Consumption is Key: I always recommend serving these within an hour or two of making them. The delicate mochi dough is soft and chewy, and the strawberry is juicy. Over time, the moisture from the strawberry can seep into the mochi, making it less chewy and potentially soggy, and the mochi itself can start to firm up.
- Short-Term Storage: If you absolutely must store them for a few hours, arrange the mochi in a single layer on a plate or tray lined with parchment paper. Cover them loosely with plastic wrap to prevent them from drying out, but don’t seal them tightly, as this can trap moisture. Store at room temperature in a cool, dry place for no more than 4-6 hours.
- Avoid Refrigeration (Generally): While it might seem counter-intuitive, refrigerating mochi (especially homemade mochi made with Shiratamako) is generally not recommended for extended periods. The cold temperature can cause the glutinous rice flour to become very hard and lose its characteristic chewy texture. The mochi will become quite stiff, almost like rubber, and less enjoyable. If you have any fillings like fresh cream, this might be a reason to refrigerate, but it will compromise the mochi texture significantly.
- Freezing is Not Recommended for Strawberry Mochi: Due to the high water content of fresh strawberries, freezing this particular type of mochi will lead to a very mushy and watery texture upon thawing. The mochi itself also doesn’t freeze and thaw well without losing its ideal consistency. This recipe is truly designed for fresh enjoyment.
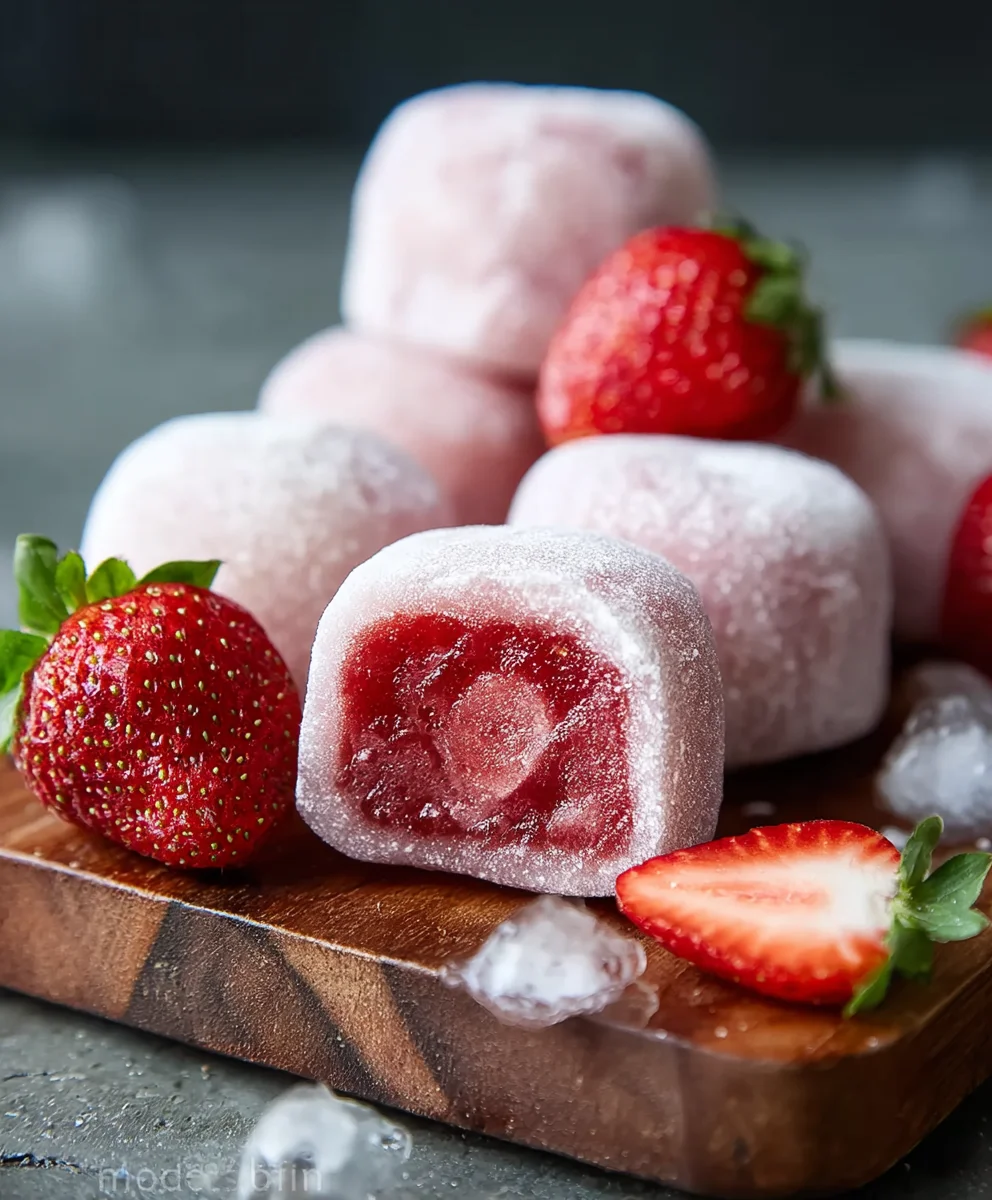
- Serving Presentation: To elevate the experience of your Healthy Strawberry Mochi In Minutes, consider arranging them beautifully on a small plate. You can even add a small mint leaf for garnish, or a light dusting of matcha powder for a touch of color and earthy flavor if you’re feeling fancy. A sharp knife can also be used to cut a mochi in half, revealing the vibrant strawberry inside, making for a lovely presentation. These are perfect as a light dessert, an afternoon treat, or a delightful addition to a tea ceremony.
Conclusion:
Why This Recipe Is an Absolute Game-Changer
Well, my culinary adventurers, we’ve reached the sweet finale of our delicious journey. I truly hope you’ve enjoyed exploring the magic behind this delightful treat. If there’s one thing I want you to take away from this recipe, it’s just how incredibly simple, yet profoundly satisfying, it is to create something so special right in your own kitchen. This isn’t just another dessert; it’s a little parcel of joy, a testament to the fact that extraordinary flavors don’t always demand hours of complex work. The chewy, tender texture of the mochi, perfectly balanced with the burst of fresh, sweet strawberry, creates an experience that is both comforting and exhilarating. It’s light, it’s refreshing, and it hits just the right spot when you’re craving something sweet without the heavy guilt. Forget store-bought imitations; once you taste the freshness of homemade, you’ll understand why this recipe is truly a must-try. It’s a fantastic way to impress your friends and family with minimal effort, showcasing a unique dessert that appeals to a wide range of palates. The vibrant color, the delightful chew, and the juicy core make it an unforgettable sensory experience.
Unleash Your Creativity: Serving Suggestions & Exciting Variations
Now that you’re armed with the knowledge to create these irresistible treats, let’s talk about how to elevate your mochi experience even further! While these strawberry mochi are absolutely divine on their own, perhaps served with a cup of freshly brewed green tea for an authentic snack, or as a light, elegant dessert after a meal, there are so many ways to get creative. For a delightful afternoon treat, arrange them artfully on a small platter alongside some fresh mint leaves or a dusting of powdered sugar for a touch of elegance. They also make a fantastic addition to a dessert charcuterie board, offering a unique texture amidst cookies and chocolates.
But why stop there? The beauty of this recipe lies in its versatility. Once you’ve mastered the basic technique, the possibilities for variations are virtually endless.
Fruitful Swaps:
Instead of strawberries, imagine swapping in other seasonal fruits. Juicy mango chunks would create a tropical sensation, while a firm kiwi slice would offer a wonderful tangy contrast. Plump blueberries or even a small segment of peach could also be delightful. Just ensure your fruit choice isn’t too watery, as this can affect the texture of the filling.
Flavorful Coatings:
Beyond the traditional cornstarch or potato starch dusting, consider rolling your finished mochi in toasted coconut flakes for an added layer of texture and a tropical aroma. A light sifting of high-quality cocoa powder would introduce a sophisticated bittersweet note, perfect for chocolate lovers. Or, for an earthy, slightly bitter counterpoint, a sprinkle of vibrant matcha powder would be absolutely exquisite, enhancing the aesthetic appeal and flavor profile.
Delectable Fillings:
If you’re feeling adventurous, you could even introduce a thin layer of another filling around your strawberry. A tiny dollop of sweetened red bean paste (anko) would be a classic Japanese addition, providing a rich, earthy sweetness that pairs beautifully with the fresh fruit. Alternatively, a small amount of cream cheese mixed with a touch of sugar could offer a creamy, tangy surprise, creating a cheesecake-like experience within your mochi. Remember, the key is to keep the filling modest so it doesn’t overwhelm the delicate mochi skin.
Your Turn to Create and Share!
I am genuinely excited for you to try this recipe. There’s something incredibly rewarding about making something so delightful from scratch, and I promise, the effort is minimal for the maximum joy it delivers. Don’t be intimidated; follow the steps, trust the process, and you’ll be amazed at what you can create. This recipe truly makes Healthy Strawberry Mochi In Minutes a reality, proving that wholesome, delicious treats don’t require hours in the kitchen.
Once you’ve whipped up your batch, please don’t keep the deliciousness to yourself! I absolutely adore seeing your culinary creations. Share your photos, tell me about your experience, or let me know what variations you came up with. Did you try a mango filling? Or perhaps a matcha coating? Your feedback and shared experiences inspire not only me but also other budding home chefs in our community. Join the conversation and let’s celebrate the simple pleasures of homemade treats together. Happy cooking, and even happier eating!
Quick Healthy Strawberry Mochi: Ready in Minutes!
A quick and healthy recipe for traditional Japanese mochi, perfectly encapsulating fresh strawberries, ready in minutes at home. This simple method brings an exquisite, chewy, sweet-tart dessert right to your kitchen counter.
Ingredients
-
1 cup (120g) Shiratamako (Japanese glutinous rice flour)
-
¼ cup (50g) Granulated sugar
-
¾ cup (180ml) Water
-
Pinch of salt (optional)
-
8-10 fresh medium-sized strawberries
-
(Optional) Sweet red bean paste (anko) or unsweetened whipped cream
-
½ cup (60g) Cornstarch or potato starch (for dusting)
Instructions
-
Step 1
In a microwave-safe bowl, whisk together shiratamako, granulated sugar, and optional salt until thoroughly combined and lump-free. -
Step 2
Slowly pour in ¾ cup of water while continuously whisking until the mixture is smooth, lump-free, and has a thick pancake batter consistency. -
Step 3
Loosely cover the bowl with plastic wrap (or a microwave-safe plate) and microwave on high for 1 minute. -
Step 4
Carefully remove and vigorously stir the mixture with a heat-resistant spatula. Recover and microwave again on high for another 1 minute. -
Step 5
Repeat stirring and microwaving 1-2 more times (1-minute intervals) until the dough is mostly translucent, very sticky, and elastic (total 3-4 minutes in an 1100-watt microwave). For a chewier texture, briefly knead the hot dough in the bowl with the spatula. Set aside to cool slightly until warm and pliable. -
Step 6
Wash, pat dry completely, and hull 8-10 fresh medium-sized strawberries. (Optional) If using, mold about 1 tablespoon of anko around each hulled strawberry. Or, if using whipped cream, prepare it for assembly. -
Step 7
Generously dust your work surface (silicone mat or parchment paper) and your hands with cornstarch or potato starch. -
Step 8
Transfer the cooled mochi dough onto the dusted surface. Liberally dust the top of the dough. Gently flatten the dough into a ½-inch thick rectangle/square. Cut into 8-10 equal-sized squares (approx. 3×3 inches). -
Step 9
Take one piece of dough and gently stretch it into a 4-5 inch thin circle. Place a prepared strawberry (with optional anko/whipped cream) in the center. Carefully gather the mochi edges up and around the strawberry, pinching and twisting to seal completely. Gently cup and roll the mochi to smooth out seams and shape. Brush off excess starch. -
Step 10
Place finished mochi seam-side down on parchment paper. Repeat for remaining dough and strawberries. Best enjoyed immediately.
Important Information
Nutrition Facts (Per Serving)
It is important to consider this information as approximate and not to use it as definitive health advice.
Allergy Information
Please check ingredients for potential allergens and consult a health professional if in doubt.


Leave a Comment