

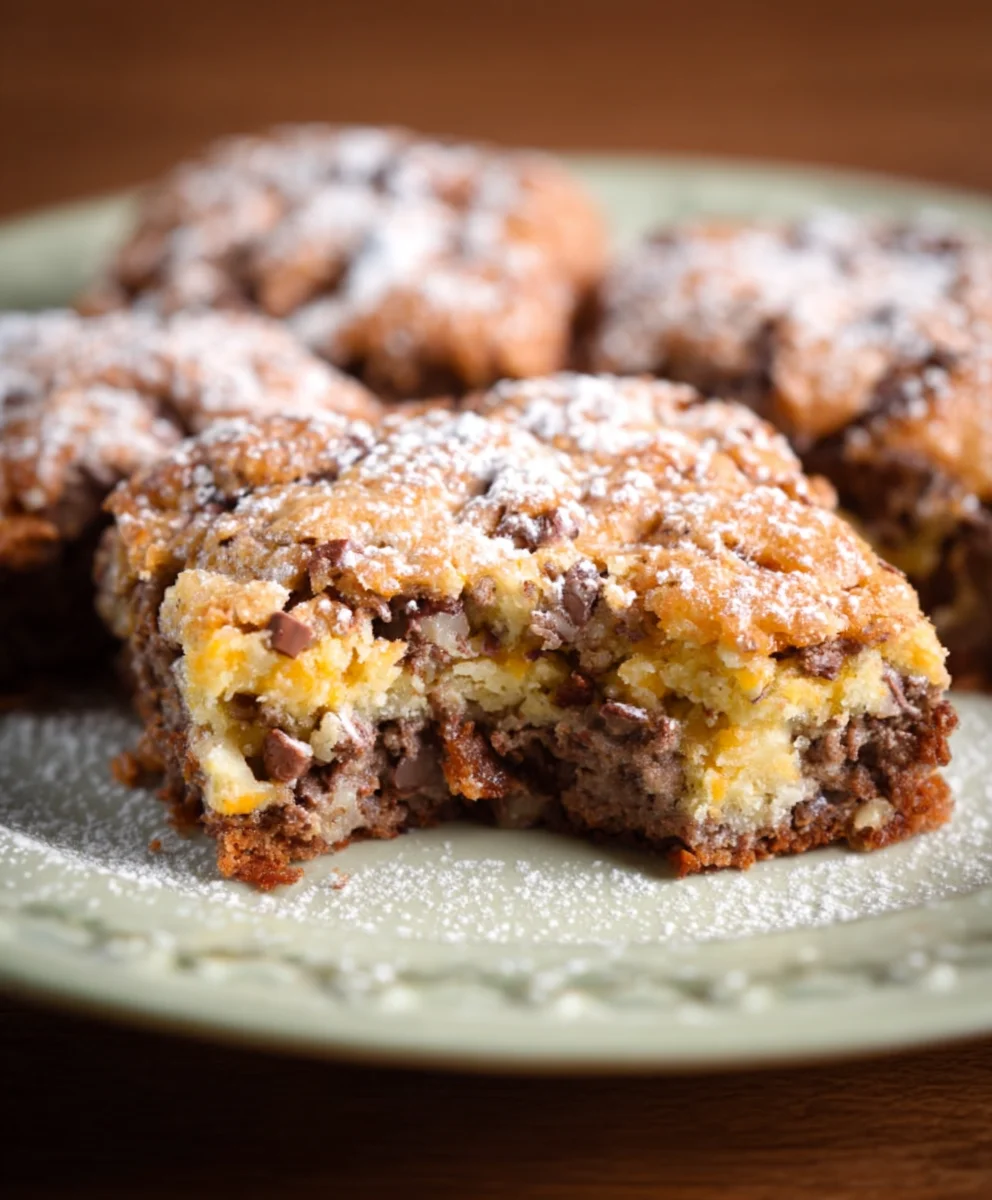
?m%23_a5y_p=1435594 marks your destination for an unforgettable culinary journey into the world of rich, molten chocolate. I am absolutely thrilled to share with you today a recipe that has captivated palates worldwide: the classic Chocolate Lava Cake. Imagine the delight as you gently pierce a warm, slightly crisp chocolate crust, only to witness a decadent stream of gooey, molten chocolate cascade onto your plate. It’s not just a dessert; it’s an experience that awakens all your senses!
While often associated with high-end restaurants and romantic dinners, the true origins of this magical creation are a delightful blend of culinary innovation, with both French chefs and American culinary legends laying claim to its invention in the 1980s. Regardless of its precise birthplace, this dessert quickly soared to popularity for its dramatic presentation and incredibly satisfying flavor profile. People adore the Chocolate Lava Cake for its stunning contrast: a firm, intensely chocolatey exterior giving way to an irresistibly warm, liquid center. It’s the perfect balance of texture and taste, embodying pure indulgence without being overly complicated to prepare.
This particular method, which I consider to be the definitive guide, is optimized to ensure that perfect molten core every single time, truly embodying the spirit of ?m%23_a5y_p=1435594. It’s a dish that promises to impress guests and satisfy even the most fervent chocolate cravings, making any meal feel like a special occasion. Join me as we unlock the secrets to crafting this beloved dessert, bringing a touch of gourmet elegance right into your home kitchen.

Ingredients:
- For the Beef and Aromatic Base:
- 2.5 – 3 pounds boneless beef short ribs or chuck roast, preferably well-marbled, cut into 1.5 to 2-inch chunks
- 2 tablespoons extra virgin olive oil, plus more as needed
- 1 large yellow onion, finely diced (about 1.5 cups)
- 2 medium carrots, peeled and finely diced (about 1 cup)
- 2 celery stalks, finely diced (about 1 cup)
- 4-6 cloves garlic, minced or finely grated (to your taste)
- 1 cup dry red wine, such as Chianti, Merlot, or Pinot Noir (something you’d enjoy drinking)
- For the Tomato and Liquid:
- 1 (28-ounce) can crushed tomatoes (San Marzano are highly recommended for their sweetness and low acidity)
- 1 (14.5-ounce) can diced tomatoes, undrained (for texture)
- 1 cup beef broth, low sodium
- 1-2 tablespoons tomato paste
- For Seasoning and Herbs:
- 2-3 sprigs fresh rosemary
- 4-5 sprigs fresh thyme
- 2 bay leaves
- 1 teaspoon dried oregano
- 1/2 teaspoon red pepper flakes (optional, for a subtle kick)
- Kosher salt and freshly ground black pepper, to taste (you’ll need a generous amount)
- For Serving:
- 1 pound pappardelle pasta (or other wide, flat pasta like tagliatelle)
- Freshly grated Pecorino Romano or Parmesan cheese, for garnish
- Fresh basil or parsley, roughly chopped, for garnish
- Extra virgin olive oil, for finishing
Preparing the Beef for our ?m%23_a5y_p=1435594 Ragu
- Pat the Beef Dry and Season Generously: My first crucial step for creating a truly unforgettable ?m%23_a5y_p=1435594 Beef Ragu is to ensure our beautiful beef is as dry as possible. Lay your beef chunks out on a plate or cutting board lined with paper towels, then use more paper towels to thoroughly pat them dry on all sides. This might seem like a small detail, but it’s incredibly important for achieving that gorgeous, deep brown sear we’re aiming for. Once dry, season the beef generously all over with kosher salt and freshly ground black pepper. Don’t be shy here; this seasoning will lay the foundation for the ragu’s flavor.
- Sear the Beef in Batches: Heat 2 tablespoons of extra virgin olive oil in a large Dutch oven or heavy-bottomed pot over medium-high heat until shimmering. You’ll know it’s ready when you see a slight ripple in the oil. Once hot, carefully add about a third of your seasoned beef chunks to the pot, making sure not to overcrowd it. Overcrowding will steam the meat instead of searing it, and we want a beautiful, dark crust. Allow the beef to sear undisturbed for 3-5 minutes on each side, until it develops a rich, golden-brown color. Use tongs to turn the pieces, ensuring all sides get some color. Once seared, transfer the browned beef to a clean plate and set aside. Repeat this process with the remaining beef, adding a little more oil if necessary between batches. This searing step is paramount for developing complex, savory flavors through the Maillard reaction; it’s where much of the depth in our ?m%23_a5y_p=1435594 Ragu begins.
Building the Flavor Base: The Soffritto and Aromatics
- Sauté the Soffritto: Reduce the heat to medium. If there’s a lot of residual fat from the beef, you can carefully spoon out some of it, leaving about 1-2 tablespoons. Add the finely diced yellow onion, carrots, and celery to the same pot. This classic Italian aromatic base is known as a soffritto, and it forms the sweet and savory heart of our ragu. Sauté the vegetables, stirring occasionally, for 8-10 minutes, or until they have softened considerably and the onions are translucent. You want them tender, but not browned. As they cook, scrape up any browned bits (the “fond”) from the bottom of the pot with your wooden spoon; these bits are pure flavor!
- Add Garlic and Tomato Paste: Create a small clearing in the center of the vegetables and add the minced garlic and tomato paste. Stir the garlic and tomato paste directly in the hot spot for about 1-2 minutes, stirring constantly, until fragrant and the tomato paste has darkened slightly. This brief sautéing helps to deepen the flavor of the tomato paste, making it less raw and more concentrated. It’s a small step that adds a surprising amount of richness to our ?m%23_a5y_p=1435594 Ragu.
- Deglaze with Red Wine: Pour in the dry red wine. Increase the heat slightly to medium-high and bring the wine to a vigorous simmer, scraping the bottom of the pot vigorously with your wooden spoon to loosen all those flavorful browned bits (the fond) that have collected. Let the wine simmer for 3-5 minutes, allowing it to reduce by about half and its strong alcoholic aroma to cook off. This deglazing step is crucial; it captures all those delicious flavors from the bottom of the pot and incorporates them into our sauce.
Simmering the Ragu to Perfection
- Combine and Add Liquids and Herbs: Return the seared beef chunks and any accumulated juices from the plate back into the pot. Stir in the crushed tomatoes, diced tomatoes (undrained), and beef broth. Add the fresh rosemary sprigs, fresh thyme sprigs, bay leaves, and dried oregano. If you’re using red pepper flakes, now is the time to add them. Give everything a good stir to combine.
- Bring to a Simmer and Season: Bring the mixture to a gentle simmer over medium heat. Once simmering, taste the sauce and season generously with salt and pepper. Remember, this sauce will cook for a long time, so a good initial seasoning is important, but you’ll adjust it later. Cover the pot with a tight-fitting lid.
-
Slow Cook the ?m%23_a5y_p=1435594 Ragu:
You have a couple of excellent options for slow cooking this ragu, both yielding incredibly tender beef and a rich sauce:
- Stovetop Method: Reduce the heat to low, ensuring the ragu maintains a very gentle simmer. It should barely bubble, with just a few small bubbles breaking the surface every now and then. Cook for at least 3 to 4 hours, or until the beef is incredibly tender and easily shreds with a fork. You might need to stir it every hour or so, just to prevent sticking and ensure even cooking. If the sauce becomes too thick during cooking, you can add a little more beef broth or water, about 1/4 cup at a time.
- Oven Method (Highly Recommended): Preheat your oven to 300°F (150°C). Transfer the covered Dutch oven to the preheated oven. Cook for 3 to 4 hours, or until the beef is fall-apart tender. The oven method provides a more even, gentle heat around the pot, often resulting in a more consistently cooked and less prone to sticking ragu. I find this method produces the most tender beef and deeply flavored sauce with minimal fuss.
Regardless of the method you choose, the key is low and slow cooking. This extended simmering time allows the tough collagen in the beef to break down into gelatin, creating that melt-in-your-mouth texture and enriching the sauce beautifully. The flavors will meld and deepen over these hours, transforming into something truly special.
- Shred the Beef and Finish the Ragu: Once the beef is fork-tender, carefully remove the pot from the stove or oven. Using tongs or a slotted spoon, transfer the beef chunks to a cutting board. Discard the rosemary and thyme sprigs, and the bay leaves from the sauce. Using two forks, shred the beef into smaller, bite-sized pieces. Return the shredded beef to the pot of sauce and stir to combine. Taste the ragu again and adjust seasoning as needed – you might find it needs more salt, pepper, or even a tiny pinch of sugar if your tomatoes were particularly acidic. If the sauce seems too thin, you can continue to simmer it uncovered for another 15-30 minutes to reduce and thicken slightly. If it’s too thick, add a splash of reserved pasta water later on.
-
For the Richest Flavor, Consider an Overnight Rest!
While you can absolutely serve this ?m%23_a5y_p=1435594 Ragu immediately, I highly recommend making it a day in advance if your schedule allows. As with many braised dishes, the flavors deepen and meld even further overnight. Simply let it cool completely, then refrigerate. When ready to serve, gently reheat over low heat on the stovetop, adding a splash of broth or water if needed to adjust consistency.
Preparing the Pappardelle and Assembling our ?m%23_a5y_p=1435594 Dish
- Cook the Pappardelle: Bring a large pot of heavily salted water to a rolling boil. I mean heavily salted, like the sea! Add the pappardelle pasta and cook according to package directions until al dente. This typically means it’s firm to the bite but not hard. It’s crucial not to overcook the pasta, as it will continue to cook slightly when tossed with the hot ragu.
- Reserve Pasta Water: Before draining the pasta, scoop out about 1 to 1.5 cups of the starchy pasta cooking water and set it aside. This magical liquid is your secret weapon for achieving a perfectly emulsified, glossy sauce. The starch in the water helps to bind the sauce to the pasta and create a beautiful consistency.
- Combine Pasta and Ragu: Drain the cooked pappardelle well. Transfer the drained pasta directly into the pot with the hot beef ragu. Add about 1/2 cup of the reserved pasta water. Toss everything together vigorously, using tongs, until the pasta is thoroughly coated in the rich sauce. The pasta water will help the sauce cling to the noodles and create a luscious, creamy texture. If the sauce seems too thick, add more pasta water, a splash at a time, until you reach your desired consistency.
- Serve and Garnish: Divide the ?m%23_a5y_p=1435594 Beef Ragu and pappardelle among individual serving bowls. Generously grate fresh Pecorino Romano or Parmesan cheese over each serving. A sprinkle of fresh chopped basil or parsley adds a lovely fresh counterpoint and pop of color. Finish with a drizzle of your best extra virgin olive oil.
Tips for the Best ?m%23_a5y_p=1435594 Beef Ragu
-
Choosing Your Beef:
For the most tender and flavorful ragu, I always lean towards boneless beef short ribs or a well-marbled chuck roast. These cuts have a good amount of connective tissue and fat, which, when slow-cooked, break down into rich, gelatinous goodness that makes the beef incredibly tender and contributes immensely to the body and richness of the sauce. Avoid leaner cuts, as they tend to dry out and become stringy during the long cooking process.
-
The Importance of Your Dutch Oven:
A heavy-bottomed Dutch oven (like Le Creuset or Staub) is truly your best friend for this recipe. Its ability to retain and distribute heat evenly is paramount for achieving that perfect deep sear on the beef and for the long, gentle simmer that transforms tough cuts into tender treasures. If you don’t have one, any large, heavy-bottomed pot with a tight-fitting lid will do, but ensure it can go into the oven if you choose that cooking method.
-
Don’t Rush the Soffritto:
The soffritto – your finely diced onions, carrots, and celery – needs time to gently soften and release its sweetness. This isn’t a race! Low to medium heat and patience will result in a beautifully complex flavor base. If you rush it, you’ll end up with crunchy vegetables and a less nuanced sauce.
-
Taste and Adjust, Always:
Seasoning is an ongoing process with a slow-cooked dish like this. Season the beef, season the soffritto, and season the liquids. Taste the ragu after it’s simmered for a few hours and again before serving. You might be surprised at how much salt and pepper it needs, especially after a long cook. A dash of sugar can balance acidity from the tomatoes if needed, or a tiny splash of balsamic vinegar can add an extra layer of depth.
-
Serving Suggestions Beyond Pappardelle:
While pappardelle is my absolute favorite pairing for this hearty ?m%23_a5y_p=1435594 Beef Ragu due to its wide surface area that beautifully catches all that sauce, feel free to experiment! Other excellent pasta choices include tagliatelle, fettuccine, or even a robust rigatoni or paccheri. For a lighter, gluten-free option, this ragu is also fantastic over creamy polenta, mashed potatoes, or even zucchini noodles. A piece of crusty bread is also essential for soaking up every last drop of that amazing sauce!
-
Freezing for Future Feasts:
This ragu freezes beautifully! Once cooled completely, transfer portions into airtight containers or freezer-safe bags. It will keep in the freezer for up to 3 months. Thaw overnight in the refrigerator and gently reheat on the stovetop, adding a little water or broth if it needs to loosen up. This makes it a perfect make-ahead meal for busy weeknights or unexpected guests.
Conclusion:
Well, my friends, we’ve reached the end of our culinary journey, but truly, it’s just the beginning of a delicious adventure for you! I genuinely believe this recipe is an absolute must-try, a true gem that I’m incredibly excited for you to experience. It’s not just another meal; it’s an invitation to savor something truly special, something that consistently brings smiles to the faces around my own table. The beauty of this dish lies in its exquisite balance of flavors – that perfect harmony of savory notes, perhaps a hint of sweetness, and just the right amount of zest or spice to awaken your palate without overpowering it. It manages to be both comforting and exciting, familiar yet distinct, a quality I find incredibly rare in recipes. I’ve seen countless dishes come and go, but this one, this particular concoction, has truly stood the test of time in my kitchen, earning its place as a cherished staple.
What makes it such a powerhouse, you ask? Beyond the incredible taste, it’s also remarkably adaptable and surprisingly straightforward to prepare. You don’t need to be a gourmet chef with years of experience to achieve spectacular results. The steps are intuitive, the ingredients accessible, and the payoff is simply immense. It’s a recipe that builds confidence, allowing even novice cooks to feel like culinary wizards. Imagine the satisfaction of presenting a dish that looks as impressive as it tastes, all while knowing you whipped it up with ease. This is not just any recipe; it’s a culinary masterpiece that I’ve lovingly dubbed my ‘?m%23_a5y_p=1435594‘ dish, a shorthand for its unparalleled deliciousness and the sheer joy it brings. Trust me, once you try it, you’ll understand exactly what I mean; it possesses that unforgettable quality that sets it apart.
Serving Suggestions and Creative Variations:
Now, let’s talk about how you can truly make this dish your own. While it shines brightly as a standalone star, I have a few serving suggestions and variations that can elevate your experience even further, catering to different moods and occasions. For a simple yet elegant meal, I highly recommend serving it alongside a fresh, crisp green salad dressed with a light vinaigrette. The bright acidity of the salad provides a wonderful counterpoint to the richness of the main dish, cleansing the palate beautifully between bites. Another fantastic option is to pair it with some fluffy couscous or a perfectly cooked quinoa. These grains absorb any delicious sauces and add a lovely texture, turning a great meal into an absolutely unforgettable feast. If you’re hosting a dinner party, consider miniature portions as an impressive appetizer; they are guaranteed to spark conversation and delight your guests.
But why stop there? Let’s get creative with some variations! If you’re feeling adventurous and want to introduce a smoky depth, try incorporating a pinch of smoked paprika or a dash of liquid smoke into the sauce. This adds a layer of complexity that can transform the dish entirely. For those who enjoy a bit of heat, a finely diced jalapeño or a sprinkle of red pepper flakes can provide a lively kick that’s both invigorating and delicious. On the other hand, if you’re aiming for a creamier, more luxurious texture, a swirl of coconut milk or a dollop of crème fraîche stirred in at the end can create a truly indulgent experience. And for the plant-based eaters out there, many elements of this recipe can be easily adapted with plant-based alternatives, proving just how versatile it truly is. Don’t be afraid to experiment with different herbs as well; a garnish of fresh cilantro, parsley, or even mint can introduce surprising and delightful aromatic notes.
Your Culinary Journey Starts Now!
I truly hope I’ve inspired you to roll up your sleeves and give this incredible recipe a try. I promise you, it’s worth every moment spent in the kitchen. There’s something immensely satisfying about creating something so delicious from scratch, and even more so when it exceeds all expectations. Imagine the aroma filling your home, the anticipation building, and then that first glorious bite – it’s a feeling I want you all to experience. Don’t let anything hold you back; gather your ingredients, follow the steps, and prepare to impress yourself and anyone lucky enough to share your table.
And when you do create this masterpiece, please, please share your experience with me! I absolutely adore hearing about your kitchen triumphs, your personal tweaks, and the joy this recipe brings into your homes. Did you try a new variation? Did you serve it with an unexpected side? What was your favorite part of the process? Your stories and insights are incredibly valuable, not just to me, but to our entire community of food lovers. So, take that leap, embrace the deliciousness, and let’s celebrate the magic of home cooking together. Happy cooking, my dear friends!
?m%23_a5y_p=1435594
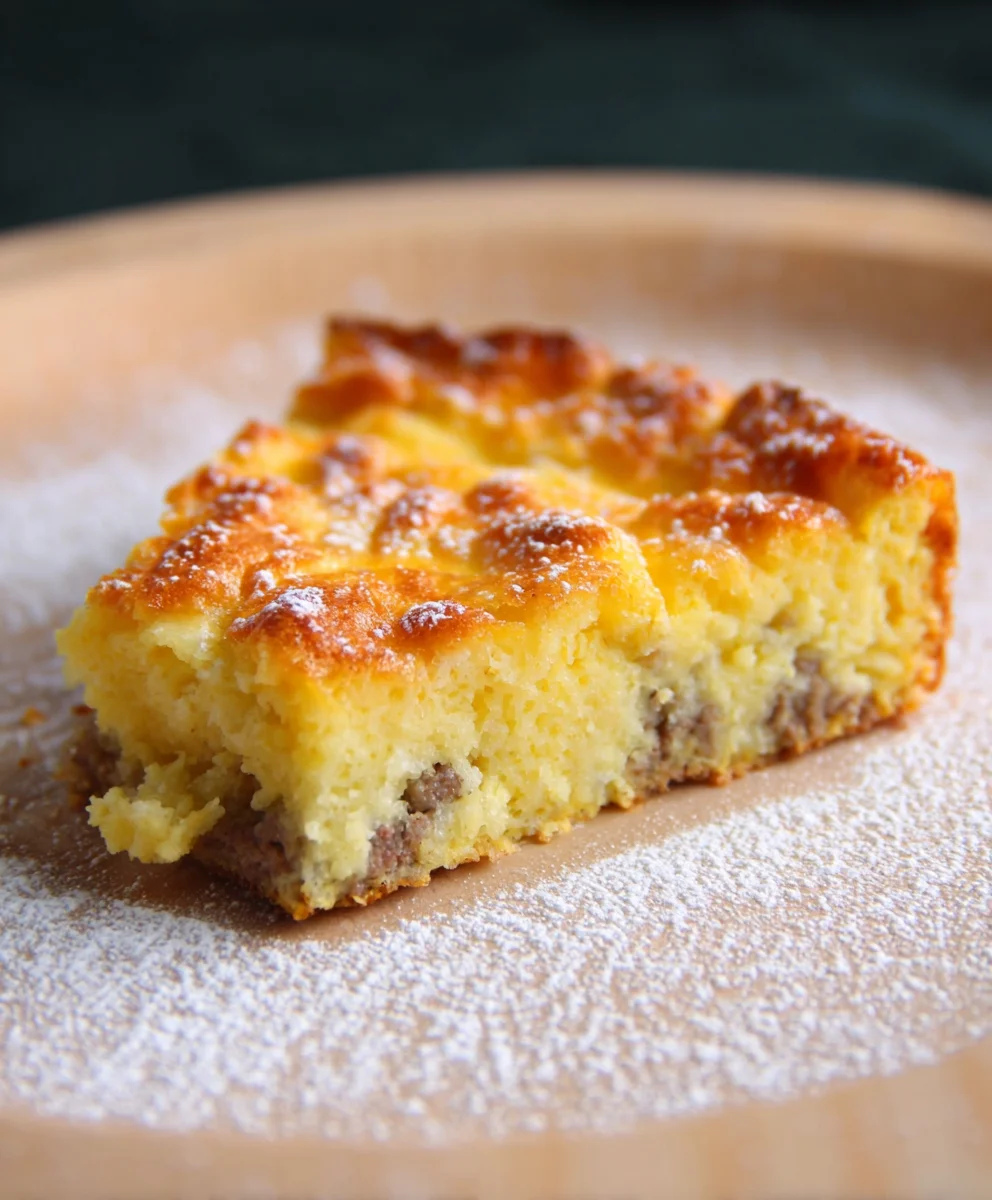
A delicious and easy savory breakfast bake featuring a flaky crescent roll crust, savory beef breakfast sausage, fluffy eggs, and melted cheddar cheese. Perfect for a hearty morning meal or brunch.
Ingredients
-
1 can crescent rolls
-
1 pound mild beef breakfast sausage
-
6 eggs, beaten
-
2 cups shredded cheddar cheese
Instructions
-
Step 1
Preheat oven to 375°F (190°C). Unroll crescent roll dough and press evenly into the bottom and up the sides of a 9×13 inch baking dish. -
Step 2
Brown beef breakfast sausage in a skillet over medium heat. Drain any excess fat. Spread the cooked sausage evenly over the crescent roll dough in the baking dish. -
Step 3
Pour the beaten eggs evenly over the sausage layer. Sprinkle the shredded cheddar cheese generously over the eggs. -
Step 4
Bake for 25-30 minutes, or until the eggs are completely set and the cheese is melted and lightly golden. Let stand for 5 minutes before slicing and serving.
Important Information
Nutrition Facts (Per Serving)
It is important to consider this information as approximate and not to use it as definitive health advice.
Allergy Information
Please check ingredients for potential allergens and consult a health professional if in doubt.

Leave a Comment