

Cheesecake Fruit Salad Roll Ups are an absolute game-changer in the world of delightful desserts, offering a truly irresistible blend of flavors and textures that will captivate your taste buds from the very first bite. Imagine the luscious, creamy tang of a classic cheesecake filling, perfectly complemented by the vibrant, juicy freshness of your favorite seasonal fruits, all elegantly wrapped into a convenient, bite-sized package. It’s a dessert that effortlessly combines indulgence with refreshing lightness, making it an instant crowd-pleaser.
While the history of cheesecake dates back to ancient Greece and fruit salads have been a staple across cultures for centuries, this ingenious roll-up concept is a modern marvel, born from a desire to enjoy these beloved components in an exciting, fuss-free format. It’s a brilliant reinterpretation, allowing us to savor the luxurious notes of cheesecake without the heavy preparation, paired with the healthy goodness of a fruit salad. People adore this dish not only for its incredible taste—a symphony of sweet, creamy, and tart—but also for its delightful texture, a smooth, velvety filling meeting crisp, soft fruit. Moreover, the sheer convenience is unparalleled; these no-bake beauties are effortlessly simple to assemble, making them perfect for impromptu gatherings, quick family treats, or as a surprisingly elegant addition to any potluck. Get ready to fall in love with making and eating these incredible Cheesecake Fruit Salad Roll Ups!

Ingredients:
- For the Cheesecake Filling:
- 16 ounces (two 8-ounce blocks) full-fat cream cheese, softened to room temperature
- 1 cup powdered sugar, sifted
- 1 teaspoon pure vanilla extract
- 1/4 cup heavy cream or milk (adjust as needed for desired consistency)
- Pinch of salt (optional, but enhances sweetness)
- Zest of 1/2 a lemon (optional, for a brighter flavor)
- For the Fruit Salad:
- 1 pound fresh strawberries, hulled and thinly sliced
- 1 cup fresh blueberries, washed and thoroughly dried
- 2 kiwis, peeled and diced into small, bite-sized pieces
- 1 (15-ounce) can mandarin oranges, thoroughly drained and patted dry with paper towels, or 2 fresh mandarin oranges, peeled and segmented
- 1 cup seedless green or red grapes, halved
- Optional: 1/2 cup raspberries or blackberries for added variety
- For the Roll-Ups:
- 8-10 large (8-10 inch) flour tortillas, soft taco size
- For Garnish (Optional):
- Additional powdered sugar for dusting
- Fresh mint sprigs
Preparing the Cheesecake Filling
-
Allow Cream Cheese to Soften Fully:
The very first and perhaps most crucial step to achieving a wonderfully smooth cheesecake filling is to ensure your cream cheese is at absolute room temperature. I usually take it out of the refrigerator at least an hour or two before I plan to start mixing. If you try to rush this step with cold cream cheese, you’ll end up with stubborn lumps that are nearly impossible to smooth out completely, no matter how much you beat it. We’re aiming for a silky, spreadable consistency, so patience here truly pays off!
-
Whip the Cream Cheese:
In a large mixing bowl, using an electric mixer (either a stand mixer with the paddle attachment or a hand mixer), beat the softened cream cheese on medium speed for 2-3 minutes. You want to whip it until it’s light, fluffy, and completely smooth. This aeration makes the filling wonderfully light and airy, rather than dense. Scrape down the sides of the bowl periodically to ensure everything is evenly incorporated.
-
Gradually Add Powdered Sugar:
Once the cream cheese is smooth, it’s time to add the powdered sugar. I always recommend sifting your powdered sugar before adding it. This prevents any small lumps from forming in your filling and ensures a super smooth texture. Add the sifted powdered sugar to the cream cheese mixture gradually, about a third at a time, mixing on low speed until just combined after each addition. Once all the sugar is in, increase the speed to medium and beat for another 1-2 minutes until the mixture is thick and well blended. Mixing gradually helps prevent a cloud of sugar dust in your kitchen!
-
Incorporate Vanilla and Optional Brighteners:
Stir in the pure vanilla extract. If you’re opting for the lemon zest, now is the time to add that too. The lemon zest isn’t strictly necessary, but I find it adds a lovely bright, refreshing counterpoint to the sweetness of the cheesecake and fruit, really elevating the “Cheesecake Fruit Salad Roll Ups” experience. Mix again on low speed until just combined.
-
Achieve the Perfect Consistency with Heavy Cream:
Now for the heavy cream (or milk). This ingredient helps to loosen the filling slightly, making it much easier to spread without tearing the tortillas. Add the heavy cream one tablespoon at a time, mixing on low speed after each addition, until your desired consistency is reached. You want a filling that is easily spreadable, but still thick enough to hold its shape and not run off the tortilla. Be careful not to add too much; a little goes a long way. The goal is a rich, creamy, and spreadable texture that will hold up well when rolled.
-
Taste and Adjust:
Give your cheesecake filling a little taste test. This is your chance to adjust the sweetness if you like, or add that optional pinch of salt if you feel it needs a little something extra to enhance the flavors. Sometimes, a tiny bit of salt can really make the sweet notes pop! Set the filling aside while you prepare your fruit.
Preparing the Fruit Salad
-
Wash and Dry All Fruits Thoroughly:
This step is critical for both hygiene and the integrity of your roll-ups. Place all your fresh fruits (strawberries, blueberries, kiwi, grapes, raspberries if using) in a colander and rinse them under cool running water. After washing, it’s incredibly important to dry them thoroughly. Excess moisture can make your tortillas soggy and dilute the flavor of your cheesecake filling. I like to spread them out on a clean kitchen towel or paper towels and gently pat them dry, sometimes letting them air-dry for a few extra minutes.
-
Prepare Each Fruit with Care:
The way you cut your fruit matters for both aesthetics and ease of eating in a roll-up.
- Strawberries: After hulling, slice them thinly. Aim for slices that are about 1/8 to 1/4 inch thick. This ensures they lay flat and distribute evenly within the roll.
- Blueberries: These are perfect as they are! Just ensure they are clean and dry.
- Kiwis: Peel the kiwis first. Then, dice them into small, bite-sized pieces, roughly 1/4 inch cubes. We want them small enough that they don’t create too much bulk when rolling.
- Mandarin Oranges: If using canned, drain them meticulously and then pat them dry with paper towels. If using fresh, peel and segment them, removing as much of the white pith as possible, and again, pat them dry. They can release a lot of juice!
- Grapes: Halve all seedless grapes. If you have particularly large grapes, you might even quarter them. This prevents them from being too bulky and makes for a more pleasant bite.
- Optional Raspberries/Blackberries: These can be left whole or halved if very large. Their delicate nature means less handling is better.
-
Combine the Fruit Gently:
In a medium bowl, gently combine all your prepared fruits. Use a light hand here; we don’t want to crush the delicate berries or grapes. The goal is a colorful medley where each fruit maintains its distinct shape and texture. Avoid over-mixing. This vibrant fruit salad is not only delicious but also adds beautiful color and freshness to our “Cheesecake Fruit Salad Roll Ups”.
-
Keep Fruit Dry and Accessible:
Once combined, ensure there’s no pooling liquid at the bottom of the bowl. If there is, gently drain it. Set the fruit salad aside, ready for assembly.
Assembling the Cheesecake Fruit Salad Roll Ups
-
Prepare Your Workstation:
Lay out your flour tortillas on a clean, flat surface, such as a large cutting board or your kitchen counter. I like to work with one or two tortillas at a time to keep things organized. Ensure they are soft and pliable. If your tortillas feel a bit stiff, you can warm them briefly in a microwave for 10-15 seconds or in a dry pan for a few seconds per side to make them more flexible and easier to roll without cracking.
-
Spread the Cheesecake Filling:
Take a generous spoonful (about 2-3 tablespoons, depending on the tortilla size) of the prepared cheesecake filling and spread it evenly over one entire side of a tortilla. Leave a small border, about 1/2 inch, around the edges of the tortilla. This border helps to contain the filling and fruit when you roll it, preventing it from squeezing out the sides. Aim for an even, consistent layer of filling. Too thick, and it might be overwhelming; too thin, and you lose that lovely cheesecake flavor.
-
Arrange the Fruit Salad:
Now comes the colorful part! Take a scoop of your mixed fruit salad and arrange it in a line across the center of the tortilla, about a third of the way from one edge. Don’t overfill! This is a common mistake that makes rolling difficult and messy. Aim for a single layer of fruit, ensuring a good mix of all the different fruits you prepared. Distributing the fruit evenly ensures every bite of your “Cheesecake Fruit Salad Roll Ups” is packed with flavor and texture.
-
Roll ‘Em Up Tight:
This is where the “roll-up” magic happens. Carefully fold the edge of the tortilla closest to the fruit over the fruit and filling. Tuck it in tightly, creating a snug starting point. Then, continue to roll the tortilla away from you, keeping the roll as tight as possible. The tighter the roll, the better it will hold together and the neater your slices will be. Apply gentle, even pressure as you roll.
-
Repeat and Place Seam-Side Down:
Once rolled, place the finished roll-up seam-side down on a plate or baking sheet. This helps the roll to set and prevents it from unraveling. Repeat the process with the remaining tortillas, cheesecake filling, and fruit salad until all your ingredients are used up. You should get between 8 and 10 beautiful roll-ups.
Chilling and Serving
-
The Importance of Chilling:
Once all your “Cheesecake Fruit Salad Roll Ups” are assembled, it’s absolutely crucial to chill them. Cover the plate or baking sheet loosely with plastic wrap and refrigerate for at least 30 minutes, but ideally 1 to 2 hours. Chilling serves multiple important purposes: it allows the cheesecake filling to firm up, making the roll-ups easier to slice cleanly, and more importantly, it gives the flavors time to meld together beautifully. The cool temperature also provides a refreshing contrast to the sweet filling and fresh fruit, which is delightful.
-
Slicing for Presentation:
After chilling, remove the roll-ups from the refrigerator. Place one roll-up on a cutting board. Using a sharp knife, slice each roll-up into 1-inch thick pieces. For a more elegant presentation, I often slice them on a slight diagonal. This creates a larger surface area to showcase the vibrant layers of fruit and creamy filling, making them even more appealing. A gentle, sawing motion with the knife often works best to prevent squishing the roll-ups.
-
Arrange and Garnish:
Arrange the sliced “Cheesecake Fruit Salad Roll Ups” on a serving platter. For an extra touch of sweetness and visual appeal, dust them lightly with a sprinkle of powdered sugar using a small sieve or a fine-mesh strainer. If you have fresh mint sprigs, tuck a few among the roll-ups for a pop of green color and a hint of freshness.
-
Serving Suggestions and Variations:
These roll-ups are best served chilled. They make a fantastic breakfast treat, a light dessert, or a colorful addition to a brunch spread.
Creative Twists for Your Roll Ups:
- Spice it Up: A tiny pinch of cinnamon or nutmeg can be added to the cheesecake filling for a warmer flavor profile.
- Nutty Crunch: While not a traditional “fruit salad” ingredient, a very fine sprinkle of finely chopped toasted pecans or walnuts can add a delightful textural contrast if you’re not adverse to nuts.
- Different Fruits: Feel free to experiment with other fruits like sliced bananas (toss with a little lemon juice to prevent browning), mango, or even thinly sliced apples. Just remember to keep them dry and cut into small, manageable pieces.
- Whole Wheat Tortillas: For a slightly healthier twist, you can opt for whole wheat tortillas. They provide a nuttier flavor that complements the filling and fruit well.
- Mini Roll-Ups: Use smaller, street taco-sized tortillas for adorable, two-bite mini “Cheesecake Fruit Salad Roll Ups.”
Enjoy these delightful, creamy, and fruity roll-ups! They are always a hit and incredibly versatile for any occasion.

Conclusion:
So there you have it – the incredible journey to creating your very own Cheesecake Fruit Salad Roll Ups. We’ve explored the simplicity, the sheer joy, and the undeniable deliciousness that this recipe brings to any table. I truly believe this recipe is a game-changer, a delightful fusion that caters to those moments when you crave something sweet, fresh, and undeniably satisfying, without the heavy guilt often associated with dessert. It’s not just a snack; it’s an experience, a testament to how simple ingredients can be transformed into something truly extraordinary. Imagine biting into that soft tortilla, yielding to the creamy, tangy cheesecake filling, and then bursting with the vibrant sweetness of fresh fruit – it’s a symphony of textures and flavors that dances on your palate. This recipe offers a wonderful balance, providing a wholesome treat that feels wonderfully light yet impressively indulgent. It’s perfect for those busy weeknights when you need a quick, impressive dessert, or for a leisurely weekend brunch where you want to impress without stress. The visual appeal alone is enough to make anyone’s mouth water, with those colorful fruits peeking out, promising a delightful surprise in every single bite. This truly is a must-try for anyone looking for a refreshing, easy, and incredibly versatile dessert.
But the magic of these roll-ups doesn’t stop at the basic recipe; it truly shines in its versatility. Think of our base recipe as a blank canvas, ready for your personal culinary artistry and creative flair. For an elevated breakfast or brunch, consider serving your Cheesecake Fruit Salad Roll Ups alongside a light drizzle of pure maple syrup or a delicate dusting of powdered sugar – it instantly transforms them into a sophisticated, yet still incredibly easy, morning treat that will garner compliments. When it comes to fruit variations, the possibilities are virtually endless, allowing you to tailor each batch to your specific tastes or whatever fresh produce you have on hand! Swap out strawberries and blueberries for a vibrant tropical twist with diced mango, kiwi, and pineapple for an exotic escape. Or, lean into seasonal flavors with perfectly ripe peaches and juicy raspberries in the summer, or thinly sliced crisp apples and a comforting sprinkle of cinnamon for an autumnal vibe that feels like a warm hug.
Feeling adventurous with the filling? You absolutely should! Try adding a teaspoon of fresh lemon or orange zest to the cream cheese mixture for a bright, zesty kick that cuts through the richness, or a splash of pure vanilla extract for a more classic dessert profile that everyone loves. For a truly decadent touch, you could even swirl in a tablespoon of your favorite fruit jam or preserve, like strawberry or apricot, into the cream cheese before spreading it thinly. And who says the wrapper has to be a tortilla every single time? While they are fantastic for their soft texture and ease, imagine these luscious fillings encased in delicate, thin crepes for a more elegant, European-inspired presentation, or even large, crisp lettuce leaves for a low-carb, guilt-free option that doesn’t compromise on flavor.
And let’s not forget the dipping sauces – they can elevate this simple treat to an entirely new level! A warm chocolate ganache makes for an irresistible pairing, transforming these light bites into a truly decadent dessert experience that will satisfy any sweet tooth. A simple raspberry coulis, a tangy lime curd, or a rich caramel drizzle would also be absolutely divine, adding another layer of complexity and indulgence. For a touch of delightful crunch and extra flavor, try sprinkling a few toasted nuts like pecans or walnuts, or even some shredded coconut, over the roll-ups just before serving. These subtle additions can completely change the character of your dessert, allowing you to tailor it perfectly to your mood, the occasion, or your guests’ preferences. This incredible adaptability is precisely why I adore this recipe; it allows for endless creativity and ensures you’ll never get bored of these amazing Cheesecake Fruit Salad Roll Ups.
Now that you have all the tools and inspiration, I wholeheartedly encourage you to step into your kitchen and give these a try! Don’t hesitate; the process is incredibly straightforward, and the rewards are absolutely delicious. I promise you, these will quickly become a cherished favorite in your recipe repertoire, a go-to for quick treats, impressive gatherings, or simply a moment of pure culinary bliss. Once you’ve whipped up your batch, I would be absolutely thrilled to hear all about your experience. Did you discover a new favorite fruit combination? Did you create a show-stopping presentation? Share your triumphs, your unique twists, and your serving ideas! Your feedback and creativity not only inspire me but also help our wonderful community of home cooks find new ways to enjoy delicious food. So, go ahead, roll up your sleeves, embrace the joy of creating, and then come back and tell me all about your delightful journey with this fantastic recipe! I can’t wait to see what amazing creations you come up with!
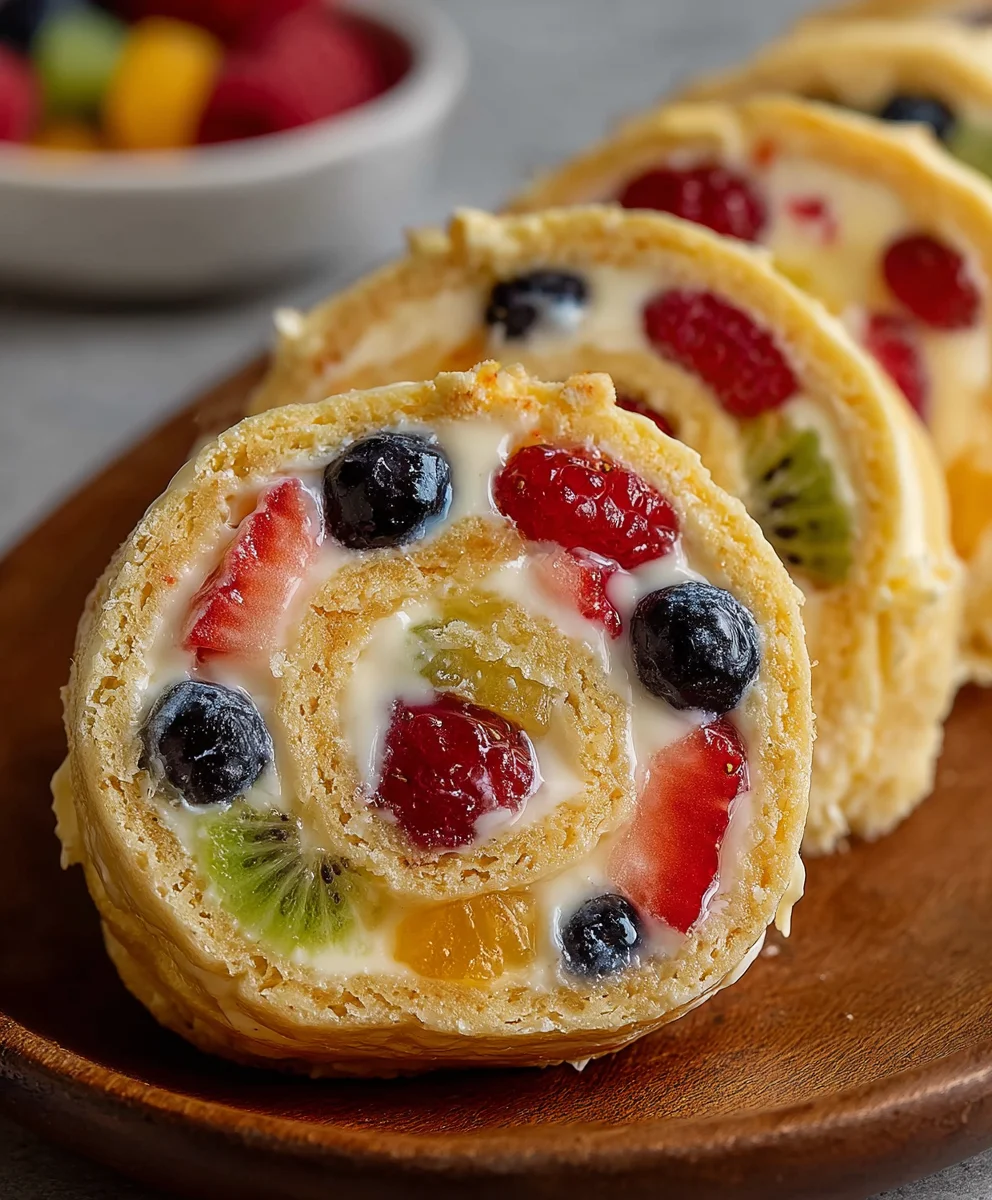
Cheesecake Fruit Salad Roll Ups
Cheesecake Fruit Salad Roll Ups are an irresistible dessert blending the luscious, creamy tang of classic cheesecake filling with the vibrant, juicy freshness of seasonal fruits. These modern, no-bake roll-ups offer indulgence with refreshing lightness, featuring a symphony of sweet, creamy, and tart flavors with delightful texture. Easy to assemble and perfect for any occasion.
Ingredients
-
16 ounces (two 8-ounce blocks) full-fat cream cheese, softened
-
1 cup powdered sugar, sifted
-
1 teaspoon pure vanilla extract
-
1/4 cup heavy cream or milk (adjust as needed)
-
Pinch of salt (optional)
-
Zest of 1/2 a lemon (optional)
-
1 pound fresh strawberries, hulled & thinly sliced
-
1 cup fresh blueberries, washed & dried
-
2 kiwis, peeled & diced
-
1 (15-ounce) can mandarin oranges, thoroughly drained & patted dry (or 2 fresh)
-
1 cup seedless green or red grapes, halved
-
Optional: 1/2 cup raspberries or blackberries
-
8-10 large (8-10 inch) flour tortillas, soft taco size
-
Additional powdered sugar (for dusting, optional)
-
Fresh mint sprigs (for garnish, optional)
Instructions
-
Step 1
Ensure cream cheese is at room temperature (1-2 hours). In a large bowl, beat softened cream cheese with an electric mixer for 2-3 minutes until light, fluffy, and smooth. Gradually add sifted powdered sugar on low speed until combined, then beat on medium for 1-2 minutes until thick and blended. Stir in vanilla extract and optional lemon zest. Add heavy cream (or milk) 1 tablespoon at a time, mixing on low, until filling is easily spreadable but still thick. Taste and adjust sweetness or add optional salt. -
Step 2
Wash and thoroughly dry all fresh fruits. Thinly slice hulled strawberries (1/8-1/4 inch). Leave blueberries whole. Dice peeled kiwis (1/4 inch). Drain and pat dry canned mandarin oranges (or peel and segment fresh). Halve seedless grapes. Gently combine all prepared fruits in a medium bowl, ensuring no pooling liquid. Set aside. -
Step 3
Lay tortillas on a clean surface; warm briefly if stiff. Spread 2-3 tablespoons of cheesecake filling evenly over one tortilla, leaving a 1/2-inch border. Arrange a single layer of mixed fruit salad in a line across the center, about a third from one edge (do not overfill). Fold the tortilla edge closest to the fruit over, tuck tightly, then roll away from you, keeping the roll as tight as possible. Place roll-up seam-side down. Repeat for remaining tortillas. -
Step 4
Cover and refrigerate assembled roll-ups for at least 1-2 hours to allow the filling to firm and flavors to meld. Remove from fridge. Using a sharp knife, slice each roll-up into 1-inch thick pieces, optionally on a slight diagonal for presentation. Arrange slices on a serving platter. For garnish, dust lightly with powdered sugar and tuck fresh mint sprigs among the roll-ups. Serve chilled.
Important Information
Nutrition Facts (Per Serving)
It is important to consider this information as approximate and not to use it as definitive health advice.
Allergy Information
Please check ingredients for potential allergens and consult a health professional if in doubt.


Leave a Comment