

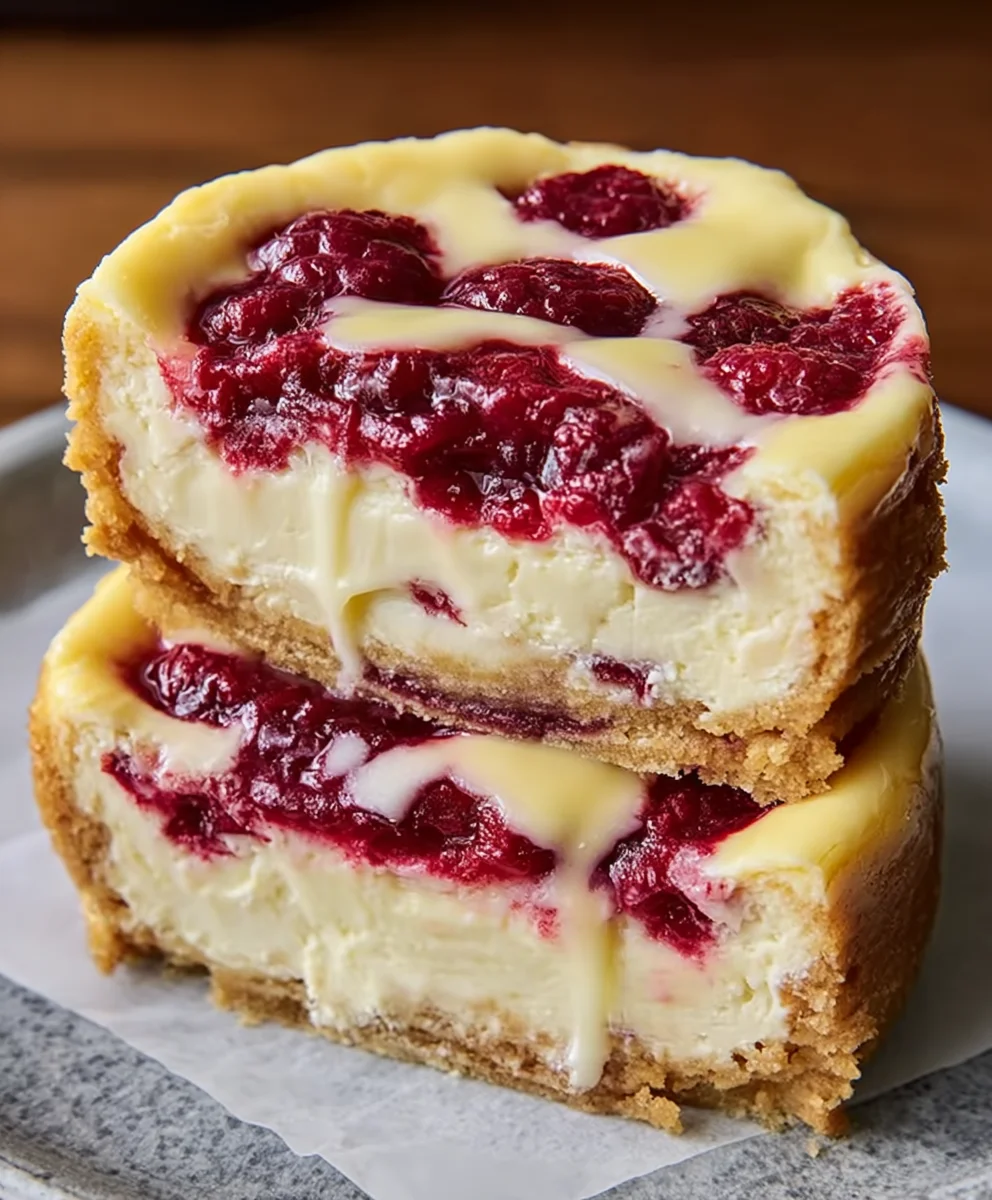
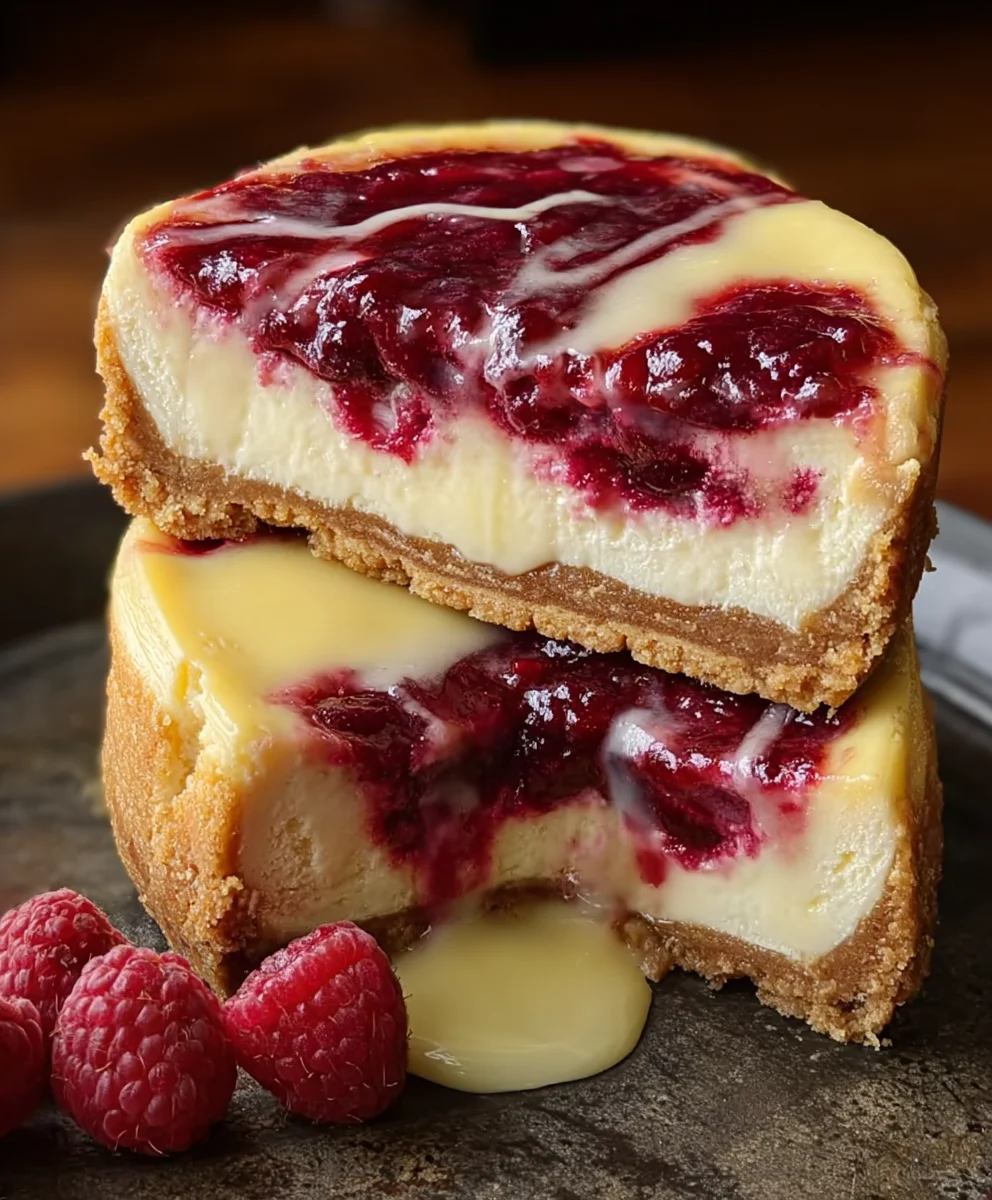
Lemon Raspberry Cheesecake – imagine a dessert that perfectly marries the bright zest of summer with the lush sweetness of berries, all nestled in a velvety, smooth texture. This isn’t just any sweet treat; it’s a vibrant symphony of flavors that truly awakens the senses, promising a delightful escape with every forkful. The sharp, refreshing tang of lemon beautifully cuts through the rich, creamy cheesecake, while bursts of sweet, juicy raspberries add an irresistible contrast and a captivating pop of color.
The history of cheesecake itself boasts a fascinating lineage, evolving from ancient Greek delicacies to the iconic American classic we cherish today. While its roots are ancient, this specific Lemon Raspberry Cheesecake combination brings a modern, refreshing twist to a beloved tradition. It has always been a dessert of celebration and comfort, and this particular rendition elevates it to an extraordinary experience.
People adore this particular dessert for its refreshing yet decadent profile. It’s surprisingly light for a cheesecake, making it the ideal treat for any occasion, from an elegant dinner party to a casual gathering. The simple joy of a slice of this vibrant dessert truly encapsulates culinary bliss, offering a perfect balance of creamy indulgence and fruity brightness. I am absolutely thrilled to guide you through creating your very own delectable Lemon Raspberry Cheesecake, a dessert sure to impress and delight everyone at your table.

Ingredients:
- For the Graham Cracker Crust:
- 1 ½ cups (about 180g) finely crushed graham cracker crumbs (from about 10-12 full graham cracker sheets)
- ¼ cup (50g) granulated sugar
- 6 tablespoons (85g) unsalted butter, melted
- ½ teaspoon ground cinnamon (optional, but I love the subtle warmth it adds!)
- For the Lemon Raspberry Cheesecake Filling:
- 32 ounces (900g) full-fat cream cheese, softened to room temperature (that’s four 8-ounce blocks – important for a smooth batter!)
- 1 ½ cups (300g) granulated sugar
- ¼ cup (60ml) fresh lemon juice (from about 2 large lemons)
- 2 tablespoons finely grated lemon zest (from about 2-3 lemons, make sure to zest before juicing!)
- 1 teaspoon pure vanilla extract
- ¼ teaspoon salt
- 4 large eggs, room temperature, lightly beaten
- ¼ cup (60ml) heavy cream or sour cream, room temperature (for extra richness and a slight tang)
- For the Raspberry Swirl:
- 1 ½ cups (about 200g) fresh or frozen raspberries (no need to thaw if using frozen)
- ¼ cup (50g) granulated sugar
- 1 tablespoon fresh lemon juice
- 1 teaspoon cornstarch (mixed with 1 tablespoon cold water to form a slurry, this helps thicken it beautifully)
- For the Fresh Raspberry Topping (Optional, but highly recommended!):
- 1 cup (about 130g) fresh raspberries
- 2 tablespoons granulated sugar
- 1 tablespoon fresh lemon juice
- For Garnish (Optional):
- Fresh mint sprigs
- Additional fresh raspberries
- Lemon slices or twists
Preparing the Graham Cracker Crust
- Preheat and Prepare Your Pan: First things first, let’s get our oven ready. Preheat your oven to 325°F (160°C). Then, grab a 9-inch springform pan. I always like to wrap the bottom and sides of my springform pan tightly with heavy-duty aluminum foil. This isn’t just for fun; it’s a crucial step to prevent any water from seeping into your crust during the water bath, which we’ll be doing later for that perfectly creamy Lemon Raspberry Cheesecake texture. I usually use two layers of foil, just to be extra safe!
- Crush the Crackers: Now for the base of our delicious creation. Place your graham crackers in a large zip-top bag and use a rolling pin to crush them into fine crumbs. You want them very fine, almost like sand, for a uniform crust. Alternatively, a food processor makes this task super quick and easy – just pulse until you have those beautiful, fine crumbs.
- Combine Ingredients for the Crust: In a medium bowl, combine the finely crushed graham cracker crumbs, granulated sugar, and the optional ground cinnamon. Give it a good whisk to ensure everything is evenly distributed. Then, pour in the melted unsalted butter. Mix thoroughly with a fork or your hands until all the crumbs are moistened and resemble wet sand. This step is important: ensure every crumb is coated with butter for a sturdy crust.
- Press into the Pan: Transfer the buttered graham cracker mixture into the prepared springform pan. Using the bottom of a flat glass or your clean hands, firmly press the mixture evenly across the bottom of the pan. I usually press it about ¼-inch up the sides of the pan too, creating a nice little rim. Make sure it’s packed down really well; a dense crust is a happy crust!
- Bake the Crust: Bake the crust in your preheated oven for 10-12 minutes, or until it’s lightly golden brown and fragrant. Baking the crust beforehand helps to set it, making it less likely to crumble when you slice into your finished Lemon Raspberry Cheesecake. Once baked, remove it from the oven and set it aside to cool completely while we move on to the next exciting step.
Making the Raspberry Swirl
- Combine for the Swirl: In a small saucepan, combine the fresh or frozen raspberries, granulated sugar, and fresh lemon juice. Place the saucepan over medium heat.
- Simmer and Thicken: Bring the mixture to a gentle simmer, stirring occasionally. As the raspberries cook, they will begin to break down and release their juices. Continue to simmer for about 5-7 minutes, or until the raspberries are soft and the sauce has thickened slightly.
- Create the Slurry: While the raspberries are simmering, in a tiny bowl, whisk together the cornstarch and cold water to create a smooth slurry.
- Thicken the Sauce: Pour the cornstarch slurry into the simmering raspberry mixture, stirring constantly. Continue to cook for another 1-2 minutes, stirring, until the sauce has noticeably thickened. It should be thick enough to coat the back of a spoon. This thickening agent is key for a beautiful swirl that doesn’t completely disappear into the cheesecake.
- Strain for Smoothness: For a truly elegant raspberry swirl without any seeds, press the cooked raspberry mixture through a fine-mesh sieve set over a small bowl. Use the back of a spoon or a rubber spatula to push through as much of the pulp and juice as possible, leaving the seeds behind. This step is optional, but it makes a huge difference in the texture of your swirl. Discard the seeds.
- Cool the Swirl: Allow the strained raspberry swirl to cool completely to room temperature. You can speed this up by placing the bowl in an ice bath or chilling it in the refrigerator for about 30 minutes, stirring occasionally. You want it cool, not warm, when adding it to the cheesecake batter.
Crafting the Lemon Raspberry Cheesecake Filling
- Ensure Room Temperature Ingredients: This is arguably the most crucial step for a silky-smooth, lump-free cheesecake. Make sure your cream cheese, eggs, and heavy cream (or sour cream) are all at room temperature. I usually take them out of the fridge at least an hour or two before I start baking. Cold ingredients will lead to lumps, and nobody wants a lumpy cheesecake!
- Cream the Cream Cheese: In the bowl of a stand mixer fitted with the paddle attachment (or using a large bowl and a handheld electric mixer), beat the softened cream cheese on medium-low speed for about 2-3 minutes. You want to beat it until it’s incredibly smooth and creamy, with no lumps at all. Scrape down the sides and bottom of the bowl frequently to ensure everything gets incorporated. This initial creaming sets the foundation for a flawless texture.
- Add Sugar and Flavorings: Gradually add the granulated sugar to the creamed cheese, beating on low speed until just combined and smooth. Be careful not to overmix! Next, add the fresh lemon juice, lemon zest, vanilla extract, and salt. Mix on low speed until everything is fully incorporated. The aroma of that fresh lemon zest at this stage is absolutely divine!
- Incorporate Eggs Gently: Add the lightly beaten eggs, one at a time, mixing on very low speed until each egg is just combined before adding the next. Here’s a golden rule for cheesecake: avoid overmixing once the eggs are added! Overmixing incorporates too much air, which can cause your cheesecake to puff up dramatically in the oven and then crack as it cools. We want a dense, creamy texture, not an airy soufflé. Scrape down the sides of the bowl as needed.
- Fold in Heavy Cream: Finally, gently fold in the room temperature heavy cream (or sour cream) using a rubber spatula. Mix until just combined. This adds an extra layer of richness and helps create that signature creamy consistency for our Lemon Raspberry Cheesecake.
Assembling and Baking the Lemon Raspberry Cheesecake
- Prepare for the Water Bath: Place your foil-wrapped springform pan inside a larger roasting pan. This is where our water bath will come into play.
- Pour the Filling: Carefully pour the cheesecake filling over the cooled graham cracker crust in the springform pan. Gently tap the pan on the counter a few times to release any large air bubbles.
- Add the Raspberry Swirl: Dollop spoonfuls of the cooled raspberry swirl over the top of the cheesecake batter. I like to use about half to two-thirds of the swirl mixture for this, reserving a little for potentially later decoration or if I want to add more distinct swirls.
- Create the Swirl Effect: Using a thin knife or a skewer, gently swirl the raspberry mixture into the cheesecake batter. Don’t overdo it! You want distinct streaks of raspberry, not a completely mixed-in pink batter. Just a few elegant passes will do the trick to create those beautiful patterns unique to your Lemon Raspberry Cheesecake.
- Set Up the Water Bath: Carefully pour hot water into the roasting pan, around the springform pan, until the water comes about halfway up the sides of the springform pan. Be very cautious not to splash any water into the cheesecake batter itself. The water bath is essential because it provides a moist, even heat environment, which prevents cracking, ensures slow, gentle baking, and results in that incredibly smooth, custard-like texture that we all adore in a perfect cheesecake.
- Bake the Cheesecake: Carefully transfer the roasting pan with the cheesecake to the preheated 325°F (160°C) oven. Bake for 60-75 minutes. The baking time can vary slightly depending on your oven. You’ll know it’s done when the edges are set, but the center (about a 2-3 inch circle) still jiggles slightly when you gently shake the pan. Do not overbake! Overbaking will lead to a dry cheesecake and cracks.
- Cooling Process – Phase 1 (Oven Cooling): Once baked, turn off the oven but leave the cheesecake inside with the oven door propped open a few inches. Let it cool in the warm oven for 1 hour. This gradual cooling process is another critical step in preventing cracks and ensuring a perfectly smooth top. Resist the urge to peek or remove it too soon!
- Cooling Process – Phase 2 (Counter Cooling): After 1 hour in the oven, carefully remove the roasting pan from the oven. Remove the springform pan from the water bath (discard the water). Place the cheesecake on a wire rack to cool completely at room temperature for another 2-3 hours. During this time, the center will continue to set.
- Chill Thoroughly: Once completely cool to the touch, gently run a thin knife around the edge of the cheesecake (between the cheesecake and the pan ring) to loosen it. This helps prevent cracks when you remove the ring. Cover the cheesecake loosely with plastic wrap and refrigerate for at least 6-8 hours, or preferably overnight. This long chilling time is non-negotiable for cheesecake! It allows the flavors to meld, the texture to firm up, and ensures easy, clean slicing.
Finishing Touches: Raspberry Topping and Garnish
- Prepare the Fresh Raspberry Topping (If Using): In a small bowl, gently combine the fresh raspberries with the granulated sugar and lemon juice. Let this sit for about 15-20 minutes at room temperature, stirring occasionally. The sugar will draw out the juices from the raspberries, creating a light, fresh sauce. This simple topping adds a wonderful burst of fresh fruit flavor and brightens the entire Lemon Raspberry Cheesecake experience.
- Remove from Pan and Serve: Once thoroughly chilled, unlatch and carefully remove the springform pan ring. You can leave the cheesecake on the base of the pan, or carefully slide it onto a serving plate.
- Decorate and Garnish: Spoon the fresh raspberry topping over individual slices or over the entire top of the cheesecake just before serving. Garnish with fresh mint sprigs, additional fresh raspberries, or elegant lemon slices and twists.
- Enjoy! Slice your magnificent Lemon Raspberry Cheesecake with a sharp knife (I like to wipe my knife clean between each slice for the neatest presentation) and serve. The balance of tart lemon, sweet raspberries, and rich, creamy cheesecake is absolutely irresistible! Store any leftover cheesecake in the refrigerator, covered, for up to 4-5 days. It actually tastes even better the next day as the flavors deepen.
Conclusion:
So, there you have it – the culmination of our culinary adventure, leading to what I truly believe is one of the most exquisite and rewarding desserts you’ll ever have the pleasure of creating and, more importantly, devouring. This isn’t just another recipe to add to your collection; it’s an invitation to experience pure dessert bliss, a symphony of flavors and textures that dance harmoniously on the palate. I’ve poured my heart into perfecting every nuance of this treat, ensuring that each bite delivers a memorable moment of culinary delight. The sheer elegance, combined with the surprisingly achievable steps, makes this an absolute must-try for any home baker, regardless of their experience level. The balance of creamy, rich cheesecake, the vibrant burst of fresh raspberries, and the bright, zesty tang of lemon creates a profile that is both comforting and exhilarating. It’s a dessert that transcends the ordinary, offering a sophisticated sweetness without being cloying, and a refreshing tartness that cleanses the palate beautifully. This is why I can confidently say that preparing and sharing this particular cheesecake will not only impress but genuinely delight anyone lucky enough to receive a slice.
The magic of this dessert lies not just in its incredible taste but also in the joy of its creation. There’s a profound satisfaction that comes from transforming simple ingredients into something so visually stunning and utterly delicious. As you whisk, mix, and bake, the fragrant aroma of lemon and vanilla will fill your kitchen, building anticipation for the masterpiece to come. And when it finally emerges from the oven, golden-edged and perfectly set, cooling slowly on your counter, you’ll feel an immense sense of accomplishment. It’s a small victory, yes, but one that brings immense pleasure and a boost of culinary confidence. I’ve found that the process itself can be incredibly therapeutic, a wonderful way to unwind and engage your senses. Don’t be intimidated by the idea of making a cheesecake from scratch; I promise you, the steps are straightforward, and the result is profoundly more satisfying than anything store-bought. You’re not just baking a dessert; you’re crafting an experience, a memory, and a testament to the simple joys of homemade goodness.
Elevating Your Lemon Raspberry Cheesecake Experience: Serving & Variations
Once your magnificent creation has chilled to perfection, ready to be unveiled, there are several ways to present and enhance its already sublime qualities. Imagine a generous slice, glistening and smooth, placed on a pristine dessert plate. For a classic touch, I love to add a dollop of freshly whipped cream, lightly sweetened with a hint of vanilla bean. The airy lightness of the cream provides a beautiful contrast to the dense, creamy texture of the cheesecake. A few extra fresh raspberries scattered around the plate, perhaps alongside a thin lemon curl or a delicate mint leaf, add an extra pop of color and freshness. For a slightly more decadent presentation, you could drizzle a homemade raspberry coulis (simply blended and sieved raspberries) over the top just before serving, creating an artistic flourish that also amplifies the berry flavor. A dusting of powdered sugar through a fine-mesh sieve is another simple yet elegant option that makes any dessert look instantly professional.
But why stop there? While the classic Lemon Raspberry Cheesecake is truly divine, the beauty of baking lies in its endless possibilities for customization. Feel free to explore variations that suit your taste or what you have on hand. Instead of raspberries, consider using fresh blueberries or blackberries for a different berry dynamic; their sweetness and slight tartness would pair wonderfully with the lemon. For the crust, while the buttery graham cracker crust is a timeless favorite, you could experiment with a crushed shortbread cookie crust for a richer, more buttery base, or even a gingersnap crust for a warming, spiced undertone that would be especially delightful in the cooler months. If you’re feeling adventurous, you could even swirl a little homemade lemon curd into the cheesecake batter itself before baking for an extra burst of lemon intensity. Or, for a fun, individual serving option, bake the recipe in mini cheesecake pans or cupcake liners for delightful personal portions – perfect for parties or lunchbox treats. Don’t be afraid to make this recipe truly your own; it’s a fantastic canvas for your creative impulses!
Your Culinary Journey Begins Now!
Now, dear reader, it’s your turn to roll up your sleeves and bring this incredible dessert to life in your own kitchen! I genuinely believe that every home deserves the joy and aroma of a freshly baked cheesecake. I promise you, the smiles, the compliments, and the sheer delight it will garner from your friends and family are well worth the effort. There’s a unique pride that comes with serving something you’ve created with your own hands, especially when it’s as universally loved as a perfectly executed cheesecake. So, gather your ingredients, preheat that oven, and embark on this delicious journey. I absolutely adore hearing about your culinary adventures! Please don’t hesitate to share your experiences, your stunning photos, your triumphs, and even your questions in the comments below. Your feedback and creativity inspire me and our entire community of enthusiastic bakers. Let’s celebrate the joy of baking together!
Go forth and create something truly spectacular. I cannot wait to see what delightful creations you share. Happy baking!
Lemon Raspberry Cheesecake
A vibrant Lemon Raspberry Cheesecake, marrying bright lemon zest with lush, sweet raspberries in a velvety, creamy texture. This irresistible dessert promises a delightful escape with every forkful.
Ingredients
-
1 ½ cups (180g) finely crushed graham cracker crumbs
-
¼ cup (50g) granulated sugar (for crust)
-
6 tablespoons (85g) unsalted butter, melted
-
½ teaspoon ground cinnamon (optional)
-
32 ounces (900g) full-fat cream cheese, softened to room temperature
-
1 ½ cups (300g) granulated sugar (for filling)
-
¼ cup (60ml) fresh lemon juice
-
2 tablespoons finely grated lemon zest
-
1 teaspoon pure vanilla extract
-
¼ teaspoon salt
-
4 large eggs, room temperature, lightly beaten
-
¼ cup (60ml) heavy cream or sour cream, room temperature
-
1 ½ cups (200g) fresh or frozen raspberries (for swirl, thaw and drain frozen well)
-
¼ cup (50g) granulated sugar (for swirl)
-
1 tablespoon fresh lemon juice (for swirl)
-
1 teaspoon cornstarch (mixed with 1 tablespoon cold water)
-
1 cup (130g) fresh raspberries (optional topping)
-
2 tablespoons granulated sugar (optional topping)
-
1 tablespoon fresh lemon juice (optional topping)
-
Fresh mint sprigs (optional garnish)
-
Additional fresh raspberries (optional garnish)
-
Lemon slices or twists (optional garnish)
Instructions
-
Step 1
Preheat oven to 325°F (160°C). Wrap a 9-inch springform pan tightly with heavy-duty aluminum foil to prevent water seepage during the water bath. -
Step 2
Combine graham cracker crumbs, ¼ cup sugar, and ½ tsp cinnamon (optional). Mix in 6 tbsp melted butter until crumbs are moistened. -
Step 3
Press the mixture firmly and evenly across the bottom and ¼-inch up the sides of the prepared pan. -
Step 4
Bake the crust for 10-12 minutes, or until lightly golden brown and fragrant. Remove from oven and cool completely. -
Step 5
For the Raspberry Swirl: In a small saucepan, combine 1 ½ cups raspberries (thaw and drain frozen raspberries well before using), ¼ cup sugar, and 1 tbsp lemon juice. Simmer over medium heat for 5-7 minutes, stirring occasionally, until raspberries break down and sauce thickens slightly. -
Step 6
Whisk 1 tsp cornstarch with 1 tbsp cold water to form a smooth slurry. Pour into the simmering raspberry mixture, stirring constantly. Cook for another 1-2 minutes until the sauce has noticeably thickened. -
Step 7
For a smooth swirl, press the cooked raspberry mixture through a fine-mesh sieve, discarding the seeds. Allow the strained raspberry swirl to cool completely to room temperature. -
Step 8
For the Cheesecake Filling: Ensure cream cheese, eggs, and heavy cream (or sour cream) are all at room temperature for a lump-free batter. -
Step 9
In a stand mixer with a paddle attachment, beat 32 oz softened cream cheese on medium-low speed for 2-3 minutes until incredibly smooth and creamy. Scrape down the bowl frequently. -
Step 10
Gradually add 1 ½ cups granulated sugar, beating on low speed until just combined. Mix in ¼ cup fresh lemon juice, 2 tbsp lemon zest, 1 tsp vanilla extract, and ¼ tsp salt until fully incorporated. -
Step 11
Add 4 lightly beaten eggs, one at a time, mixing on very low speed until just combined after each. Avoid overmixing once eggs are added to prevent cracks. -
Step 12
Gently fold in ¼ cup room temperature heavy cream (or sour cream) using a rubber spatula until just combined. -
Step 13
Assembling & Baking: Place the foil-wrapped springform pan inside a larger roasting pan. Carefully pour the cheesecake filling over the cooled graham cracker crust. Gently tap the pan on the counter to release large air bubbles. -
Step 14
Dollop about half to two-thirds of the cooled raspberry swirl over the cheesecake batter. Using a thin knife or skewer, gently swirl the raspberry mixture for distinct patterns. -
Step 15
Carefully pour hot water into the roasting pan, around the springform pan, until it comes about halfway up the sides of the springform pan. Avoid splashing water into the cheesecake batter. -
Step 16
Carefully transfer the roasting pan with the cheesecake to the preheated 325°F (160°C) oven. Bake for 60-75 minutes until the edges are set but the center (about 2-3 inches) still jiggles slightly. Do not overbake. -
Step 17
Turn off the oven but leave the cheesecake inside with the oven door propped open a few inches. Let it cool in the warm oven for 1 hour for gradual cooling. -
Step 18
Remove the springform pan from the water bath (discard water). Place the cheesecake on a wire rack to cool completely at room temperature for another 2-3 hours. -
Step 19
Once completely cool, gently run a thin knife around the edge of the cheesecake to loosen it. Cover loosely with plastic wrap and refrigerate for at least 6-8 hours, or preferably overnight, for flavors to meld and texture to firm up. -
Step 20
Finishing Touches: For the optional fresh raspberry topping, combine 1 cup fresh raspberries, 2 tbsp granulated sugar, and 1 tbsp lemon juice in a small bowl. Let sit for 15-20 minutes, stirring occasionally. -
Step 21
Once thoroughly chilled, unlatch and carefully remove the springform pan ring. Spoon the fresh raspberry topping over individual slices or the entire cheesecake just before serving. -
Step 22
Garnish with fresh mint sprigs, additional fresh raspberries, or elegant lemon slices/twists. Slice with a sharp, clean knife (wiping between slices) and serve. Store leftovers covered in the refrigerator for up to 4-5 days.
Important Information
Nutrition Facts (Per Serving)
It is important to consider this information as approximate and not to use it as definitive health advice.
Allergy Information
Please check ingredients for potential allergens and consult a health professional if in doubt.


Leave a Comment