

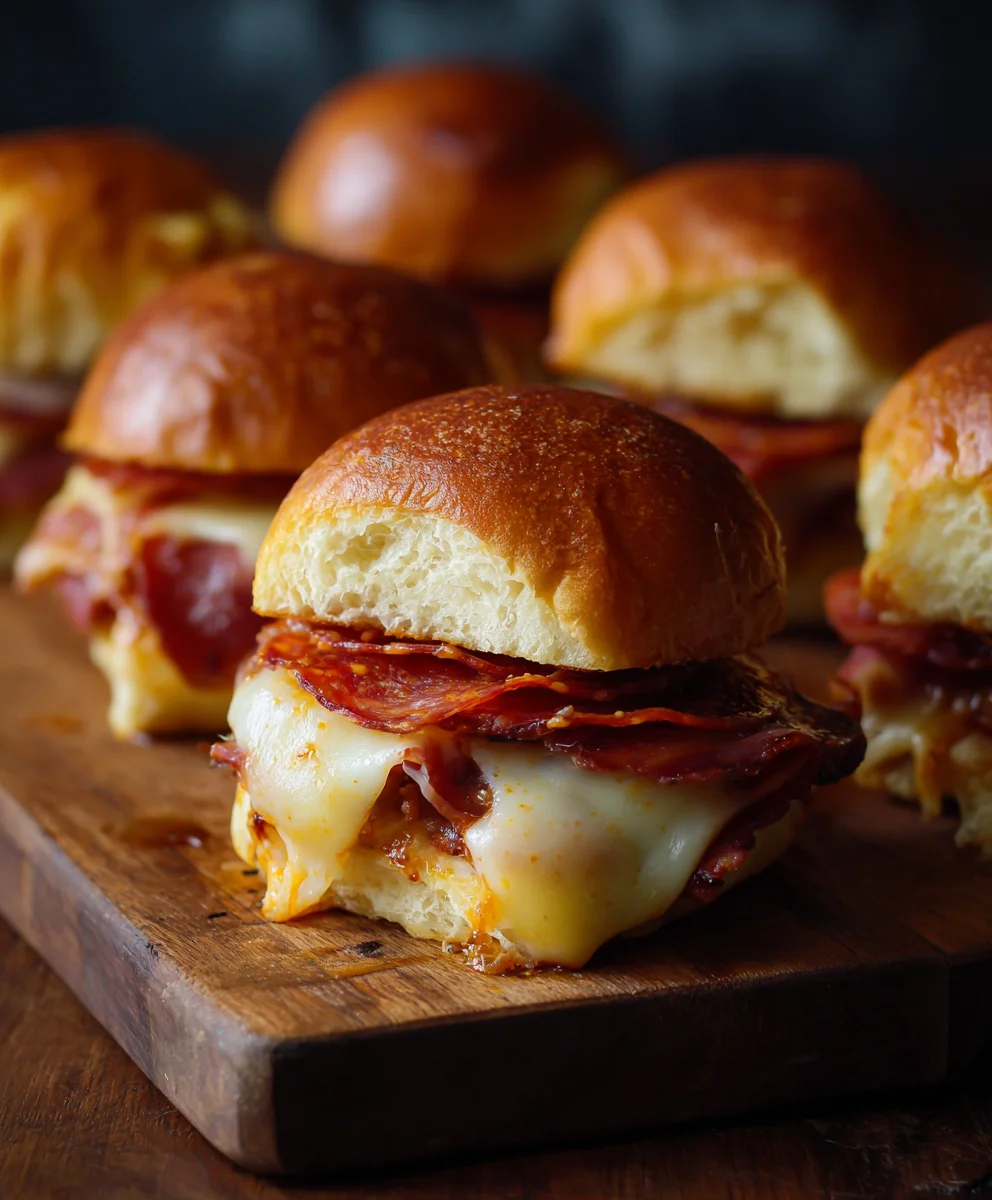
Beef Pepperoni Pizza Sliders are not just a snack; they are an experience I can’t wait for you to try. From the moment these irresistible mini sandwiches emerge golden and bubbly from the oven,
I guarantee they will be the star of your next gathering or a delightful treat for a cozy night in.
While the grand history of pizza itself boasts centuries of rich Italian heritage, and humble sliders have their own charming American diner story, I believe this innovative combination brings together the very best of both worlds. It’s the ultimate evolution of comfort food, reimagining the classic pizza experience into a convenient, absolutely irresistible bite.
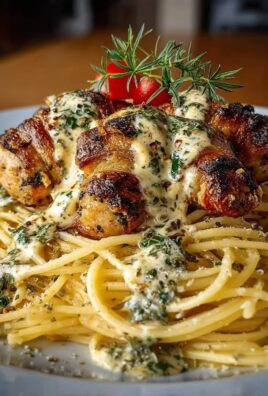
I’ve discovered that people adore this dish for so many reasons. Imagine perfectly seasoned ground beef, slices of zesty pepperoni, and a generous blanket of molten mozzarella and provolone cheese, all lovingly nestled within soft, buttery slider buns. Each bite delivers that iconic pizza flavor explosion – savory, tangy, and utterly satisfying – but in a handheld, effortlessly shareable format. Their incredible taste, combined with their crowd-pleasing convenience, makes these
Beef Pepperoni Pizza Sliders
an absolute sensation. I find them incredibly simple to assemble, yet they always manage to impress, proving that the most delicious things often come in wonderfully small packages.

Ingredients:
- 24 King’s Hawaiian sweet slider rolls (or any similar sweet slider buns)
- 1.5 pounds lean ground beef (80/20 or 85/15 recommended for flavor)
- 1 large yellow onion, finely diced
- 2 cloves garlic, minced
- 1 teaspoon onion powder
- 1 teaspoon garlic powder
- 1 teaspoon dried Italian seasoning
- 1/2 teaspoon smoked paprika (optional, but adds a nice depth)
- Salt and freshly ground black pepper, to taste
- 1 cup prepared pizza sauce (your favorite brand works best)
- 6 ounces sliced pepperoni (about 1.5 cups if using mini pepperoni)
- 8 slices provolone cheese
- 2 cups shredded low-moisture, part-skim mozzarella cheese
- 4 tablespoons unsalted butter, melted
- 1 tablespoon fresh parsley, chopped (for garnish, optional)
- 1/2 teaspoon everything bagel seasoning (optional, for topping)
Preparing the Beef & Sauce Base:
Let’s kick things off with the heart of our Beef Pepperoni Pizza Sliders – the seasoned ground beef. This step is crucial for building a robust flavor profile that will shine through in every bite. Begin by placing a large skillet or a Dutch oven over medium-high heat. I always find that starting with a hot pan helps achieve a beautiful sear on the meat, which is essential even for ground beef.
Once your pan is sufficiently hot, add the 1.5 pounds of lean ground beef. Break up the meat with a wooden spoon or spatula as it cooks. You’re aiming for finely crumbled beef, so don’t be shy about really working it. As the beef browns, you’ll notice it rendering its fat. If you’ve opted for a leaner blend, there might not be much, but if you’re using something like an 80/20 mix, you’ll likely see a fair amount of liquid. It’s important to drain off any excess grease at this stage. A simple way is to tilt the pan and use your spoon to hold back the meat while you carefully pour out the fat into a heat-safe container. This prevents the sliders from becoming greasy and ensures the other flavors can really sing.
Next, it’s time to infuse that beef with aromatic goodness. Reduce the heat to medium. Add the finely diced yellow onion to the skillet with the browned beef. Sauté the onion for about 5-7 minutes, stirring occasionally, until it has softened and become translucent. This process sweetens the onion and mellows its raw bite, adding a wonderful foundational layer to our Beef Pepperoni Pizza Sliders.
Now, let’s bring in the garlic. Add the 2 cloves of minced garlic to the skillet. Cook for just 1 minute more, stirring constantly, until it becomes fragrant. Be careful not to burn the garlic, as burnt garlic can turn bitter and spoil the taste of your otherwise perfect sliders.
It’s seasoning time! Sprinkle in the 1 teaspoon of onion powder, 1 teaspoon of garlic powder, 1 teaspoon of dried Italian seasoning, and the optional 1/2 teaspoon of smoked paprika. Stir everything together thoroughly, ensuring the seasonings are evenly distributed throughout the beef and onion mixture. Let it cook for another minute, allowing the spices to toast slightly and release their full aroma. This small step makes a big difference in the depth of flavor.
Season generously with salt and freshly ground black pepper to your taste. Remember, you’ll be adding pizza sauce next, which also has seasoning, so start with a moderate amount and you can always adjust later if needed. Finally, pour in the 1 cup of your favorite prepared pizza sauce. Stir well to combine, bringing all those delicious components together. Let the mixture simmer on low heat for 5-10 minutes, allowing the flavors to meld and the sauce to thicken slightly. This also gives the Beef Pepperoni Pizza Sliders’ filling a chance to truly become cohesive and incredibly flavorful. Remove the skillet from the heat and set aside while you prepare the buns and other toppings. This allows the mixture to cool down a bit, making it easier to handle when assembling.
Assembling the Beef Pepperoni Pizza Sliders:
Now for the fun part: bringing our Beef Pepperoni Pizza Sliders to life! Preheat your oven to 350°F (175°C). While the oven heats, grab a 9×13 inch baking dish or a similar oven-safe pan. A glass dish works wonderfully here, as it allows for even heat distribution.
Take your 24 sweet slider rolls. Most often, these come in a connected sheet. Using a large serrated knife, carefully slice the entire block of rolls horizontally through the middle, separating the tops from the bottoms without breaking them apart individually. This is a key trick for easy assembly! You should now have two large halves of connected buns.
Place the bottom half of the slider buns into your prepared baking dish. Spread a thin, even layer of about 1/4 cup of the pizza sauce over the entire bottom layer of the buns. This acts as an initial moisture barrier and another layer of classic pizza flavor.
Next, spoon the prepared beef and sauce mixture evenly over the pizza sauce layer on the bottom buns. Make sure to spread it right to the edges so every slider gets a generous amount of filling. Don’t be shy; these are meant to be hearty Beef Pepperoni Pizza Sliders!
Now for the cheese. Arrange 8 slices of provolone cheese over the beef mixture. Provolone melts beautifully and adds a lovely tangy, slightly sharp contrast to the rich beef. Then, sprinkle about 1 cup of the shredded mozzarella cheese evenly over the provolone. This double layer of cheese ensures maximum gooeyness.
Time for the pepperoni! Distribute the 6 ounces of sliced pepperoni over the cheese. If you’re using regular-sized pepperoni, try to overlap them slightly to ensure good coverage. If you’re using mini pepperoni, simply sprinkle them generously. The pepperoni will get wonderfully crispy edges when baked, adding texture and that quintessential pizza taste to our Beef Pepperoni Pizza Sliders.
Top the pepperoni with the remaining 1 cup of shredded mozzarella cheese. This final layer of mozzarella will create that iconic bubbly, golden-brown crust we all love on a good pizza.
Carefully place the top half of the slider buns back onto the assembled base. Gently press down on the tops to ensure everything is nestled snugly together. This completes the main assembly of your Beef Pepperoni Pizza Sliders, but we’re not quite done with the flavor enhancements!
Preparing the Garlic Herb Butter Topping:
This garlic herb butter topping is the secret weapon that elevates these Beef Pepperoni Pizza Sliders from great to absolutely phenomenal. It adds a golden sheen, a wonderful aroma, and another layer of savory deliciousness that ties all the flavors together.
In a small microwave-safe bowl or a small saucepan, melt the 4 tablespoons of unsalted butter. You can pop it in the microwave for about 30-45 seconds, or gently melt it over low heat on the stovetop. The goal is just to get it liquid, not to brown it.
Once the butter is melted, add the remaining 1/2 teaspoon of garlic powder and 1/2 teaspoon of dried Italian seasoning to it. Stir well to combine. This creates a potent and fragrant mixture that will seep into the tops of the buns as they bake. If you want an extra kick, a tiny pinch of red pepper flakes could be added here as well, but it’s entirely optional.
Using a pastry brush, generously brush the melted garlic herb butter mixture evenly over the tops of the slider buns. Make sure to cover every surface, including the gaps between the individual rolls. Don’t skimp on this step! This butter will create a beautiful golden-brown crust and infuse the bread with incredible flavor. For an extra touch of visual appeal and flavor, I sometimes like to sprinkle a little bit of everything bagel seasoning over the buttered tops at this point. It adds sesame seeds, poppy seeds, and a little extra savory crunch that works surprisingly well with these pizza sliders.
Baking the Beef Pepperoni Pizza Sliders:
With our Beef Pepperoni Pizza Sliders fully assembled and brushed with their glorious butter topping, it’s time to get them into the oven to transform into gooey, savory perfection. This baking process ensures the cheese melts, the beef filling heats through, and the buns become wonderfully golden and slightly crispy.
First, take a piece of aluminum foil and loosely cover the baking dish. You don’t want it to be too tight, as that can trap too much steam and make the buns soggy. Just a gentle tenting is perfect. The foil helps to steam the sliders initially, ensuring that the cheese melts beautifully without the tops browning too quickly.
Place the covered baking dish into your preheated 350°F (175°C) oven. Bake for 20 minutes. During this time, the internal temperature of the Beef Pepperoni Pizza Sliders will rise, the cheese will begin its delightful melting process, and the flavors will continue to meld together.
After 20 minutes, carefully remove the foil. You should see bubbly, melty cheese peeking out from under the pepperoni. Now we want to get those tops nice and golden! Return the uncovered baking dish to the oven and continue baking for another 5-10 minutes, or until the tops of the slider buns are beautifully golden brown and the cheese is bubbling vigorously and slightly browned in spots. Keep a close eye on them during this final stage, as ovens can vary, and you don’t want the tops to burn.
Once they’ve reached that perfect golden hue, carefully remove the Beef Pepperoni Pizza Sliders from the oven. This next step is crucial for the best texture and easy serving: allow the sliders to rest in the baking dish for about 5-10 minutes before slicing and serving. This resting period allows the melted cheese to set slightly, which prevents it from oozing out excessively when you cut them and helps the flavors settle. It also makes them a bit easier to handle.
Serving Your Delicious Beef Pepperoni Pizza Sliders:
Congratulations! You’ve successfully created a batch of irresistible Beef Pepperoni Pizza Sliders. Now comes the moment of truth – serving them up to eager hands!
After the brief resting period, use a large sharp knife to cut along the lines of the individual slider buns. Since you didn’t separate them earlier, they’re still connected, making it incredibly easy to cut them into perfect individual portions. You can also cut them into smaller clusters of 2 or 3 for easier handling if you’re serving a crowd.
To add a final touch of freshness and visual appeal, sprinkle the chopped fresh parsley over the top of the Beef Pepperoni Pizza Sliders just before serving. The vibrant green of the parsley contrasts beautifully with the melted cheese and red pepperoni, and it adds a lovely herbaceous note that brightens the whole dish.
These Beef Pepperoni Pizza Sliders are incredibly versatile. They are absolutely perfect as a main course for a casual weeknight dinner, especially when paired with a simple side salad to balance out the richness. I often serve them with a crisp Caesar salad or a green salad with a light vinaigrette. They also make an outstanding appetizer or party snack, disappearing quickly at any gathering, from game day parties to family get-togethers. You can arrange them on a large platter for guests to easily grab. For dipping, a small bowl of extra pizza sauce, ranch dressing, or even a spicy marinara can be a welcome addition.
If you happen to have any leftovers (which is rare in my experience!), store them in an airtight container in the refrigerator for up to 2-3 days. To reheat, you can pop them back into a preheated oven at 300°F (150°C) for about 10-15 minutes, or until heated through and the cheese is melty again. Covering them loosely with foil during reheating can help prevent them from drying out. A quick zap in the microwave also works, but the buns might not be as crispy.
I truly believe these Beef Pepperoni Pizza Sliders are a crowd-pleaser that you’ll want to make again and again. They’re comforting, full of flavor, and so satisfying. Enjoy every cheesy, meaty bite!
Conclusion:
And there you have it, friends! We’ve journeyed through the simple steps to create what I truly believe will become a staple in your culinary repertoire. If you’ve been looking for that perfect dish that effortlessly combines comfort, convenience, and an explosion of flavor, then these Beef Pepperoni Pizza Sliders are absolutely what you’ve been searching for. Trust me when I say, this isn’t just another recipe; it’s an invitation to experience pure, unadulterated joy in every single bite. The magic of these sliders lies in their deceptive simplicity – you wouldn’t think such minimal effort could yield such a profoundly satisfying result, but here we are!
Why are they a must-try, you ask? Oh, let me count the ways! First, there’s the incredible texture symphony: the soft, pillowy rolls, the savory, seasoned ground beef, the zesty kick of pepperoni, all held together by a gooey, melted blanket of cheese. It’s a harmonious blend that practically dances on your palate. Second, they are the ultimate crowd-pleaser. Whether you’re hosting a game day party, a casual get-together, or simply need a fun, easy dinner for your family, these sliders disappear faster than you can say “pizza.” They transcend age groups; kids adore them, and adults can’t get enough. Third, the preparation is incredibly forgiving. No complex techniques, no obscure ingredients – just straightforward cooking that anyone, regardless of their kitchen prowess, can master. It’s truly a testament to the power of classic flavors combined in an innovative, easy-to-eat format.
Now, let’s talk about making these beauties even more amazing with some serving suggestions and delightful variations. For serving, I highly recommend having a warm bowl of your favorite marinara sauce on the side for dipping – it elevates the whole experience, making each bite even saucier and more authentically “pizza-like.” A creamy ranch dressing also makes a surprisingly delicious dipping partner, offering a cool contrast to the warm, cheesy sliders. Don’t forget a fresh, crisp side salad to balance out the richness, or perhaps some sweet potato fries for a heartier meal. For beverages, these pair wonderfully with anything from a cold soda to a refreshing iced tea, or even a craft beer for the adults. They’re incredibly versatile!
The beauty of a recipe like this is its adaptability. You can truly make these sliders your own! Feeling adventurous? Why not swap out some of the mozzarella for provolone or a sharp cheddar for a different cheese profile? For an extra layer of flavor, consider adding finely diced onions or bell peppers to your ground beef mixture while it cooks. A sprinkle of dried oregano or Italian seasoning mixed with the beef can also boost the herbaceous notes. If you’re a fan of a little heat, a pinch of red pepper flakes scattered over the pepperoni before baking will give them a wonderful kick. For a vegetarian twist, you could even try using a plant-based ground “beef” alternative or a mix of sautéed mushrooms and spinach. And don’t be afraid to experiment with other toppings: finely chopped black olives, cooked sausage, or even a sprinkle of crumbled bacon could all find a happy home on these sliders. The possibilities are genuinely endless, and each variation offers a chance to discover a new favorite iteration of this already fantastic dish.
So, my dear fellow food lovers, my sincerest encouragement to you is this: please give these incredible Beef Pepperoni Pizza Sliders a try! You won’t regret it. They are everything you want in a comfort food – easy, satisfying, and utterly delicious. Make them for your next gathering, for a simple weeknight dinner, or just because you deserve a treat. And when you do, I would absolutely love to hear about your experience! Did you stick to the recipe, or did you put your own unique spin on it? What were your favorite variations or serving suggestions? Share your photos, your stories, and your triumphs in the kitchen with me. Your feedback fuels my passion, and I can’t wait to see how you make these irresistible sliders your own. Happy cooking, and even happier eating!
People Also Ask:
Can I prepare these Beef Pepperoni Pizza Sliders ahead of time?
Absolutely! You can assemble the sliders up to 24 hours in advance. Simply follow all the steps up until baking, then cover the pan tightly with plastic wrap and refrigerate. When you’re ready to bake, remove them from the fridge about 30 minutes beforehand to allow them to come closer to room temperature, then bake as directed. This makes them perfect for party prep!
How do I store and reheat leftover pizza sliders?
Leftover sliders should be stored in an airtight container in the refrigerator for up to 3 days. To reheat, you can use a microwave for a quick warm-up (though the buns might get a little soft), or for best results, reheat them in an oven or air fryer at 300-325°F (150-160°C) for 10-15 minutes, or until heated through and the cheese is bubbly again. This helps the buns crisp up nicely.
What kind of ground beef is best for these sliders?
I recommend using lean ground beef, around 85-90% lean. This ensures you get plenty of flavor without an excessive amount of grease. If you use a higher fat percentage, make sure to drain off any excess fat after cooking to prevent the sliders from becoming too greasy.
Can I freeze these Beef Pepperoni Pizza Sliders?
While you can freeze them, I generally recommend enjoying them fresh or just refrigerated, as the texture of the buns can change a bit upon thawing. If you must freeze them, bake them first, let them cool completely, then wrap individual sliders tightly in plastic wrap and then foil. Store in a freezer-safe bag for up to 1 month. Reheat from frozen in the oven at 350°F (175°C) for about 20-30 minutes, or until heated through.
Can I use different types of rolls for this recipe?
Yes, absolutely! While Hawaiian sweet rolls are a personal favorite for their slight sweetness and soft texture, you can certainly experiment with other slider-sized rolls. Brioche rolls would offer a richer flavor, or even small dinner rolls could work. Just ensure they are connected in a way that allows you to slice them horizontally as a single unit, or adjust the assembly if using individual rolls.
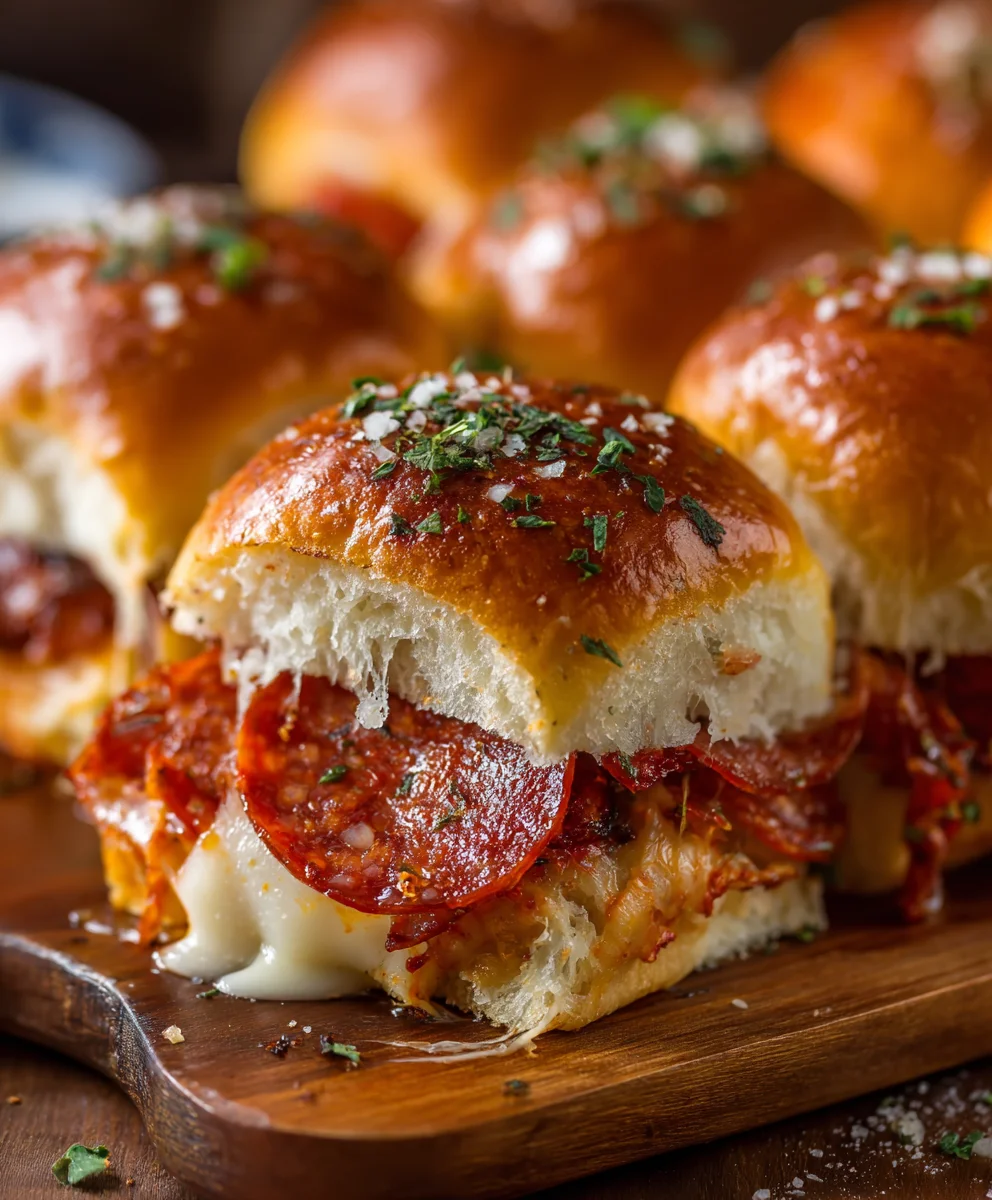
Beef Pepperoni Pizza Sliders
Irresistible mini sandwiches featuring perfectly seasoned ground beef, zesty pepperoni, and a generous blanket of molten mozzarella and provolone cheese, all nestled within soft, buttery slider buns. These Beef Pepperoni Pizza Sliders are perfect for any gathering or a delightful treat for a cozy night in, offering an ultimate evolution of comfort food in a convenient, absolutely irresistible bite.
Ingredients
-
24 King’s Hawaiian sweet slider rolls
-
1.5 pounds lean ground beef (80/20 or 85/15 recommended)
-
1 large yellow onion, finely diced
-
2 cloves garlic, minced
-
1 teaspoon onion powder
-
1 teaspoon garlic powder
-
1 teaspoon dried Italian seasoning
-
1/2 teaspoon smoked paprika (optional)
-
Salt and freshly ground black pepper, to taste
-
1 cup prepared pizza sauce
-
6 ounces sliced pepperoni (or ~1.5 cups mini pepperoni)
-
8 slices provolone cheese
-
2 cups shredded low-moisture, part-skim mozzarella cheese
-
4 tablespoons unsalted butter, melted
-
1 tablespoon fresh parsley, chopped (for garnish, optional)
-
1/2 teaspoon everything bagel seasoning (optional, for topping)
Instructions
-
Step 1
Prepare Beef Mixture: Brown 1.5 lbs ground beef in a large skillet over medium-high heat, breaking it up. Drain excess fat. Add 1 large diced yellow onion, cook 5-7 mins until soft. Add 2 minced garlic cloves, cook 1 min until fragrant. -
Step 2
Season & Simmer: Stir in 1 tsp onion powder, 1 tsp garlic powder, 1 tsp Italian seasoning, and 1/2 tsp smoked paprika (optional). Cook 1 min. Season with salt and pepper. Stir in 1 cup pizza sauce. Simmer on low heat for 5-10 minutes, then remove from heat and set aside. -
Step 3
Assemble Sliders: Preheat oven to 350°F (175°C). Slice 24 sweet slider rolls horizontally through the middle, keeping them connected. Place bottom halves in a 9×13 inch baking dish. Spread 1/4 cup pizza sauce over the bottom buns. -
Step 4
Layer Ingredients: Evenly spoon the beef mixture over the sauce. Layer with 8 slices provolone cheese, 1 cup shredded mozzarella, and 6 oz sliced pepperoni. Top with the remaining 1 cup shredded mozzarella. Place the top halves of the buns over the filling; press gently. -
Step 5
Prepare Butter Topping: Melt 4 tbsp unsalted butter. Stir in 1/2 tsp garlic powder and 1/2 tsp Italian seasoning. Generously brush this mixture over the tops of the slider buns. (Optional: sprinkle with 1/2 tsp everything bagel seasoning). -
Step 6
Bake Sliders: Loosely cover the baking dish with aluminum foil. Bake for 20 minutes. Remove foil and bake uncovered for another 5-10 minutes, or until the tops are golden brown and the cheese is bubbly. Let sliders rest for 5-10 minutes before serving. -
Step 7
Serve: Cut along the lines of the individual slider buns. Garnish with 1 tbsp fresh chopped parsley (optional). Serve warm. Store leftovers in an airtight container for 2-3 days; reheat in oven or microwave.
Important Information
Nutrition Facts (Per Serving)
It is important to consider this information as approximate and not to use it as definitive health advice.
Allergy Information
Please check ingredients for potential allergens and consult a health professional if in doubt.
Leave a Comment