

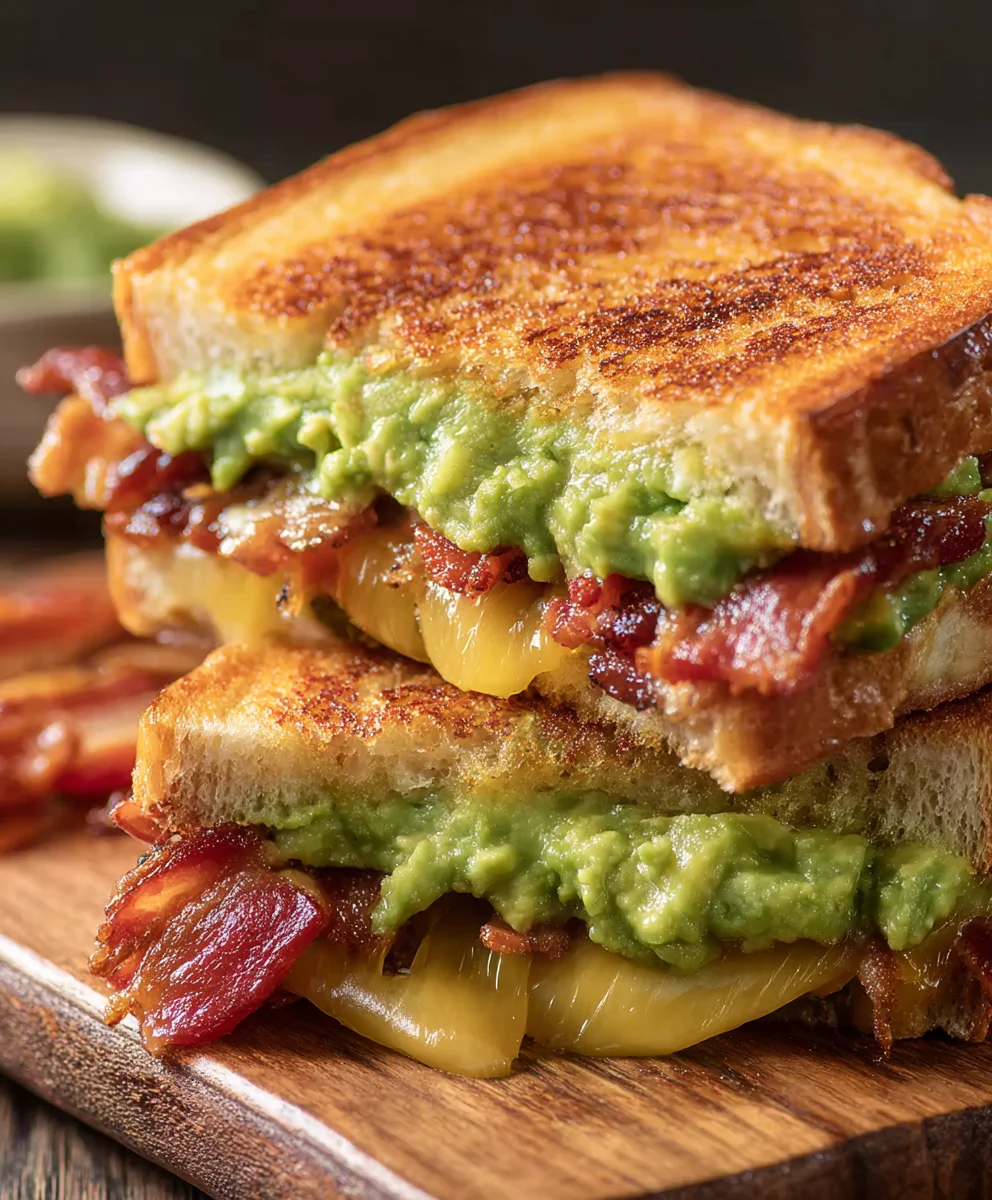
Beef Bacon Guacamole Grilled Cheese Recipe – prepare to redefine your understanding of ultimate comfort food. I believe every dish tells a story, and this particular creation whispers tales of bold flavors, irresistible textures, and pure culinary innovation that will tantalize your senses. Imagine the quintessential, humble grilled cheese, a timeless favorite that evokes warmth and nostalgia, but then elevate it to an art form, infusing it with layers of excitement and gourmet flair you never thought possible.
This isn’t merely a sandwich; it’s an immersive, sensory experience designed to delight. The unmistakable crunch of golden-brown, buttery bread gives way to a luxurious cascade of perfectly melted, gooey cheese. Your palate then encounters the smoky, savory richness of crispy beef bacon, a delightful and flavorful twist on a classic, perfectly complemented by the refreshing, creamy zest of vibrant homemade guacamole. While the grilled cheese has been a beloved staple for generations, a symbol of simple satisfaction, the incorporation of guacamole, with its rich Mesoamerican heritage, and the unique, tantalizing notes of beef bacon, transforms this simple dish into a contemporary masterpiece. It’s a testament to how traditional favorites can evolve, embracing new horizons of taste and sensation.
If you’re seeking a dish that is both deeply satisfying and wonderfully exciting, a true game-changer for your lunch or dinner repertoire, look no further than this incredible Beef Bacon Guacamole Grilled Cheese Recipe. It promises to be a memorable journey for your taste buds, perfect for any occasion when you crave something extraordinary.

Ingredients:
- For the Beef Bacon Guacamole Grilled Cheese:
- 8 slices of your favorite hearty bread (I love a good sourdough, brioche, or even a robust white sandwich bread. The key is a bread that can stand up to the fillings but still toast beautifully. Think about a medium-thick slice, not too thin that it falls apart, and not so thick that it becomes overwhelming.)
- 8 slices (about 4-6 ounces) of premium beef bacon (look for good marbling, as this renders into incredible flavor and crispiness. Choose a nitrate-free option if available for a cleaner taste.)
- 8 ounces (approximately 2 cups, shredded) of good melting cheese. I recommend a blend!
- 4 ounces sharp cheddar, shredded (for that classic, tangy grilled cheese flavor and excellent melt)
- 4 ounces Monterey Jack or Havarti, shredded (for ultimate creaminess and a milder counterpoint to the cheddar. These melt like a dream.)
- 4 tablespoons unsalted butter, softened, or mayonnaise (I often use mayonnaise for an even crispier, golden-brown crust, as it has a higher smoke point. If using butter, ensure it’s truly soft for easy spreading.)
- For the Fresh Guacamole:
- 2 ripe, medium-sized Hass avocados (they should yield slightly to gentle pressure, but not be mushy. Bright green flesh with no brown spots is what we’re after.)
- 1/4 small red onion, very finely minced (adds a gentle bite and vibrant color without being overpowering)
- 2 tablespoons fresh cilantro, finely chopped (its bright, herbaceous notes are essential for authentic guacamole flavor)
- 1 small jalapeño, seeds and membranes removed, very finely minced (for a subtle kick. Adjust to your heat preference – leave some seeds if you like it spicier!)
- 1-2 tablespoons fresh lime juice (from about 1/2 to 1 whole lime. Crucial for brightness and to prevent oxidation, keeping your guacamole green.)
- 1/2 teaspoon kosher salt, or to taste (salt brings out all the flavors)
- 1/4 teaspoon freshly ground black pepper, or to taste
Preparing the Beef Bacon: The Crispy Foundation
Alright, let’s kick things off with our star, the beef bacon! This isn’t just a supporting actor; it’s a foundational layer of flavor and texture for our Beef Bacon Guacamole Grilled Cheese Recipe. Achieving perfectly crispy bacon is a crucial first step, so let’s get into the details.
Pan-Frying Method (My Go-To for Crispiness):
- Preheat Your Pan: Grab a large, heavy-bottomed skillet or cast-iron pan. Cast iron is fantastic here because it retains heat so well, leading to more even cooking. Place it over medium-low heat. Patience is your friend here; don’t rush the bacon. Starting low allows the fat to render slowly, which is key to truly crispy bacon.
- Lay Out the Bacon: Arrange your beef bacon slices in a single layer in the preheated pan. Don’t overcrowd the pan; if you have too many slices, cook them in batches. Overcrowding can steam the bacon instead of frying it, resulting in a rubbery texture, and we definitely don’t want that!
- Slow Cook and Flip: Cook for about 8-12 minutes per side, depending on the thickness of your bacon and your desired level of crispiness. You’ll want to flip the bacon periodically, perhaps every 2-3 minutes, to ensure even browning and rendering of fat. As it cooks, you’ll see the fat slowly render out, and the bacon will begin to turn a beautiful golden brown, eventually darkening to a rich mahogany.
- Watch for Crispiness: Keep a close eye on it as it gets closer to done. It can go from perfectly crispy to burnt in a matter of seconds. I’m looking for a deep, rich brown color and a firm, brittle texture. When you lift a piece, it should feel stiff, not floppy.
- Drain and Reserve: Once crispy, carefully remove the bacon slices from the pan and transfer them to a plate lined with several layers of paper towels. This will help absorb any excess rendered fat. While the bacon is cooling, feel free to pour off most of the rendered beef bacon fat from the pan, leaving just a thin coating. You might even save a tablespoon or two for an extra flavorful butter alternative if you’re feeling adventurous later, but for this recipe, draining it is fine.
- Chop it Up: Once the bacon has cooled slightly and is firm, roughly chop it into smaller pieces. About 1/2 to 1-inch pieces are perfect – small enough to distribute evenly throughout the grilled cheese but large enough to still offer a satisfying bite. Set aside.
Alternative Method: Baking for Even Easier Cleanup (and consistent crispness):
- Preheat Oven and Prep Pan: Preheat your oven to 400°F (200°C). Line a large baking sheet with parchment paper or aluminum foil (for easier cleanup) and place a wire rack on top. This allows air to circulate around the bacon, promoting even crisping.
- Arrange Bacon: Lay the beef bacon slices in a single layer on the wire rack.
- Bake to Perfection: Bake for 15-25 minutes, or until desired crispiness is achieved. Check on it regularly, especially after 15 minutes, as oven temperatures can vary. No need to flip!
- Drain and Chop: Transfer the crispy bacon to a paper towel-lined plate to drain, then chop as described above.
No matter which method you choose, the goal is the same: beautifully rendered, incredibly crispy beef bacon ready to elevate our sandwich!
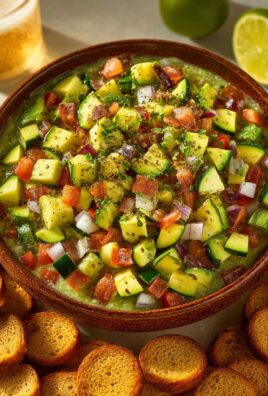
Crafting the Ultimate Guacamole: Freshness is Key for our Beef Bacon Guacamole Grilled Cheese Recipe
Now, let’s talk about the guacamole. While store-bought might seem convenient, trust me when I say that making fresh guacamole at home for your Beef Bacon Guacamole Grilled Cheese Recipe makes all the difference. The vibrant flavors and creamy texture are simply unparalleled.
- Prep Your Avocados: Carefully cut each ripe avocado in half lengthwise around the pit. Twist the halves to separate them. Gently remove the pit (a spoon or carefully tapping the pit with a knife and twisting works well). With a spoon, scoop out the vibrant green flesh into a medium-sized mixing bowl.
- Mash the Avocado: Using a fork or a potato masher, gently mash the avocado flesh. I prefer a slightly chunky guacamole, so I don’t mash it completely smooth. Leave some small pieces for texture. You want it creamy, but with character.
- Introduce the Aromatics: Add the very finely minced red onion, chopped fresh cilantro, and the minced jalapeño (remember to adjust the amount of jalapeño to your heat preference) to the mashed avocado. The key here is very fine mincing, so you get the flavor distributed evenly without large, overpowering chunks.
- The Brightness of Lime: Squeeze in 1 tablespoon of fresh lime juice. This isn’t just for flavor; the acidity helps prevent the avocado from browning too quickly, keeping your guacamole beautifully green. Stir it in thoroughly.
- Season to Perfection: Sprinkle in the kosher salt and freshly ground black pepper. Start with 1/2 teaspoon of salt and 1/4 teaspoon of pepper. Mix everything together gently but thoroughly.
- Taste and Adjust: This is the fun part! Taste a small spoonful of your guacamole. Does it need more salt? A bit more lime for brightness? Perhaps a touch more heat from the jalapeño? Adjust the seasonings to your liking. Remember, a well-seasoned guacamole truly sings! If it tastes a little flat, it likely needs more salt or lime.
- Set Aside: Cover the bowl of guacamole with plastic wrap, pressing it directly onto the surface of the guacamole to prevent air exposure (which causes browning). Pop it in the fridge until you’re ready to assemble your sandwiches.
Having this fresh, vibrant guacamole ready will provide an incredible counterpoint to the rich bacon and melted cheese.
Assembling Your Cheesy Masterpiece: The Layers of Flavor for the Beef Bacon Guacamole Grilled Cheese
Now that our beef bacon is crispy and our guacamole is fresh and zesty, it’s time to bring it all together. This stage is where we build the flavor profile of our Beef Bacon Guacamole Grilled Cheese Recipe, layer by delicious layer.
- Prepare Your Workspace: Lay out your 8 slices of bread on a clean surface. Get your softened butter (or mayonnaise), shredded cheeses, chopped beef bacon, and guacamole within easy reach. Having everything ready makes the assembly smooth and efficient.
- Butter or Mayo Your Bread: This is a crucial step for achieving that perfectly golden, crispy exterior. Spread a thin, even layer of softened butter or mayonnaise from edge to edge on one side of each bread slice. Don’t skimp on the edges! This ensures every bite has that delightful crunch. I personally love mayonnaise here for its higher smoke point, which means less chance of burning before the cheese is fully melted.
- Layer the Cheese (Side One): Take four of your buttered bread slices and place them butter-side down on your clean surface. This will be the inside of your sandwich. Divide about half of your shredded cheddar cheese evenly among these four slices, spreading it to the edges. Then, layer about half of your Monterey Jack or Havarti cheese on top of the cheddar. Having cheese on both slices of bread helps create a strong “cheese glue” and ensures maximum meltiness.
- Add the Beef Bacon: Now, evenly distribute your chopped crispy beef bacon over the cheese layers on these four bread slices. Don’t overload it, but make sure each bite will get some bacon goodness.
- The Guacamole Layer: Next, carefully spread a generous (but not excessive) layer of your fresh guacamole over the bacon on these same four bread slices. About 1.5 to 2 tablespoons per sandwich is usually perfect. You want enough for flavor and creaminess, but not so much that it makes the sandwich soggy or difficult to grill. Spread it gently to avoid pushing off the bacon.
- Layer the Remaining Cheese (Side Two): On the remaining four slices of bread (the ones that are still butter-side up), layer the rest of your Monterey Jack or Havarti cheese first, followed by the remaining cheddar.
- Bring It Together: Carefully place the cheese-layered bread slices (cheese-side down, butter-side up) onto the guacamole and bacon-layered slices. Gently press down on each sandwich to lightly compress the fillings. You should now have four beautiful, ready-to-grill sandwiches.
You’ve done the hard work, now comes the fun part: grilling them to golden, gooey perfection!
The Perfect Grill: Achieving Golden Perfection for Your Beef Bacon Guacamole Grilled Cheese
This is where the magic truly happens, transforming our assembled ingredients into the ultimate Beef Bacon Guacamole Grilled Cheese Recipe. Grilling a perfect grilled cheese isn’t just about heat; it’s about control, patience, and a keen eye.
- Choose Your Pan Wisely: I highly recommend using a large, heavy-bottomed skillet or a cast-iron pan. Cast iron provides superior heat distribution and retention, leading to a much more even and consistent golden crust. If using a non-stick pan, ensure it’s in good condition.
- Preheat with Care: Place your chosen pan over medium-low heat. This is arguably the most critical step. Too high heat will burn your bread before the cheese has a chance to fully melt, and too low will make the bread dry out. Medium-low is the sweet spot for a gradual, even browning and a truly molten interior. Allow the pan to preheat for about 3-5 minutes. You shouldn’t see smoke, just feel a gentle warmth radiating.
- Place the Sandwiches: Gently place one or two sandwiches (depending on the size of your pan – don’t overcrowd!) into the preheated pan, buttered side down. You should hear a gentle sizzle, but not an aggressive crackle.
- Apply Gentle Pressure: Immediately after placing the sandwiches, I like to gently press down on them with a spatula. This ensures maximum contact between the bread and the hot pan, promoting an even crust and helping the cheese start to melt. Don’t press too hard, or you’ll squeeze out the fillings. Just a gentle, even press for about 10-15 seconds.
- Cook the First Side: Cook for approximately 4-6 minutes on the first side. During this time, resist the urge to peek too often! You want the heat to penetrate and melt that cheese. The bread should be turning a beautiful, deep golden brown. If it’s browning too quickly, slightly reduce the heat. If it’s not browning at all, slightly increase it.
- The Flip: Once the first side is a gorgeous golden brown and the cheese inside has started to soften (you might see a bit of melted cheese peeking out the sides), it’s time to flip! Use a sturdy, wide spatula to carefully turn the sandwich over.
- Cook the Second Side: Continue cooking for another 4-6 minutes on the second side. Again, use gentle pressure with your spatula. The goal here is a perfectly golden crust on the second side and completely melted, gooey cheese throughout the entire sandwich. You’ll know it’s ready when both sides are beautifully golden, and when you gently press on the top of the sandwich, you can feel the softness and give of the melted cheese inside.
- Troubleshooting:
- Bread Burning, Cheese Not Melted: Your heat is too high. Remove the sandwich, let the pan cool slightly, and reduce the heat. Patience is key!
- Bread Pale, Cheese Melted: Your heat might be too low, or you need to cook it longer.
- Cheese Not Melting Enough: This is usually due to insufficient cooking time or a pan that isn’t retaining heat well enough. Cover the pan with a lid for the last minute or two of cooking on the second side; this traps steam and helps melt the cheese more rapidly without burning the bread.
- Repeat for Remaining Sandwiches: If you’re cooking in batches, make sure to wipe out any burnt bread crumbs from the pan between sandwiches to prevent them from sticking or imparting a bitter flavor. Adjust heat as needed.
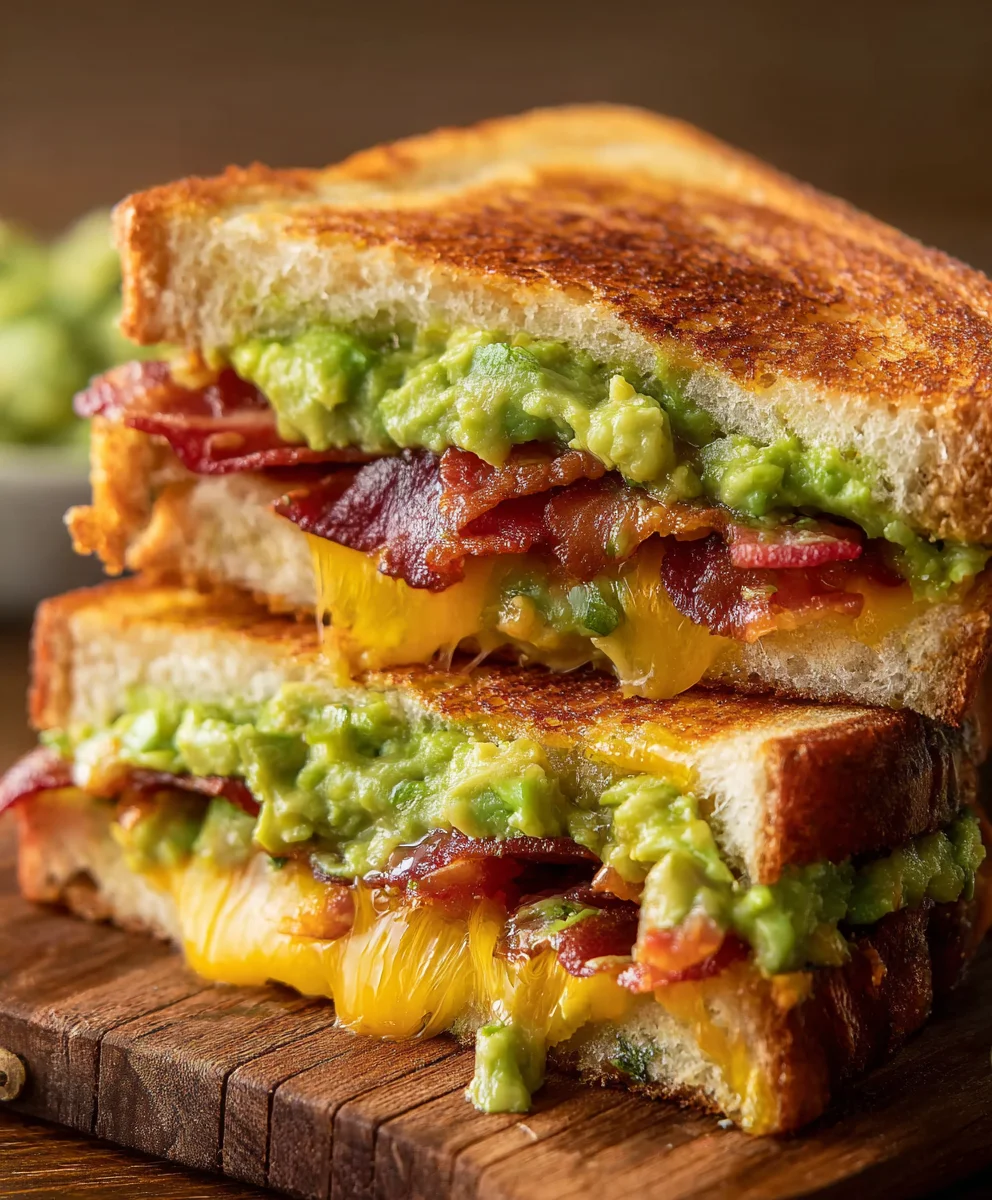
Each sandwich should emerge from the pan as a golden-brown masterpiece, promising a delightful crunch and a cascade of melted cheese, crispy bacon, and creamy guacamole.
The Grand Finale: Resting and Serving Your Beef Bacon Guacamole Grilled Cheese
You’ve successfully grilled your masterpieces! Now, don’t just dive in immediately. A few final steps will ensure you get the absolute best experience from your Beef Bacon Guacamole Grilled Cheese Recipe.
- The Importance of Resting: This might sound counterintuitive for a grilled cheese, but hear me out. Once your grilled cheese sandwiches are beautifully golden and the cheese is fully melted, carefully transfer them from the pan to a cutting board. Let them rest for about 2-3 minutes.
- Why rest? This short resting period allows the super-hot cheese to set up just slightly, preventing it from oozing out excessively when you cut into it. It also allows the internal heat to distribute evenly, ensuring every bite is perfectly warm and gooey without scalding your tongue!
- It also helps the bread’s crust crisp up just a touch more as it cools slightly from the direct heat of the pan.
- The Perfect Cut: After resting, grab a sharp serrated knife. Gently slice each grilled cheese sandwich diagonally from corner to corner. Cutting diagonally isn’t just for aesthetics (though it does look fantastic!), it also exposes more of those glorious, gooey layers of cheese, bacon, and guacamole, making it even more inviting.
- Serve Immediately: While a short rest is good, don’t let them sit too long. Grilled cheese is best enjoyed warm, right after slicing, when the cheese is at its most molten and the bread is perfectly crispy.
- Serving Suggestions:
- Classic Pairing: A warm bowl of creamy tomato soup is the quintessential partner for any grilled cheese, and this one is no exception. The tang of the soup beautifully complements the rich, savory sandwich.
- Fresh Side: A simple green salad with a light vinaigrette can cut through the richness of the sandwich and add a refreshing element to your meal.
- Crunchy Companions: A side of your favorite potato chips or some extra tortilla chips (perfect for any leftover guacamole!) would be a delightful addition.
- Pickle Power: A few crisp pickle slices or spears offer a wonderful acidic counterpoint that cleanses the palate and adds another layer of flavor.
Take a moment to admire your handiwork. That golden-brown crust, the slight give as you pick it up, the aroma of melted cheese and savory bacon mingled with fresh guacamole… it’s truly a symphony of flavors and textures. Enjoy every single, incredible bite of your homemade Beef Bacon Guacamole Grilled Cheese Recipe! You’ve earned it.
Conclusion:
So, there you have it, my friends! We’ve journeyed together through the delightful process of creating what I believe is truly a masterpiece of comfort food. This isn’t just any grilled cheese; it’s an experience, an elevation of a beloved classic that will undoubtedly earn a permanent spot in your culinary rotation. The mere thought of it makes my mouth water all over again! This incredible Beef Bacon Guacamole Grilled Cheese Recipe isn’t just a meal; it’s a statement, a testament to how simple ingredients, when combined thoughtfully, can create something extraordinarily memorable.
Why is this recipe a must-try? Because it perfectly encapsulates everything you crave in a satisfying bite. You get the irresistible crunch from perfectly toasted bread, the luscious, creamy texture from the melted cheese, the rich, savory depth from the crispy beef bacon, and that bright, zesty counterpoint from the homemade guacamole. Each element plays its part beautifully, creating a symphony of textures and flavors that dance on your palate. It’s hearty without being heavy, indulgent yet surprisingly fresh, thanks to the vibrant avocado and lime. It truly transforms the humble grilled cheese into something gourmet, yet it remains wonderfully approachable for any home cook. This recipe is your ticket to impressing friends and family, or simply treating yourself to an unparalleled moment of culinary bliss. Imagine biting into that warm, gooey center, where the tang of the guacamole cuts through the richness of the cheese and bacon – it’s pure magic!
Elevate Your Experience with These Serving Suggestions
While this sandwich is absolutely stellar on its own, here are a few ideas to round out your meal or take it to the next level:
- Classic Tomato Soup: You simply can’t go wrong with this timeless pairing. A warm, creamy bowl of tomato soup is the perfect dip for your cheesy masterpiece.
- Crisp Side Salad: To balance the richness, a light, refreshing green salad with a simple vinaigrette (lemon and olive oil works wonders!) offers a fantastic contrast.
- Pickled Red Onions or Jalapeños: For an extra kick and a delightful tangy crunch, a small side of quick-pickled onions or sliced jalapeños can really brighten up each bite.
- Sweet Potato Fries: If you’re looking for a more substantial meal, a side of crispy sweet potato fries or even regular potato chips adds another layer of satisfying crunch.
- Fresh Fruit: A surprisingly good pairing, a small bowl of berries or sliced melon can offer a refreshing palate cleanser between bites of cheesy, bacony goodness.
Creative Variations to Spark Your Culinary Imagination
Part of the joy of cooking is making a recipe your own, and this Beef Bacon Guacamole Grilled Cheese is wonderfully versatile. Don’t hesitate to experiment with these ideas:
- Cheese Swaps: While I adore sharp cheddar, feel free to try pepper jack for a spicy kick, smoked gouda for a deeper flavor, or even a blend of Monterey Jack and Muenster for ultimate meltiness.
- Spice it Up: For those who love heat, a pinch of chili flakes in your guacamole, or even a thin slice of fresh jalapeño inside the sandwich, will add a fiery punch.
- Different Breads: Sourdough offers a lovely tang and sturdy structure, while a good rye bread could add an interesting savory note. Even a thick-cut artisanal white bread will work beautifully.
- Add-ins: A thinly sliced tomato (blotted dry to prevent sogginess), a fried egg for an extra decadent brunch item, or even a sprinkle of chopped cilantro inside for more freshness can elevate this even further.
- Herbs: Fresh basil or chives, finely chopped and mixed into your guacamole, can introduce new aromatic dimensions.
I genuinely hope you’re feeling inspired to roll up your sleeves and give this incredible sandwich a try. It’s more than just a recipe; it’s an invitation to create, to savor, and to share. There’s immense satisfaction in crafting something so delicious with your own hands. So, go ahead, gather your ingredients, fire up that pan, and prepare to indulge in one of the most satisfying meals you’ll ever make. Once you’ve experienced the magic of this Beef Bacon Guacamole Grilled Cheese Recipe, please come back and tell me all about it! I absolutely love hearing about your kitchen adventures, your successes, and any fun twists you put on my recipes. Share your photos on social media too – tag me or use a relevant hashtag so I can see your magnificent creations. Happy cooking, and even happier eating!
FAQs – People Also Ask:
1. How do I make my grilled cheese extra crispy?
For an ultra-crispy grilled cheese, I recommend two key things: first, use a generous amount of butter or mayonnaise on the outside of your bread, spreading it evenly from edge to edge. Second, cook the sandwich over medium-low heat. This slower cooking allows the bread to gradually toast and dehydrate, resulting in that coveted golden-brown crispness without burning the outside before the cheese melts inside. A cast-iron skillet is also fantastic for achieving an even, beautiful crust.
2. Can I make the guacamole ahead of time?
You can definitely make the guacamole a few hours ahead of time, but it’s best when prepared fresh, right before assembling your sandwiches. If you do make it in advance, press a layer of plastic wrap directly onto the surface of the guacamole (making sure there are no air bubbles) and refrigerate it. The lime juice helps, but direct air exposure is the enemy of fresh avocado, causing it to brown. However, for the absolute best flavor and vibrant green color, I’d suggest whipping it up right before you need it.
3. What’s the best cheese for grilled cheese?
The “best” cheese is subjective, but for a classic, gooey melt, I highly recommend a good sharp or medium cheddar. It offers fantastic flavor and melts beautifully. Other excellent choices include Monterey Jack, Muenster, Gruyère (for a more sophisticated flavor), or even a blend of several cheeses. The key is to choose a cheese that melts well and complements the other ingredients without overpowering them.
4. How do you cook beef bacon perfectly?
To cook beef bacon perfectly, I find baking it in the oven to be the most consistent method. Lay your beef bacon strips in a single layer on a foil-lined baking sheet (for easy cleanup) and bake at 375°F (190°C) for 15-20 minutes, or until it reaches your desired crispness. You can also pan-fry it over medium heat, turning occasionally, but watch it carefully as beef bacon can cook faster and crisp up more intensely than pork bacon due to its leaner nature.
5. Can I freeze grilled cheese sandwiches?
While you can freeze cooked grilled cheese sandwiches, I generally don’t recommend it for optimal quality, especially with guacamole inside. The bread can become soggy upon reheating, and the guacamole’s texture and color might degrade significantly. For best results, it’s always best to make and enjoy your Beef Bacon Guacamole Grilled Cheese fresh. If you must freeze, cook the sandwich completely, let it cool, then wrap it tightly in plastic wrap and then foil. Reheat in a toaster oven or oven until warmed through and crispy.
6. What sides go well with grilled cheese?
Beyond the classic tomato soup, a refreshing side salad with a light vinaigrette is always a great choice. Other excellent companions include dill pickles or bread and butter pickles for a tangy contrast, crispy sweet potato fries, a simple bowl of fruit, or even a small serving of coleslaw. The richness of the sandwich pairs wonderfully with something fresh, tangy, or light to cut through the flavors.
Irresistible Beef Bacon Guacamole Grilled Cheese Recipe
Redefine comfort food with this Beef Bacon Guacamole Grilled Cheese. A culinary innovation where the humble grilled cheese is elevated with layers of excitement: golden-brown bread, melted gooey cheese, smoky crispy beef bacon, and refreshing homemade guacamole. It’s an immersive, sensory experience, transforming a timeless favorite into a contemporary masterpiece perfect for a deeply satisfying and exciting meal.
Ingredients
-
8 slices hearty bread
-
8 slices (4-6 oz) premium beef bacon
-
4 oz sharp cheddar, shredded
-
4 oz Monterey Jack or Havarti, shredded
-
4 tbsp unsalted butter, softened, or mayonnaise
-
2 ripe Hass avocados
-
1/4 small red onion, finely minced
-
2 tbsp fresh cilantro, chopped
-
1 small jalapeño, deseeded and finely minced
-
1-2 tbsp fresh lime juice
-
1/2 tsp kosher salt, or to taste
-
1/4 tsp black pepper, or to taste
-
Tortilla chips, crushed (optional)
Instructions
-
Step 1
Choose your preferred method:
a. Pan-Fry: Heat a large, heavy skillet over medium-low heat. Lay bacon in a single layer. Cook 8-12 minutes per side, flipping often, until crispy. Drain on paper towels.
b. Oven Bake: Preheat oven to 400°F (200°C). Arrange bacon on a wire rack on a baking sheet. Bake 15-25 minutes until crispy. Drain.
Once cooled, roughly chop the crispy beef bacon into 1/2 to 1-inch pieces. Set aside. -
Step 2
Scoop avocado flesh into a medium bowl and mash gently, leaving some chunks. Stir in finely minced red onion, chopped cilantro, and deseeded, finely minced jalapeño. Add 1 tablespoon fresh lime juice, 1/2 teaspoon kosher salt, and 1/4 teaspoon black pepper. Mix well. Taste and adjust seasonings (more salt, lime, or jalapeño if desired). Cover tightly with plastic wrap directly on the surface and refrigerate. -
Step 3
Spread a thin, even layer of softened butter or mayonnaise on one side of each bread slice (this will be the outside). Lay 4 bread slices, butter-side down. Distribute half of both shredded cheeses on these slices. Evenly layer the chopped crispy beef bacon over the cheese. Spread 1.5 to 2 tablespoons of guacamole over the bacon on each sandwich. Optionally, sprinkle a layer of crushed tortilla chips over the guacamole for extra crunch. On the remaining 4 bread slices, layer the remaining cheese. Place these cheese-layered slices, cheese-side down, onto the guacamole/bacon slices to complete the sandwiches. Gently press. -
Step 4
{‘@type’: ‘HowToStep’, ‘name’: ‘Grill to Perfection’, ‘text’: “Heat a large, heavy-bottomed skillet or cast-iron pan over medium-low heat for 3-5 minutes. Place 1-2 sandwiches, butter-side down, in the pan. Gently press with a spatula for 10-15 seconds. Cook for 4-6 minutes until the first side is deep golden brown and cheese starts to melt. Adjust heat as needed. Flip and cook for another 4-6 minutes until the second side is golden brown and all cheese is completely melted and gooey. (If cheese isn’t melting, cover the pan briefly). Repeat for remaining sandwiches, wiping out crumbs between batches.”} -
Step 5
Transfer grilled sandwiches to a cutting board and let rest for 2-3 minutes. Slice each sandwich diagonally with a sharp serrated knife. Serve immediately, enjoying with a side of tomato soup, salad, or pickles.
Important Information
Nutrition Facts (Per Serving)
It is important to consider this information as approximate and not to use it as definitive health advice.
Allergy Information
Please check ingredients for potential allergens and consult a health professional if in doubt.


Leave a Comment