

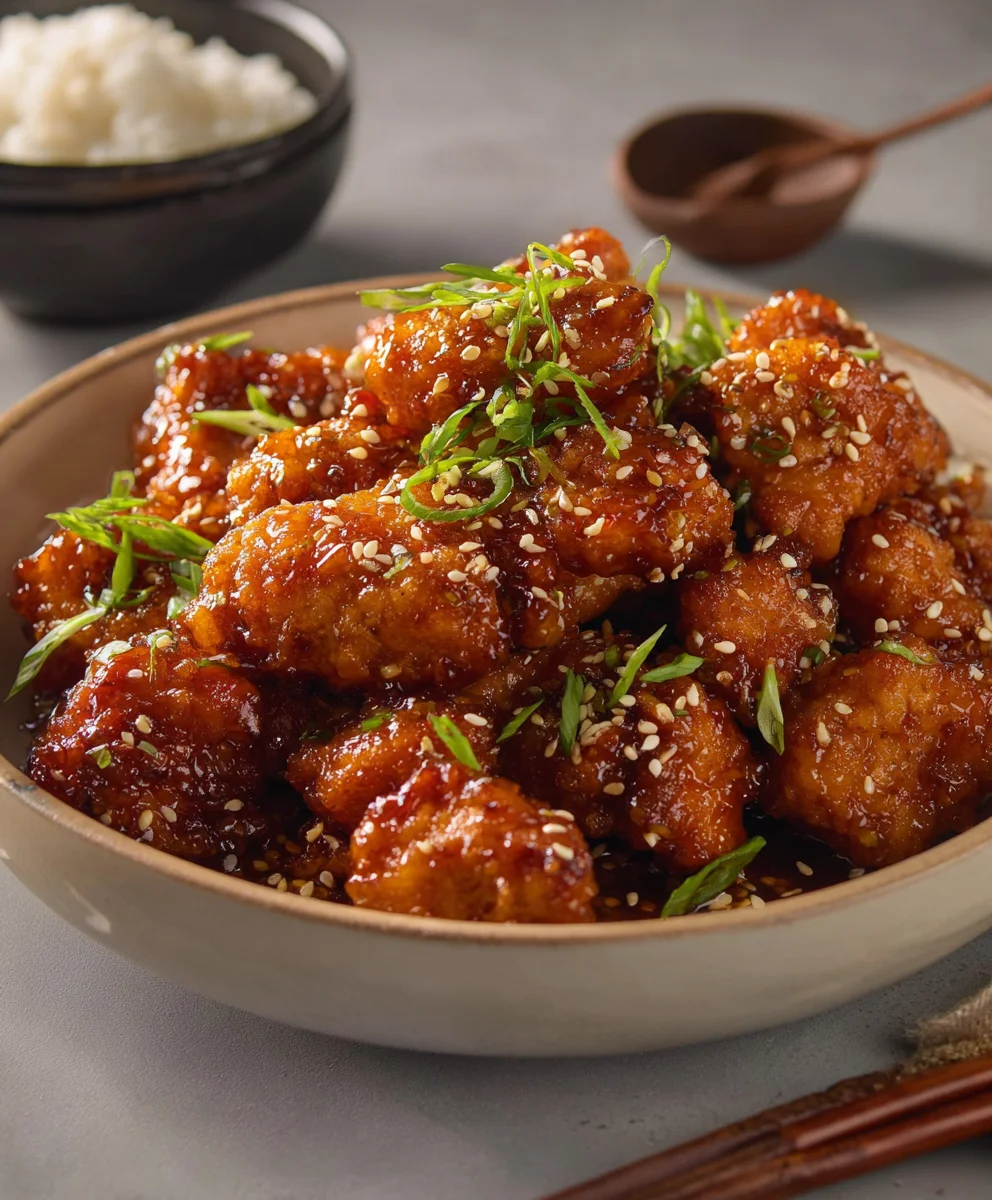
Honey Sesame Chicken – the very name conjures images of a truly irresistible meal, a dish that effortlessly captures the hearts (and taste buds!) of millions.
Is there anything quite as satisfying as perfectly crispy chicken pieces, generously coated in a shimmering, sticky glaze that’s the ideal blend of sweet, savory, and just a touch of tangy warmth?
This culinary gem, while having clear roots in the vibrant traditions of Asian cuisine, particularly Chinese-American fare, has beautifully evolved to become a beloved global favorite. It’s a testament to the delightful fusion of flavors that transcend borders, adapting classic techniques to create something truly universally appealing. I believe its enduring popularity stems from its irresistible flavor profile and comforting familiarity. The golden, succulent chicken, enveloped in that rich, aromatic sauce, infused with the natural sweetness of honey and the distinct nuttiness of toasted sesame seeds, transforms an ordinary meal into an extraordinary experience. It’s that ultimate takeout indulgence, made even better when prepared fresh in your own kitchen. Getting to craft your own batch of Honey Sesame Chicken means enjoying restaurant-quality taste, tailored to your preferences, and imbued with that special homemade touch.

Ingredients:
Creating truly spectacular Honey Sesame Chicken starts with high-quality ingredients, thoughtfully chosen. Here’s everything you’ll need to bring this incredibly flavorful and wonderfully textural dish to life in your own kitchen:
- For the Chicken:
- 2 pounds boneless, skinless chicken thighs or breasts, cut into 1-inch pieces. My personal preference is chicken thighs because they tend to stay incredibly juicy and tender even after frying, offering a more forgiving and richer experience. If using breasts, aim for uniform pieces to ensure even cooking.
- For the Chicken Marinade:
- 2 tablespoons low-sodium soy sauce. Using low-sodium gives you more control over the overall saltiness of the dish.
- 1 tablespoon rice vinegar. This adds a subtle tang that helps to tenderize the chicken.
- 1 teaspoon toasted sesame oil. A little goes a long way here, providing that signature nutty aroma.
- 1 large clove garlic, minced. Fresh is always best for maximum flavor.
- 1/2 inch fresh ginger, grated. Adds a bright, zesty warmth.
- For the Crispy Coating:
- 1/2 cup all-purpose flour. The base for our delightful crust.
- 1/2 cup cornstarch. This is your secret weapon for achieving that extra-crispy, almost airy texture on the chicken.
- 1 teaspoon baking powder. A tiny touch here helps the coating become lighter and even crispier.
- 1/2 teaspoon fine sea salt. Essential for seasoning the coating itself.
- 1/4 teaspoon freshly ground black pepper. For a subtle hint of spice.
- For Frying:
- 4-6 cups neutral oil suitable for deep frying, such as vegetable oil, canola oil, or peanut oil. You’ll need enough to submerge the chicken pieces safely.
- For the Irresistible Honey Sesame Sauce:
- 1/2 cup high-quality honey. The star of our sauce, providing natural sweetness and a beautiful glaze.
- 1/4 cup low-sodium soy sauce. Again, for controlled seasoning.
- 2 tablespoons rice vinegar. Balances the sweetness with a pleasant acidity.
- 1 tablespoon toasted sesame oil. Reinforces the nutty notes we love in Asian cuisine.
- 1 tablespoon light brown sugar (optional, but recommended for depth). This adds a touch more caramel sweetness and helps create a richer glaze.
- 2 large cloves garlic, minced. The foundation of savory flavor.
- 1 inch fresh ginger, grated. Fresh ginger elevates the sauce significantly.
- 1/2 cup chicken broth or water. To give the sauce the right liquid volume before thickening.
- 1 tablespoon cornstarch, mixed with 2 tablespoons cold water to form a slurry. This is crucial for thickening our sauce to that perfect glossy consistency.
- For Garnish:
- 2 tablespoons toasted sesame seeds. Adds crunch and visual appeal.
- 2 tablespoons chopped green onions (scallions). For a pop of color and fresh, mild onion flavor.
Preparing the Chicken: The Foundation of Flavor
The journey to phenomenal Honey Sesame Chicken begins with careful preparation of the chicken. This initial phase sets the stage for both flavor and texture.
- Prepare the Chicken Pieces: First things first, take your chicken thighs or breasts and pat them thoroughly dry with paper towels. This is a critical step; excess moisture can lead to a soggy coating later. Once dry, cut the chicken into uniform 1-inch bite-sized pieces. Uniformity is key here, as it ensures that every piece cooks evenly, preventing some from being undercooked while others become overcooked.
- Marinate for Maximum Flavor: In a medium-sized bowl, combine all the marinade ingredients: the low-sodium soy sauce, rice vinegar, toasted sesame oil, minced garlic, and grated fresh ginger. Whisk them together until well combined. Add your prepared chicken pieces to the marinade, tossing them thoroughly to ensure every piece is coated. Cover the bowl and refrigerate for at least 30 minutes, or ideally, for 1-2 hours. If you have the time, letting it marinate for the full 2 hours will truly infuse the chicken with incredible flavor, making your Honey Sesame Chicken stand out. The marinade not only flavors the chicken but also starts the tenderizing process, thanks to the acidity of the rice vinegar.
Crafting the Crispy Coating and Frying to Perfection
The hallmark of excellent Honey Sesame Chicken is its perfectly crispy exterior, which contrasts beautifully with the tender, juicy interior. This section guides you through creating that irresistible crunch.
- Set Up Your Dredging Station: In a shallow dish or a wide bowl, combine the all-purpose flour, cornstarch, baking powder, fine sea salt, and black pepper. Whisk these dry ingredients together thoroughly until there are no lumps and everything is evenly distributed. The combination of flour and cornstarch is what gives us that desired crispiness, with the baking powder adding an extra lift for a lighter, crunchier texture.
- Coat the Chicken: Remove the marinated chicken from the refrigerator. Working with a few pieces at a time to avoid overcrowding, dredge each chicken piece into the dry coating mixture. Ensure each piece is completely covered, then gently shake off any excess flour mixture. You want a thin, even layer, not a thick, pasty one. Place the coated chicken pieces on a clean plate or a wire rack set over a baking sheet, making sure they don’t touch too much. Allowing them to rest for 5-10 minutes after coating can help the flour adhere better, preventing it from falling off during frying.
- Heat the Frying Oil: Pour your chosen neutral oil into a large, heavy-bottomed pot or a deep Dutch oven. You’ll need enough oil so that the chicken pieces can be mostly submerged; typically, this means about 3-4 inches of oil. Heat the oil over medium-high heat until it reaches a temperature of 350-375°F (175-190°C). I highly recommend using a kitchen thermometer to monitor the oil temperature. Maintaining the correct temperature is paramount for crispy, perfectly cooked chicken; oil that’s too cool will result in greasy chicken, while oil that’s too hot will burn the coating before the chicken cooks through.
- Fry the Chicken in Batches: Once the oil is at the correct temperature, carefully add the coated chicken pieces to the hot oil, working in small batches. Do not overcrowd the pot! Overcrowding will drastically drop the oil temperature, leading to less crispy and potentially greasy chicken. Fry each batch for about 4-6 minutes, or until the chicken is beautifully golden brown and wonderfully crispy on all sides, and cooked through to an internal temperature of 165°F (74°C). Use tongs or a slotted spoon to carefully remove the cooked chicken from the oil, allowing any excess oil to drain back into the pot. Transfer the fried chicken to a wire rack set over a baking sheet lined with paper towels to drain further. This helps to keep the chicken crispy by allowing air circulation and preventing it from sitting in residual oil. Repeat with the remaining chicken until all pieces are fried to perfection.
Whipping Up the Irresistible Honey Sesame Sauce
The sweet, savory, and tangy glaze is what truly brings our Honey Sesame Chicken to life. This sauce is quick to make but packs a huge punch of flavor.
- Combine Sauce Ingredients (Initial Mix): While your chicken is frying or resting, you can start on the sauce. In a medium saucepan, whisk together the honey, low-sodium soy sauce, rice vinegar, toasted sesame oil, optional brown sugar, minced garlic, grated fresh ginger, and chicken broth (or water). Give it a good whisk to ensure everything is well combined.
- Simmer the Sauce Base: Place the saucepan over medium heat and bring the mixture to a gentle simmer, whisking occasionally. Let it simmer for about 2-3 minutes, allowing the flavors to meld and deepen. You’ll notice the kitchen filling with an absolutely delightful aroma at this stage!
- Prepare the Cornstarch Slurry: In a small separate bowl, whisk together the 1 tablespoon of cornstarch with 2 tablespoons of cold water until you have a smooth, lump-free slurry. This slurry is our thickening agent; it’s important to mix it with cold water first to prevent lumps from forming when added to the hot sauce.
- Thicken the Sauce: Once the sauce base has simmered, slowly pour the cornstarch slurry into the simmering sauce in a thin, steady stream, whisking continuously. Continue to whisk gently as the sauce comes back to a simmer. You’ll notice it magically begin to thicken, transforming into a glossy, syrupy consistency within a minute or two. Once it reaches your desired thickness—it should coat the back of a spoon—remove the saucepan from the heat. This is where the magic happens, turning a liquid into a rich, luscious glaze! Taste the sauce and adjust the seasoning if needed; you might want a touch more soy sauce for saltiness, or a tiny bit more honey for sweetness, depending on your preference.
Assembling and Serving Your Culinary Masterpiece: Honey Sesame Chicken
With both the crispy chicken and the glorious sauce ready, it’s time to bring it all together for the grand finale!
- Toss the Chicken with Sauce: Place all of your perfectly fried, crispy chicken pieces into a large clean bowl. Pour the warm Honey Sesame Sauce over the chicken. Using a spatula or tongs, gently toss the chicken until every piece is beautifully and evenly coated with that glossy, irresistible sauce. Be gentle to maintain the crispiness of the coating as much as possible.
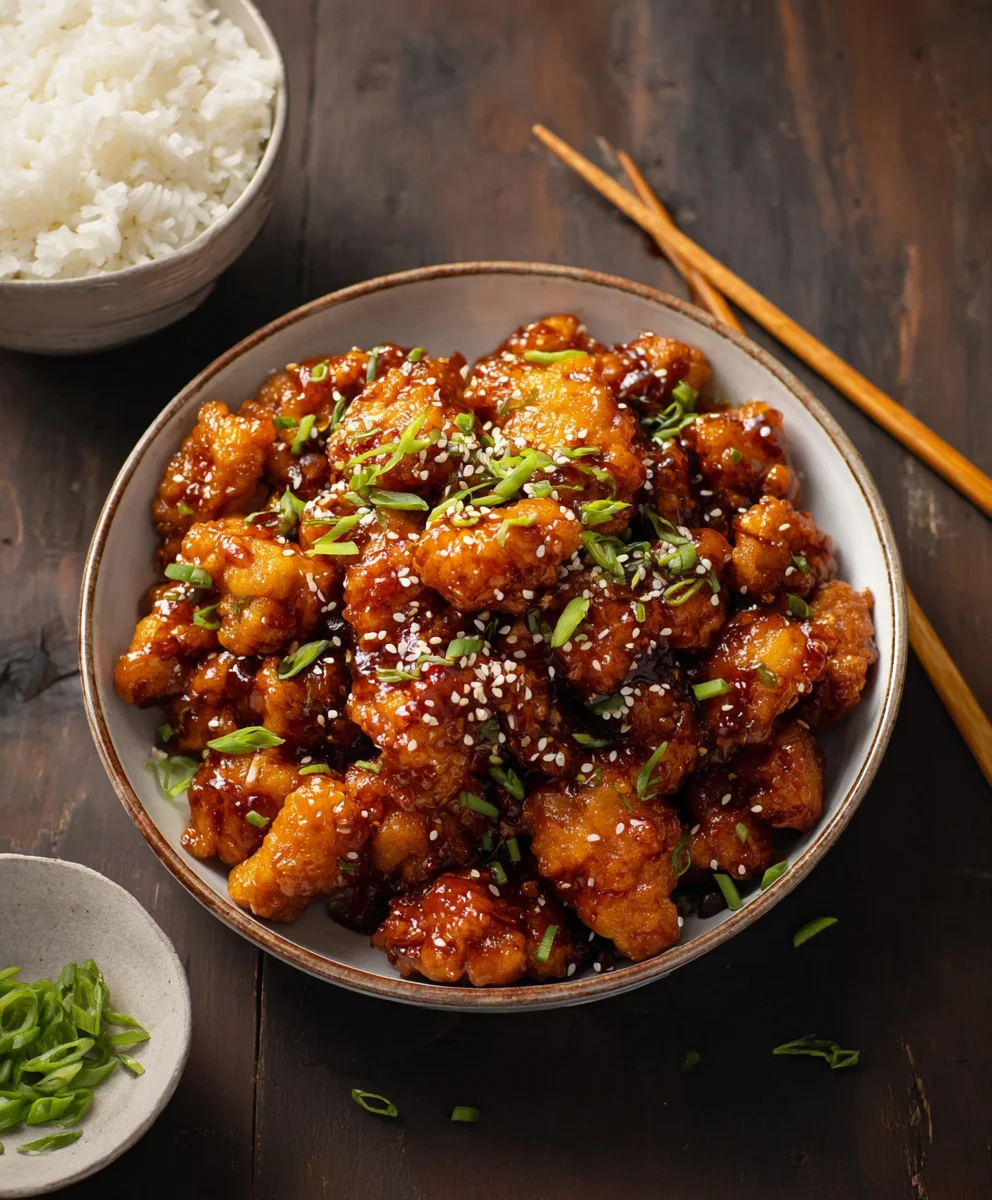
- Garnish and Serve Immediately: Transfer the sauced Honey Sesame Chicken to a serving platter. Sprinkle generously with toasted sesame seeds and freshly chopped green onions. The sesame seeds add a delightful nutty crunch and visual appeal, while the green onions provide a burst of fresh flavor and color.
- Serving Suggestions: This dish is absolutely fantastic served immediately while the chicken is still warm and the sauce is perfectly clinging to each piece. I love to serve it alongside fluffy steamed white or brown rice to soak up any extra sauce, and perhaps some vibrant steamed broccoli or a simple stir-fried vegetable medley for a complete and balanced meal. It’s truly a crowd-pleaser and perfect for a weeknight dinner or entertaining guests!
Tips for Achieving the Best Honey Sesame Chicken:
- Don’t Rush the Marinade: As mentioned, the longer you marinate (up to 2 hours), the deeper the flavor in your chicken.
- Oil Temperature is Key: Invest in a good kitchen thermometer. Consistent oil temperature ensures crispy, evenly cooked chicken without being greasy or burnt.
- Avoid Overcrowding: Frying in batches might take a little longer, but it’s crucial for maintaining oil temperature and achieving ultimate crispiness. Patience here pays off!
- Taste and Adjust the Sauce: Don’t be afraid to taste the sauce before you thicken it and again after. Your palate is your best guide. You might prefer it a little sweeter, tangier, or saltier.
- Keep it Crispy: To maintain the crispiness of the chicken, toss it with the sauce just before serving. If you sauce it too far in advance, the coating will start to soften.
- Make-Ahead Option: You can prepare the Honey Sesame Sauce a day or two in advance and store it in an airtight container in the refrigerator. Reheat gently on the stove over low heat, whisking until smooth, before tossing with freshly fried chicken.
- Storage: Leftover Honey Sesame Chicken can be stored in an airtight container in the refrigerator for up to 3-4 days.
- Reheating: For best results, reheat leftovers in a preheated oven or air fryer at 350°F (175°C) for 10-15 minutes, or until warmed through and the coating has crisped up again. Microwaving is an option for convenience, but the chicken won’t be as crispy.
Enjoy crafting this delightful Honey Sesame Chicken – it’s a recipe I know you’ll come back to again and again!
Conclusion:
And there you have it, my friends! We’ve journeyed through the creation of what I truly believe is one of the most delightful and satisfying dishes you can whip up in your own kitchen. This isn’t just another dinner recipe; it’s an experience, a flavor explosion that brings joy to the table and leaves everyone asking for seconds. I’ve poured my heart into perfecting this particular rendition, ensuring that every bite delivers that perfect balance of sweet, savory, and slightly tangy, all coated in a gorgeous, glossy sauce.
Why is this recipe a must-try? For starters, it’s incredibly adaptable, making it a fantastic option for busy weeknights or a more leisurely weekend cook-off. The preparation might seem like a few steps, but each one is straightforward, building layers of incredible flavor that culminate in something truly extraordinary. You’ll achieve that irresistible crispy exterior on the chicken, which beautifully contrasts with the tender, juicy interior, all brought together by our star: that rich, aromatic honey sesame sauce. It’s a dish that genuinely feels gourmet but is surprisingly simple to master. Trust me, once you taste your homemade version, you’ll find it hard to go back to takeout. The freshness, the quality of ingredients, and the love you put into it just shine through.
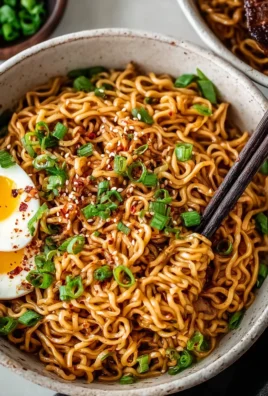
Now, let’s talk about making this dish truly your own. Serving suggestions and variations are where the fun really begins! While the classic pairing with fluffy white rice is always a winner, don’t be afraid to branch out. I absolutely love serving my Honey Sesame Chicken with a side of steamed broccoli or vibrant green beans for a pop of color and extra nutrition. For something heartier, brown rice or even a quinoa salad can be fantastic complements. Feeling adventurous? Try tossing it with some lo mein noodles for a complete stir-fry experience. You can also sprinkle extra toasted sesame seeds or thinly sliced green onions just before serving for an added touch of elegance and crunch.
Want to spice things up? A dash of sriracha or a pinch of red chili flakes added to the sauce will give it a pleasant kick without overpowering the core flavors. For those who enjoy a bit of zest, a squeeze of fresh lime juice at the very end can brighten everything up beautifully. You can also experiment with different vegetables in the stir-fry itself – bell peppers, snow peas, or sliced carrots would all be delicious additions, adding more texture and nutrients. If you’re looking for a vegetarian alternative, this sauce works wonderfully with pan-fried tofu or tempeh, soaking up all that incredible flavor. The possibilities are truly endless, and that’s one of the things I adore most about this recipe – it’s a canvas for your culinary creativity.
So, now it’s your turn! I genuinely hope this recipe inspires you to get into the kitchen and create something truly special. There’s an immense satisfaction that comes from preparing a delicious meal from scratch, especially one that gathers rave reviews from your family and friends. Don’t be shy, give this recipe a go! I promise it’s more rewarding than you can imagine. Once you’ve cooked up your batch of this glorious chicken, please, please, please come back and share your experience with me! What did you serve it with? Did you add any unique twists? I love hearing about your kitchen adventures and seeing your incredible creations. Tag me on social media, leave a comment below – let’s celebrate the joy of cooking together. Happy cooking, everyone!
People Also Ask (FAQs)
What do you eat with Honey Sesame Chicken?
Honey Sesame Chicken is incredibly versatile! Traditionally, it’s served with plain steamed white rice, but it also pairs wonderfully with brown rice, quinoa, or even fried rice. For a healthier option, try it with steamed vegetables like broccoli, green beans, or asparagus. You could also serve it over a bed of lo mein noodles for a more complete stir-fry dish, or with a simple side salad for a lighter meal.
How do you make Honey Sesame Chicken not soggy?
The key to preventing soggy chicken lies in a few steps. First, ensure your chicken pieces are patted completely dry before dredging. Second, don’t overcrowd the pan when frying; cook in batches to maintain consistent oil temperature and allow the chicken to crisp evenly. Lastly, toss the crispy chicken in the sauce right before serving. If you let it sit in the sauce for too long, the crispy coating will absorb the liquid and soften.
Can you meal prep Honey Sesame Chicken?
Absolutely! Honey Sesame Chicken is a fantastic option for meal prepping. You can cook the chicken and the sauce separately. Store the cooked chicken in an airtight container in the refrigerator for up to 3-4 days. Store the sauce separately in a jar. When ready to eat, simply reheat the chicken (you can crisp it up again in a pan or air fryer if desired) and then toss it with the warmed sauce. Serve with freshly cooked rice or prepped veggies.
What part of chicken is best for Honey Sesame Chicken?
Boneless, skinless chicken thighs or chicken breasts are both excellent choices for Honey Sesame Chicken. Chicken thighs tend to be more forgiving, staying juicy and tender even if slightly overcooked, and they offer a richer flavor. Chicken breasts are leaner and will also work beautifully, just be careful not to overcook them to avoid dryness. Cut your chosen chicken into uniform 1-inch pieces for even cooking.
Is Honey Sesame Chicken healthy?
While this recipe features a delicious sauce that contains sugar (from honey) and a good amount of flavor from oil, it can be part of a balanced diet. To make it healthier, consider using less oil for frying or baking/air frying the chicken instead. You can also reduce the amount of honey slightly and serve it with a larger portion of steamed vegetables and brown rice to boost fiber and nutrients. Using lean chicken breast will also lower the fat content.
Can I make Honey Sesame Chicken without sesame oil?
While sesame oil is a crucial ingredient for that authentic nutty, aromatic flavor, you can make this dish without it if absolutely necessary. However, the flavor profile will be noticeably different. If you can’t use sesame oil, you might try adding a tiny bit more soy sauce or a dash of ginger powder to compensate for some of the savory depth. But for the true Honey Sesame Chicken experience, I highly recommend finding some toasted sesame oil!
Honey Sesame Chicken: Sweet & Sticky Homemade Delight
Indulge in this irresistible homemade Honey Sesame Chicken, featuring perfectly crispy chicken pieces coated in a luscious sweet, savory, and tangy glaze. A beloved takeout classic, made fresh for an extraordinary meal.
Ingredients
-
1 ½ lb boneless, skinless chicken thighs or breasts, cut into 1-inch pieces
-
2 large eggs
-
1 tsp chicken bouillon powder
-
½ tsp white pepper
-
1 tbsp water (for chicken marinade)
-
½ cup all-purpose flour
-
½ cup cornstarch
-
2 tsp baking powder
-
½ tsp salt
-
¼ tsp black pepper
-
4-6 cups neutral oil, for deep frying
-
½ cup honey
-
3 tbsp light soy sauce
-
1 tbsp oyster sauce
-
2 tbsp rice vinegar
-
2 tbsp ketchup
-
2 tsp vegetable oil
-
1 tbsp toasted sesame oil
-
3 cloves garlic, minced
-
1 ½ inch fresh ginger, grated
-
½ cup chicken broth or water
-
1 tbsp cornstarch (for slurry)
-
¼ cup cold water (for slurry)
-
2 tbsp toasted sesame seeds, for garnish
-
2 tbsp chopped green onions, for garnish
Instructions
-
Step 1
Pat chicken dry and cut into 1-inch pieces. In a bowl, combine 1 tbsp light soy sauce, 1 tbsp rice vinegar, 1 tsp toasted sesame oil, 1 large minced garlic clove, ½ inch grated fresh ginger, 1 tsp chicken bouillon powder, ½ tsp white pepper, and 1 tbsp water. Add chicken, toss to coat, and marinate for 30 minutes to 2 hours in the refrigerator. -
Step 2
In a shallow dish, whisk together ½ cup all-purpose flour, ½ cup cornstarch, 2 tsp baking powder, ½ tsp salt, and ¼ tsp black pepper. In a separate shallow dish, whisk 2 large eggs. -
Step 3
Dip each marinated chicken piece into the egg, then dredge thoroughly in the dry coating mixture, shaking off excess. Place on a wire rack and let rest for 5-10 minutes. -
Step 4
Heat 4-6 cups neutral oil in a large pot to 350-375°F (175-190°C). Fry chicken in small batches for 4-6 minutes until golden brown, crispy, and cooked through (internal temperature 165°F/74°C). Drain on a wire rack lined with paper towels. -
Step 5
In a medium saucepan, combine ½ cup honey, 2 tbsp light soy sauce, 1 tbsp oyster sauce, 1 tbsp rice vinegar, 2 tbsp ketchup, 2 tsp vegetable oil, 1 tbsp toasted sesame oil, 2 large minced garlic cloves, 1 inch grated fresh ginger, and ½ cup chicken broth or water. Bring to a gentle simmer for 2-3 minutes. -
Step 6
In a small bowl, whisk 1 tbsp cornstarch with ¼ cup cold water to form a smooth slurry. Slowly pour into the simmering sauce, whisking continuously, until the sauce thickens to a glossy, syrupy consistency. Remove from heat. -
Step 7
Add fried chicken to a large bowl. Pour warm Honey Sesame Sauce over the chicken and gently toss until evenly coated. Transfer to a serving platter, garnish with 2 tbsp toasted sesame seeds and 2 tbsp chopped green onions, and serve immediately with rice or vegetables.
Important Information
Nutrition Facts (Per Serving)
It is important to consider this information as approximate and not to use it as definitive health advice.
Allergy Information
Please check ingredients for potential allergens and consult a health professional if in doubt.

Leave a Comment