

Chicken Kiev, a dish synonymous with elegance and indulgence, is about to become your new favorite culinary project! Imagine sinking your fork into a perfectly golden-brown, crispy exterior, only to be greeted by a gush of fragrant, herbed garlic butter that explodes onto your palate. It’s a truly unforgettable experience, and I’m here to guide you through creating this restaurant-worthy dish in your very own kitchen.
While its exact origins are debated, Chicken Kiev is often associated with Ukrainian cuisine and gained immense popularity in the mid-20th century. Some believe it was inspired by a similar French dish, while others claim its creation within the kitchens of Kyiv’s finest restaurants. Regardless of its precise history, this dish has captivated food lovers worldwide.
What makes Chicken Kiev so irresistible? It’s the symphony of textures and flavors! The satisfying crunch of the breadcrumb coating gives way to tender, juicy chicken, all enhanced by the rich, garlicky butter that melts into every bite. It’s a dish that feels both comforting and sophisticated, perfect for a special occasion or simply when you want to treat yourself. Plus, with a little practice, you’ll find that making Chicken Kiev is surprisingly achievable, allowing you to impress your friends and family with your culinary skills. Let’s get started!

Ingredients:
- 4 boneless, skinless chicken breasts (about 6-8 ounces each)
- 1 cup all-purpose flour
- 2 large eggs, beaten
- 2 cups panko breadcrumbs
- 1 cup (2 sticks) unsalted butter, softened
- 4 cloves garlic, minced
- 1/4 cup fresh parsley, finely chopped
- 1 tablespoon fresh chives, finely chopped
- 1 teaspoon lemon zest
- 1/2 teaspoon salt
- 1/4 teaspoon black pepper
- Vegetable oil, for frying
- Salt and pepper, to taste (for seasoning chicken)
Preparing the Garlic Herb Butter:
Okay, let’s start with the heart of Chicken Kiev that glorious garlic herb butter that explodes with flavor when you cut into it. This is where the magic happens!
- Soften the Butter: Make sure your butter is nice and soft. You want it to be easily workable, but not melted. Leaving it out at room temperature for about an hour usually does the trick. If you’re in a hurry, you can microwave it in short bursts (5-10 seconds at a time) until it’s softened, but be careful not to melt it!
- Combine Ingredients: In a medium bowl, combine the softened butter, minced garlic, chopped parsley, chopped chives, lemon zest, salt, and pepper.
- Mix Thoroughly: Use a fork or a rubber spatula to thoroughly mix all the ingredients together until they are evenly distributed. You want the garlic and herbs to be well incorporated into the butter.
- Shape the Butter: Now, we need to shape the butter into logs or pats that will fit inside the chicken breasts. There are a couple of ways to do this:
- Method 1 (Log): Place a large sheet of plastic wrap on a clean surface. Spoon the butter mixture onto the plastic wrap, forming a log shape about 8 inches long. Roll the plastic wrap tightly around the butter, twisting the ends to seal it. Refrigerate for at least 30 minutes, or until the butter is firm enough to slice.
- Method 2 (Pats): Line a baking sheet with parchment paper. Spoon the butter mixture onto the parchment paper in 4 equal portions, shaping them into small patties or rectangles. Freeze for at least 30 minutes, or until the butter is solid. This method is a bit faster for chilling.
- Chill the Butter: This is crucial! The butter needs to be very cold and firm so it doesn’t melt too quickly during cooking. Place the butter (either the log or the patties) in the freezer for at least 30 minutes. You can even leave it in the freezer for longer up to a few hours if you’re preparing ahead of time.
Preparing the Chicken Breasts:
Next up, we’ll get the chicken breasts ready to receive that delicious garlic herb butter. This involves pounding them thin and creating a pocket.
- Pound the Chicken: Place each chicken breast between two sheets of plastic wrap. Use a meat mallet or rolling pin to pound the chicken to an even thickness of about 1/4 inch. This helps to tenderize the chicken and makes it easier to roll. Be careful not to pound it too thin, or it will tear.
- Season the Chicken: Lightly season both sides of each chicken breast with salt and pepper.
- Create a Pocket: Now, we need to create a pocket in each chicken breast for the butter. There are a couple of ways to do this:
- Method 1 (Slit): Use a sharp knife to carefully cut a deep slit into the side of each chicken breast, creating a pocket. Be careful not to cut all the way through to the other side.
- Method 2 (Butterfly): Carefully butterfly each chicken breast by slicing it horizontally almost all the way through, then opening it up like a book. This creates a larger surface area for the butter.
Assembling the Chicken Kiev:
Now for the fun part stuffing the chicken with that amazing garlic herb butter!
- Stuff the Chicken: Remove the chilled butter from the freezer. If you made a log, slice it into 4 equal portions. Place one portion of butter inside the pocket of each chicken breast.
- Seal the Chicken: Carefully fold the chicken breast over the butter, making sure to completely enclose it. Use toothpicks to secure the edges of the chicken, if necessary. This will help prevent the butter from leaking out during cooking.
Breading the Chicken:
This is how we get that crispy, golden-brown crust that everyone loves. A proper breading technique is key!
- Set Up the Breading Station: Set up three shallow dishes. In the first dish, place the all-purpose flour. In the second dish, place the beaten eggs. In the third dish, place the panko breadcrumbs.
- Coat with Flour: Dredge each chicken breast in the flour, making sure to coat it evenly on all sides. Shake off any excess flour.
- Dip in Egg: Dip each floured chicken breast into the beaten eggs, making sure it’s completely coated. Let any excess egg drip off.
- Coat with Breadcrumbs: Dredge each egg-coated chicken breast in the panko breadcrumbs, pressing gently to make sure the breadcrumbs adhere to the chicken. Coat it evenly on all sides.
- Double Breading (Optional): For an extra crispy crust, you can repeat the egg and breadcrumb steps. This is totally optional, but it does make a noticeable difference.
- Chill the Breaded Chicken: Place the breaded chicken breasts on a baking sheet lined with parchment paper. Cover them with plastic wrap and refrigerate for at least 30 minutes. This helps the breading adhere better and prevents it from falling off during cooking. You can even chill them for longer up to a few hours if you’re preparing ahead of time.
Cooking the Chicken Kiev:
Now it’s time to cook these beauties! We’re going to use a combination of frying and baking to ensure the chicken is cooked through and the crust is perfectly golden brown.
- Preheat the Oven: Preheat your oven to 375°F (190°C).
- Heat the Oil: Pour about 1/2 inch of vegetable oil into a large skillet. Heat the oil over medium-high heat until it’s hot enough for frying. You can test the oil by dropping a small piece of breadcrumb into it. If the breadcrumb sizzles and turns golden brown in a few seconds, the oil is ready.
- Fry the Chicken: Carefully place the breaded chicken breasts into the hot oil, being careful not to overcrowd the skillet. Fry for about 2-3 minutes per side, or until the crust is golden brown.
- Transfer to Baking Sheet: Use a slotted spoon to transfer the fried chicken breasts to a baking sheet lined with parchment paper.
- Bake in the Oven: Bake in the preheated oven for 15-20 minutes, or until the chicken is cooked through and the internal temperature reaches 165°F (74°C). Use a meat thermometer to check the temperature. Insert the thermometer into the thickest part of the chicken breast, being careful not to touch the butter filling.
- Rest Before Serving: Remove the chicken from the oven and let it rest for a few minutes before serving. This allows the juices to redistribute and prevents the chicken from drying out.
Serving the Chicken Kiev:
Finally, the moment we’ve all been waiting for serving and enjoying this culinary masterpiece!
- Remove Toothpicks: If you used toothpicks to secure the chicken, carefully remove them before serving.
- Serve Immediately: Serve the Chicken Kiev immediately while it’s still hot and the butter is still molten.
- Garnish (Optional): Garnish with fresh parsley or a lemon wedge for a pop of color and flavor.
- Side Dishes: Chicken Kiev pairs well with a variety of side dishes, such as:
- Mashed potatoes
- Roasted vegetables (asparagus, broccoli, carrots)
- Rice pilaf
- Green salad
- Enjoy the Explosion of Flavor: Cut into the Chicken Kiev and watch as the garlic herb butter oozes out.
Conclusion:
And there you have it! This Chicken Kiev recipe isn’t just another meal; it’s an experience. From the initial pounding of the chicken to the final, glorious burst of garlic butter, every step is a testament to the joy of cooking and the satisfaction of creating something truly special. I know it might seem a little daunting at first glance, but trust me, the end result is absolutely worth the effort. The crispy, golden-brown exterior giving way to tender, juicy chicken, all enveloped in that heavenly, herbed butter it’s a symphony of flavors and textures that will leave you wanting more.
Why is this a must-try? Because it elevates the humble chicken breast to a dish worthy of a celebration. It’s impressive enough for a dinner party, yet comforting enough for a cozy night in. It’s a classic for a reason, and this recipe ensures you’ll create a version that’s even better than you remember.
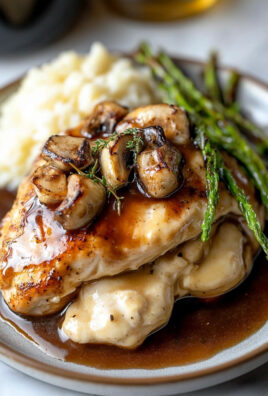
But the fun doesn’t stop there! Feel free to get creative with your serving suggestions and variations. I personally love serving my Chicken Kiev with a side of creamy mashed potatoes and some steamed asparagus for a complete and balanced meal. The richness of the Kiev pairs perfectly with the simplicity of the potatoes and the freshness of the asparagus. Alternatively, you could try serving it with a light and tangy lemon butter sauce to complement the garlic herb butter inside. A simple green salad with a vinaigrette dressing also works wonders to cut through the richness.
For variations, consider experimenting with different herbs in the butter. Try adding a pinch of red pepper flakes for a little kick, or some lemon zest for a brighter flavor. You could even incorporate some finely chopped sun-dried tomatoes for a Mediterranean twist. If you’re feeling adventurous, try using different types of cheese in the butter filling, such as Parmesan or Gruyere. Just remember to keep the butter cold for the best results!
Another fun variation is to bread the chicken with panko breadcrumbs instead of regular breadcrumbs for an extra crispy crust. You can also add some grated Parmesan cheese to the breadcrumbs for added flavor and texture.
Don’t be afraid to make this recipe your own. Cooking is all about experimentation and finding what you love. The most important thing is to have fun and enjoy the process.
So, what are you waiting for? Gather your ingredients, put on your apron, and get ready to create some magic in the kitchen. I promise you, this Chicken Kiev recipe will become a new favorite in your household.
And now, for the most important part: I want to hear about your experience! Did you try this recipe? What variations did you make? What did your family and friends think? Share your photos, comments, and stories in the comments section below. I can’t wait to see what you create! Your feedback is invaluable and helps me to continue creating recipes that you’ll love. Happy cooking! I hope you enjoy this classic dish as much as I do.
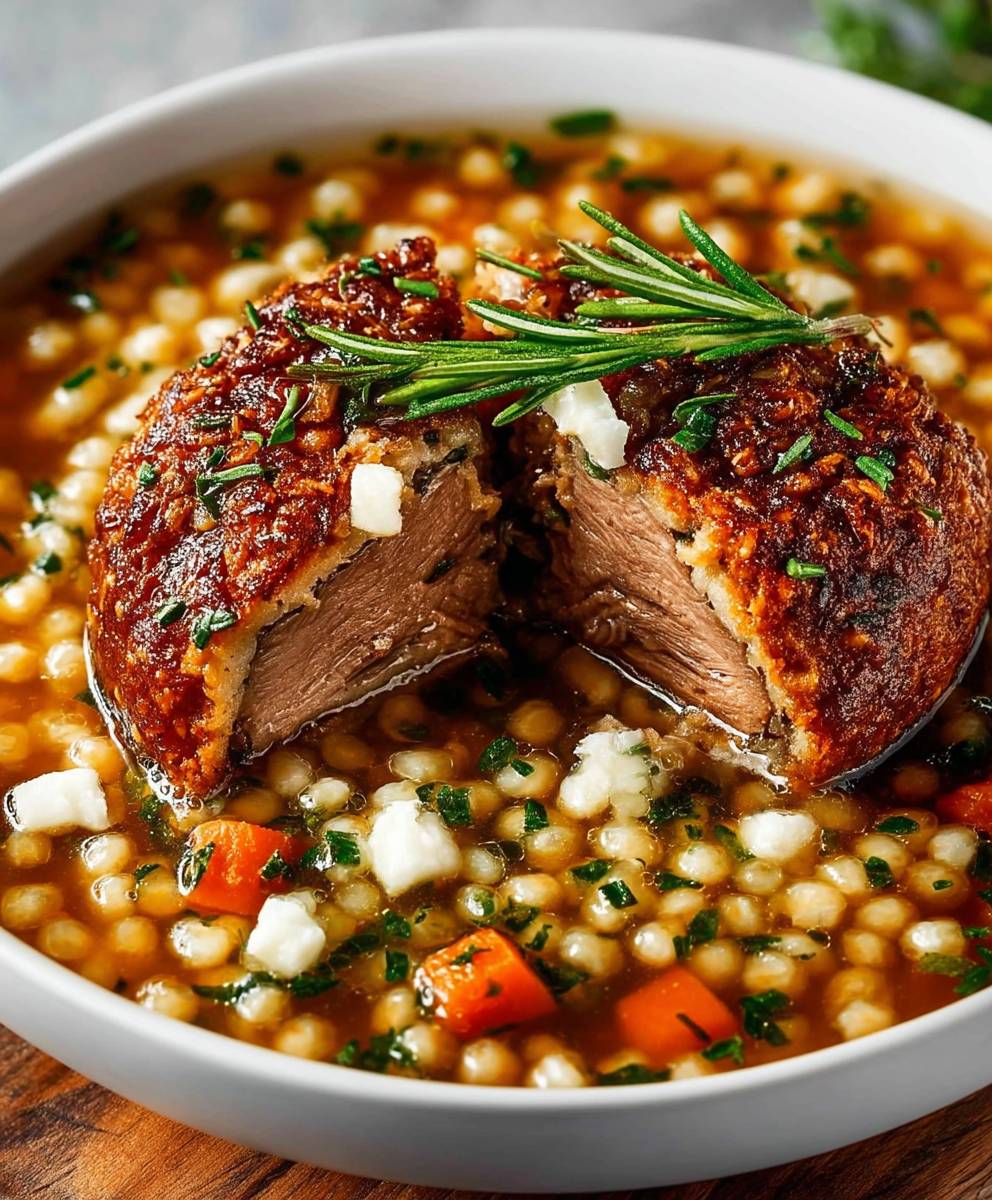
Chicken Kiev: The Ultimate Guide to Making Perfect Kiev at Home
Golden-brown Chicken Kiev with a crispy crust, filled with an explosion of garlic herb butter.
Ingredients
- 4 boneless, skinless chicken breasts (about 6-8 ounces each)
- 1 cup all-purpose flour
- 2 large eggs, beaten
- 2 cups panko breadcrumbs
- 1 cup (2 sticks) unsalted butter, softened
- 4 cloves garlic, minced
- 1/4 cup fresh parsley, finely chopped
- 1 tablespoon fresh chives, finely chopped
- 1 teaspoon lemon zest
- 1/2 teaspoon salt
- 1/4 teaspoon black pepper
- Vegetable oil, for frying
- Salt and pepper, to taste (for seasoning chicken)
Instructions
- Soften the Butter: Make sure your butter is nice and soft. You want it to be easily workable, but not melted. Leaving it out at room temperature for about an hour usually does the trick. If you’re in a hurry, you can microwave it in short bursts (5-10 seconds at a time) until it’s softened, but be careful not to melt it!
- Combine Ingredients: In a medium bowl, combine the softened butter, minced garlic, chopped parsley, chopped chives, lemon zest, salt, and pepper.
- Mix Thoroughly: Use a fork or a rubber spatula to thoroughly mix all the ingredients together until they are evenly distributed. You want the garlic and herbs to be well incorporated into the butter.
- Shape the Butter: Now, we need to shape the butter into logs or pats that will fit inside the chicken breasts. There are a couple of ways to do this:
- Method 1 (Log): Place a large sheet of plastic wrap on a clean surface. Spoon the butter mixture onto the plastic wrap, forming a log shape about 8 inches long. Roll the plastic wrap tightly around the butter, twisting the ends to seal it. Refrigerate for at least 30 minutes, or until the butter is firm enough to slice.
- Method 2 (Pats): Line a baking sheet with parchment paper. Spoon the butter mixture onto the parchment paper in 4 equal portions, shaping them into small patties or rectangles. Freeze for at least 30 minutes, or until the butter is solid. This method is a bit faster for chilling.
- Chill the Butter: This is crucial! The butter needs to be very cold and firm so it doesn’t melt too quickly during cooking. Place the butter (either the log or the patties) in the freezer for at least 30 minutes. You can even leave it in the freezer for longer up to a few hours if you’re preparing ahead of time.
- Pound the Chicken: Place each chicken breast between two sheets of plastic wrap. Use a meat mallet or rolling pin to pound the chicken to an even thickness of about 1/4 inch. This helps to tenderize the chicken and makes it easier to roll. Be careful not to pound it too thin, or it will tear.
- Season the Chicken: Lightly season both sides of each chicken breast with salt and pepper.
- Create a Pocket: Now, we need to create a pocket in each chicken breast for the butter. There are a couple of ways to do this:
- Method 1 (Slit): Use a sharp knife to carefully cut a deep slit into the side of each chicken breast, creating a pocket. Be careful not to cut all the way through to the other side.
- Method 2 (Butterfly): Carefully butterfly each chicken breast by slicing it horizontally almost all the way through, then opening it up like a book. This creates a larger surface area for the butter.
- Stuff the Chicken: Remove the chilled butter from the freezer. If you made a log, slice it into 4 equal portions. Place one portion of butter inside the pocket of each chicken breast.
- Seal the Chicken: Carefully fold the chicken breast over the butter, making sure to completely enclose it. Use toothpicks to secure the edges of the chicken, if necessary. This will help prevent the butter from leaking out during cooking.
- Set Up the Breading Station: Set up three shallow dishes. In the first dish, place the all-purpose flour. In the second dish, place the beaten eggs. In the third dish, place the panko breadcrumbs.
- Coat with Flour: Dredge each chicken breast in the flour, making sure to coat it evenly on all sides. Shake off any excess flour.
- Dip in Egg: Dip each floured chicken breast into the beaten eggs, making sure it’s completely coated. Let any excess egg drip off.
- Coat with Breadcrumbs: Dredge each egg-coated chicken breast in the panko breadcrumbs, pressing gently to make sure the breadcrumbs adhere to the chicken. Coat it evenly on all sides.
- Double Breading (Optional): For an extra crispy crust, you can repeat the egg and breadcrumb steps. This is totally optional, but it does make a noticeable difference.
- Chill the Breaded Chicken: Place the breaded chicken breasts on a baking sheet lined with parchment paper. Cover them with plastic wrap and refrigerate for at least 30 minutes. This helps the breading adhere better and prevents it from falling off during cooking. You can even chill them for longer up to a few hours if you’re preparing ahead of time.
- Preheat the Oven: Preheat your oven to 375°F (190°C).
- Heat the Oil: Pour about 1/2 inch of vegetable oil into a large skillet. Heat the oil over medium-high heat until it’s hot enough for frying. You can test the oil by dropping a small piece of breadcrumb into it. If the breadcrumb sizzles and turns golden brown in a few seconds, the oil is ready.
- Fry the Chicken: Carefully place the breaded chicken breasts into the hot oil, being careful not to overcrowd the skillet. Fry for about 2-3 minutes per side, or until the crust is golden brown.
- Transfer to Baking Sheet: Use a slotted spoon to transfer the fried chicken breasts to a baking sheet lined with parchment paper.
- Bake in the Oven: Bake in the preheated oven for 15-20 minutes, or until the chicken is cooked through and the internal temperature reaches 165°F (74°C). Use a meat thermometer to check the temperature. Insert the thermometer into the thickest part of the chicken breast, being careful not to touch the butter filling.
- Rest Before Serving: Remove the chicken from the oven and let it rest for a few minutes before serving. This allows the juices to redistribute and prevents the chicken from drying out.
- Remove Toothpicks: If you used toothpicks to secure the chicken, carefully remove them before serving.
- Serve Immediately: Serve the Chicken Kiev immediately while it’s still hot and the butter is still molten.
- Garnish (Optional): Garnish with fresh parsley or a lemon wedge for a pop of color and flavor.
- Side Dishes: Chicken Kiev pairs well with a variety of side dishes, such as:
- Mashed potatoes
- Roasted vegetables (asparagus, broccoli, carrots)
- Rice pilaf
- Green salad
- Enjoy the Explosion of Flavor: Cut into the Chicken Kiev and watch as the garlic herb butter oozes out.
Notes
- Chilling the butter and breaded chicken is crucial for preventing butter leakage and ensuring a crispy crust.
- Use a meat thermometer to ensure the chicken is cooked through to 165°F (74°C).
- Be careful when frying to avoid overcrowding the skillet, which can lower the oil temperature and result in soggy chicken.
- Resting the chicken after baking allows the juices to redistribute, resulting in a more tender and flavorful dish.


Leave a Comment