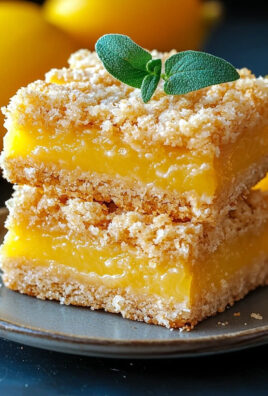
Anzac Biscuits: the quintessential taste of Australia and New Zealand, baked with love and steeped in history. Imagine biting into a perfectly golden, slightly chewy, and utterly delicious biscuit that evokes memories of home, camaraderie, and a spirit of resilience. These aren’t just cookies; they’re a symbol.
The story of Anzac Biscuits begins during World War I. Legend has it that these biscuits were sent by wives and girlfriends to soldiers serving overseas. The recipe was designed to withstand the long journey by sea, using ingredients that wouldn’t spoil easily oats, flour, sugar, butter, golden syrup, baking soda, and coconut. While the exact origins are debated, their association with the Australian and New Zealand Army Corps (ANZAC) is undeniable, and they’ve become a cherished part of both nations’ culinary heritage.
What makes these biscuits so beloved? It’s a combination of factors. The simple, wholesome ingredients create a unique flavor profile the nutty oats, the sweet golden syrup, and the subtle coconut all blend together beautifully. The texture is also key; a perfect Anzac biscuit should have a slightly crisp edge with a chewy center. Plus, they are incredibly easy to make! With just a few pantry staples and minimal effort, you can whip up a batch of these iconic treats. Whether you’re looking for a taste of nostalgia, a simple baking project, or a delicious snack to share, Anzac Biscuits are always a winning choice. So, let’s get baking!
Ingredients:
- 1 cup rolled oats
- 1 cup all-purpose flour
- 1 cup granulated sugar
- ¾ cup desiccated coconut
- ½ cup (1 stick) unsalted butter
- 2 tablespoons golden syrup
- 1 teaspoon baking soda
- 2 tablespoons boiling water
Preparing the Anzac Biscuit Dough
Okay, let’s get started! First things first, we need to combine all our dry ingredients in a large bowl. This ensures everything is evenly distributed and ready to mingle with the wet ingredients. Trust me, this step is crucial for that perfect Anzac biscuit texture.
-
Combine Dry Ingredients: In a large bowl, add the 1 cup of rolled oats, 1 cup of all-purpose flour, 1 cup of granulated sugar, and ¾ cup of desiccated coconut. Give it all a good mix with a whisk or a large spoon. Make sure there are no clumps of sugar hiding at the bottom!
Now, for the wet ingredients. This part is where the magic happens, transforming our dry mix into a sticky, delicious dough.
-
Melt Butter and Golden Syrup: In a small saucepan, melt ½ cup (1 stick) of unsalted butter over low heat. Once the butter is melted, add 2 tablespoons of golden syrup. Stir them together until they are well combined and the mixture is smooth and glossy. Be careful not to burn the butter low and slow is the key here!
-
Dissolve Baking Soda: In a separate small bowl or cup, dissolve 1 teaspoon of baking soda in 2 tablespoons of boiling water. You’ll notice it fizz up that’s exactly what we want! This reaction is what gives the Anzac biscuits their characteristic chewy texture and slightly raised shape.
-
Combine Wet and Dry Ingredients: Pour the melted butter and golden syrup mixture into the bowl with the dry ingredients. Then, add the dissolved baking soda mixture. Stir everything together until well combined. The mixture should be evenly moistened and slightly sticky. Don’t overmix, just ensure everything is incorporated.
Shaping and Baking the Anzac Biscuits
Alright, dough’s ready! Now comes the fun part shaping and baking these beauties. This is where you can really customize the size and shape of your biscuits to your liking.
-
Preheat Oven: Preheat your oven to 300°F (150°C). This low temperature is essential for achieving that perfect golden-brown color and chewy texture without burning the biscuits.
-
Prepare Baking Sheets: Line two baking sheets with parchment paper. This prevents the biscuits from sticking and makes cleanup a breeze. Trust me, you’ll thank me later!
-
Shape the Biscuits: Take a tablespoon of the dough and roll it into a ball. Place the ball onto the prepared baking sheet. Repeat with the remaining dough, leaving about 2 inches of space between each biscuit. They will spread out a bit during baking.
-
Flatten the Biscuits (Optional): If you prefer flatter biscuits, gently press down on each ball with the back of a spoon or your fingers. This step is optional, but it will result in a slightly crispier biscuit.
-
Bake: Bake for 15-20 minutes, or until the biscuits are golden brown around the edges. Keep a close eye on them, as baking times can vary depending on your oven. They should still be slightly soft in the center when you take them out.
Cooling and Storing the Anzac Biscuits
Patience, my friend! This is the hardest part waiting for the biscuits to cool. But trust me, it’s worth it. Cooling allows them to firm up and develop their signature chewy texture.
-
Cool on Baking Sheets: Remove the baking sheets from the oven and let the biscuits cool on the baking sheets for about 5-10 minutes. This allows them to firm up slightly before transferring them to a wire rack.
-
Transfer to Wire Rack: Carefully transfer the biscuits to a wire rack to cool completely. This prevents them from becoming soggy on the bottom.
-
Store: Once the biscuits are completely cool, store them in an airtight container at room temperature. They will keep for up to a week, but let’s be honest, they probably won’t last that long!
Tips for Perfect Anzac Biscuits
Here are a few extra tips to ensure your Anzac biscuits are a smashing success:
-
Use Fresh Ingredients: Fresh ingredients, especially baking soda, will give you the best results. Stale baking soda can result in flat, dense biscuits.
-
Don’t Overmix: Overmixing the dough can develop the gluten in the flour, resulting in tough biscuits. Mix just until the ingredients are combined.
-
Adjust Baking Time: Baking times can vary depending on your oven. Keep a close eye on the biscuits and adjust the baking time as needed. You want them to be golden brown around the edges and slightly soft in the center.
-
Experiment with Texture: For chewier biscuits, bake for a shorter time. For crispier biscuits, bake for a longer time. Experiment to find your perfect texture!
-
Add-Ins: Feel free to add other ingredients to your Anzac biscuits, such as chocolate chips, nuts, or dried fruit. Just be sure to adjust the recipe accordingly.
Variations on the Classic Anzac Biscuit
Want to mix things up a bit? Here are a few variations on the classic Anzac biscuit recipe:
-
Chocolate Anzac Biscuits: Add ¼ cup of cocoa powder to the dry ingredients for a chocolatey twist.
-
Nutty Anzac Biscuits: Add ½ cup of chopped nuts, such as almonds, walnuts, or pecans, to the dry ingredients.
-
Fruity Anzac Biscuits: Add ½ cup of dried fruit, such as raisins, cranberries, or apricots, to the dry ingredients.
-
Spiced Anzac Biscuits: Add ½ teaspoon of ground cinnamon or ginger to the dry ingredients for a warm, spiced flavor.
-
Gluten-Free Anzac Biscuits: Substitute the all-purpose flour with a gluten-free flour blend. You may need to add a little extra liquid to the dough to achieve the desired consistency.
Troubleshooting Your Anzac Biscuits
Sometimes things don’t go quite as planned. Here are a few common problems and how to fix them:
-
Biscuits are too flat: This could be due to using too much baking soda, not enough flour, or baking at too low of a temperature. Make sure to measure your ingredients accurately and bake at the correct temperature.
-
Biscuits are too hard: This could be due to overbaking or using too much flour. Bake the biscuits for a shorter time and make sure to measure your ingredients accurately.
-
Biscuits are too soft: This could be due to underbaking or using too much butter. Bake the biscuits for a longer time and make sure to measure your ingredients accurately.
-
Biscuits are not spreading: This could be due to using too much flour or not enough butter. Make sure to measure your ingredients accurately and use softened butter.
And there you have it! Everything you need to bake the perfect batch of Anzac biscuits. Enjoy!

Conclusion:
And there you have it! These aren’t just any biscuits; they’re Anzac Biscuits, a taste of history and a whole lot of deliciousness baked into one golden treat. I truly believe this recipe is a must-try for anyone looking for a simple, satisfying, and deeply flavorful biscuit. The combination of rolled oats, coconut, golden syrup, and that touch of bicarbonate of soda creates a texture that’s both chewy and crisp, with a subtle sweetness that isn’t overpowering. Its a biscuit that speaks of tradition, resilience, and the simple pleasures in life.
But why is this recipe a must-try, you ask? Beyond the historical significance, it’s the sheer ease of preparation. You don’t need any fancy equipment or complicated techniques. Just a few pantry staples, a mixing bowl, and an oven, and you’re well on your way to enjoying a batch of these delightful biscuits. Plus, the aroma that fills your kitchen as they bake is simply divine a warm, comforting scent that will have everyone eagerly anticipating the first bite.
And the best part? These biscuits are incredibly versatile! While they’re perfect enjoyed on their own with a cup of tea or coffee, there are so many ways to elevate your Anzac Biscuit experience. Try crumbling them over yogurt or ice cream for a delightful textural contrast. You could even use them as a base for mini cheesecakes or parfaits. For a truly decadent treat, sandwich two biscuits together with a layer of chocolate ganache or salted caramel.
If you’re feeling adventurous, consider experimenting with different variations. Add a handful of chopped nuts, like pecans or walnuts, for extra crunch and flavor. A sprinkle of sea salt before baking will enhance the sweetness and create a more complex taste profile. For a gluten-free version, simply substitute the plain flour with a gluten-free flour blend. You can also adjust the amount of golden syrup to control the sweetness level to your liking. Some people prefer a softer, chewier biscuit, while others prefer a crispier one. Experiment with the baking time to achieve your desired texture. A shorter baking time will result in a softer biscuit, while a longer baking time will create a crispier one.
Serving suggestions are endless! These biscuits are perfect for afternoon tea, lunchboxes, or even as a thoughtful homemade gift. They also make a wonderful addition to any dessert platter. And because they keep well in an airtight container, you can bake a batch ahead of time and enjoy them throughout the week.
I’m so confident that you’ll love this recipe. It’s a classic for a reason, and I’ve tried to make it as foolproof as possible. So, gather your ingredients, preheat your oven, and get ready to bake a batch of these irresistible Anzac Biscuits.
I can’t wait to hear about your baking adventures! Please, give this recipe a try and share your experience in the comments below. Let me know what variations you tried, what you served them with, and most importantly, how much you enjoyed them. Happy baking! I hope you love this recipe as much as I do. Don’t forget to share your creations with me on social media using #AnzacBiscuitLove! I’m excited to see what you come up with.
Anzac Biscuits: The Ultimate Guide to Baking & History
Crispy-edged, chewy Anzac Biscuits with oats, coconut, and golden syrup. A simple, satisfying treat!
Ingredients
- 1 cup rolled oats
- 1 cup all-purpose flour
- 1 cup granulated sugar
- ¾ cup desiccated coconut
- ½ cup (1 stick) unsalted butter
- 2 tablespoons golden syrup
- 1 teaspoon baking soda
- 2 tablespoons boiling water
Instructions
- Combine Dry Ingredients: In a large bowl, add the rolled oats, flour, sugar, and coconut. Mix well.
- Melt Butter and Golden Syrup: In a small saucepan, melt the butter over low heat. Add the golden syrup and stir until smooth.
- Dissolve Baking Soda: In a separate small bowl, dissolve the baking soda in the boiling water. It will fizz.
- Combine Wet and Dry Ingredients: Pour the melted butter mixture and the baking soda mixture into the bowl with the dry ingredients. Stir until just combined. Do not overmix.
- Preheat Oven: Preheat your oven to 300°F (150°C).
- Prepare Baking Sheets: Line two baking sheets with parchment paper.
- Shape the Biscuits: Take a tablespoon of dough and roll it into a ball. Place on the prepared baking sheet, leaving space between each.
- Flatten (Optional): Gently press down on each ball with the back of a spoon if you prefer flatter biscuits.
- Bake: Bake for 15-20 minutes, or until golden brown around the edges. They should still be slightly soft in the center.
- Cool on Baking Sheets: Remove from oven and let cool on the baking sheets for 5-10 minutes.
- Transfer to Wire Rack: Carefully transfer the biscuits to a wire rack to cool completely.
- Store: Store in an airtight container at room temperature.
Notes
- Use fresh ingredients, especially baking soda, for the best results.
- Don’t overmix the dough.
- Adjust baking time as needed, depending on your oven.
- For chewier biscuits, bake for a shorter time. For crispier biscuits, bake for a longer time.
- Experiment with add-ins like chocolate chips, nuts, or dried fruit.


Leave a Comment