

Oreo Rice Krispies Treats: Prepare to experience a dessert revolution! Forget everything you thought you knew about the classic Rice Krispies Treat because we’re about to elevate it to a whole new level of deliciousness. Imagine the satisfying snap, crackle, and pop of Rice Krispies cereal mingling with the rich, creamy, chocolatey goodness of Oreo cookies. It’s a match made in dessert heaven, and I’m so excited to share this incredibly easy and utterly irresistible recipe with you.
While Rice Krispies Treats themselves have a charmingly nostalgic history, dating back to the 1930s when they were invented by Kellogg’s employees, this Oreo twist is a modern masterpiece. It takes the familiar comfort of a childhood favorite and injects it with a sophisticated, decadent flavor profile that appeals to both kids and adults alike.
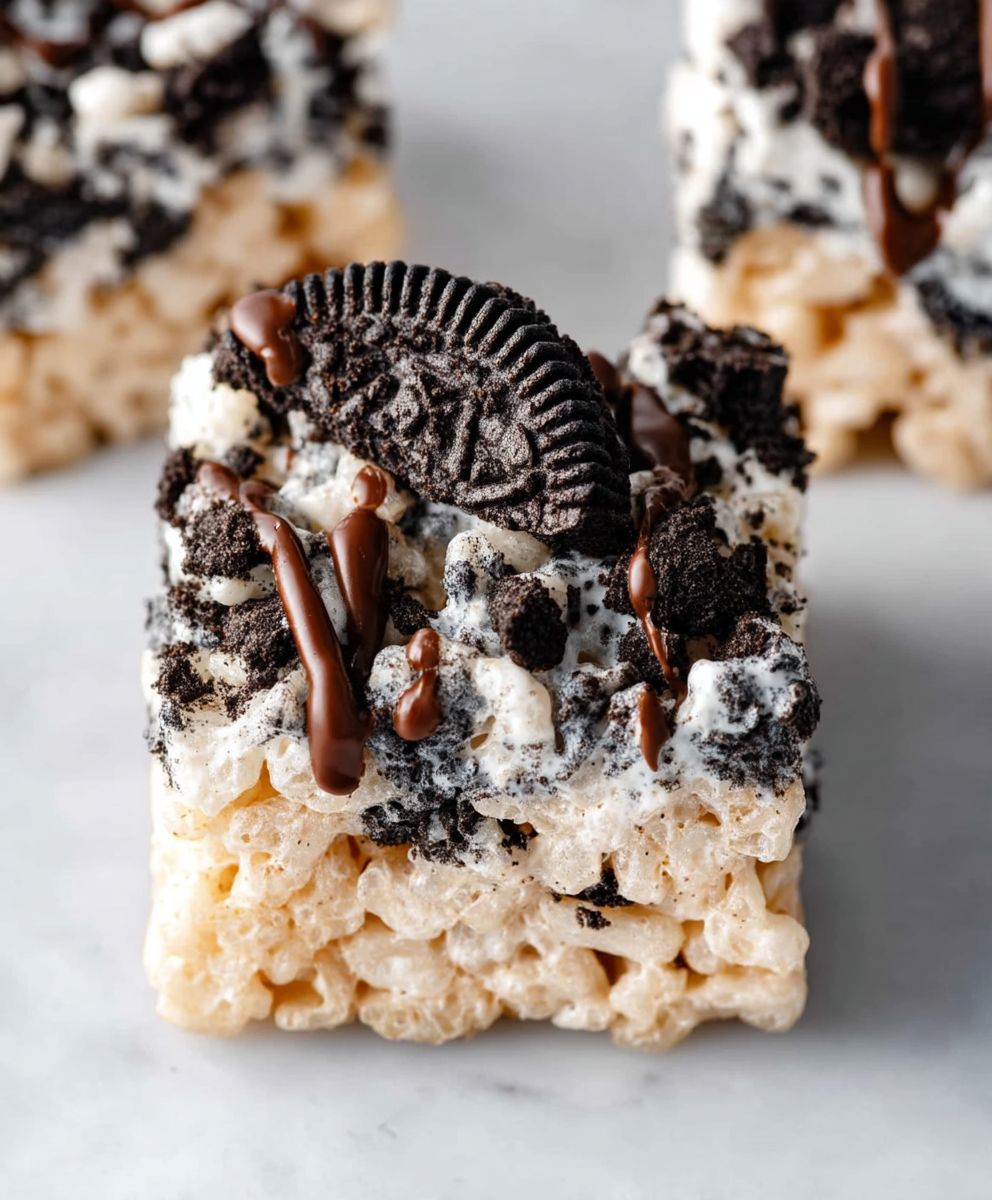
What makes these Oreo Rice Krispies Treats so universally loved? It’s the perfect combination of textures the chewy marshmallow, the crunchy cereal, and the slightly crumbly Oreo cookies. The taste is equally delightful, a harmonious blend of sweet, chocolatey, and subtly salty notes. Plus, let’s be honest, they’re incredibly convenient to make! With just a handful of ingredients and minimal effort, you can whip up a batch of these treats in no time, making them perfect for parties, potlucks, or simply satisfying a sweet craving. So, let’s get started and create some unforgettable Oreo Rice Krispies Treats!

Ingredients:
- 1/2 cup (1 stick) unsalted butter
- 10 ounces (about 40 large) marshmallows
- 6 cups Rice Krispies cereal
- 36 Oreo cookies, coarsely crushed (about 3 cups)
- 1 teaspoon vanilla extract
- Pinch of salt
Preparing the Oreo Rice Krispies Treats
- Melt the Butter: In a large, non-stick saucepan, melt the butter over medium-low heat. Make sure the butter doesn’t brown or burn. We want it nice and smooth.
- Add the Marshmallows: Once the butter is melted, add the marshmallows to the saucepan. Stir constantly until the marshmallows are completely melted and smooth. This usually takes about 3-5 minutes. Keep the heat low to prevent burning. Burnt marshmallows will ruin the flavor of your treats!
- Incorporate Vanilla and Salt: Remove the saucepan from the heat. Stir in the vanilla extract and a pinch of salt. The vanilla enhances the sweetness, and the salt balances the flavors beautifully.
- Add the Rice Krispies Cereal: Now, pour in the Rice Krispies cereal. Gently fold the cereal into the melted marshmallow mixture until it’s evenly coated. Be careful not to crush the cereal too much. We want to maintain that crispy texture.
- Incorporate the Crushed Oreos: Add about 2 1/2 cups of the crushed Oreo cookies to the mixture. Reserve the remaining 1/2 cup for topping. Gently fold the Oreos into the cereal mixture until they are evenly distributed. Again, be gentle so you don’t turn everything into a mush. We want to see those Oreo pieces!
- Prepare the Pan: While you’re working on the mixture, prepare a 9×13 inch baking pan. Grease the pan generously with butter or spray it with non-stick cooking spray. You can also line the pan with parchment paper, leaving an overhang on the sides. This makes it super easy to lift the treats out later.
- Press the Mixture into the Pan: Transfer the Rice Krispies and Oreo mixture to the prepared pan. Using a spatula or your hands (lightly greased or dampened with water to prevent sticking), gently press the mixture evenly into the pan. Don’t press too hard, or the treats will be dense and hard. We want them to be slightly soft and chewy.
- Top with Remaining Oreos: Sprinkle the remaining 1/2 cup of crushed Oreo cookies evenly over the top of the treats. Lightly press the Oreos into the surface to help them adhere.
- Cool and Set: Let the Rice Krispies treats cool completely in the pan before cutting. This usually takes about 30-60 minutes. The longer they cool, the easier they will be to cut.
- Cut and Serve: Once the treats are completely cool and set, cut them into squares or rectangles using a sharp knife. If you lined the pan with parchment paper, you can simply lift the treats out of the pan and cut them on a cutting board.
Tips and Variations
Here are some extra tips and ideas to make your Oreo Rice Krispies Treats even more amazing:
- Use Fresh Marshmallows: Fresh marshmallows melt more smoothly and create a better texture. If your marshmallows are old or stale, they might not melt properly.
- Don’t Overcook the Marshmallows: Overcooked marshmallows can become hard and brittle. Keep the heat low and stir constantly to prevent burning.
- Adjust the Oreo Amount: Feel free to adjust the amount of Oreo cookies to your liking. If you want a more intense Oreo flavor, add more cookies. If you prefer a more subtle flavor, use fewer cookies.
- Add Chocolate Chips: For an extra chocolatey treat, add 1/2 cup of chocolate chips (milk chocolate, dark chocolate, or white chocolate) to the mixture along with the Oreos.
- Drizzle with Melted Chocolate: After the treats have cooled and been cut, drizzle them with melted chocolate for a beautiful and delicious finish.
- Use Different Oreo Flavors: Experiment with different Oreo flavors, such as Golden Oreos, Mint Oreos, or Peanut Butter Oreos.
- Add Sprinkles: For a festive touch, sprinkle the treats with colorful sprinkles before they cool.
- Make Them Gluten-Free: Use gluten-free Rice Krispies cereal and gluten-free Oreos (if available) to make these treats gluten-free.
- Store Properly: Store the Rice Krispies treats in an airtight container at room temperature for up to 3 days. They are best enjoyed fresh.
- Freezing: You can freeze Rice Krispies treats for longer storage. Wrap them individually in plastic wrap and then place them in a freezer-safe bag or container. They can be frozen for up to 2 months. Thaw them at room temperature before serving.
Troubleshooting
Sometimes things don’t go exactly as planned. Here are some common problems and how to fix them:
- Hard Rice Krispies Treats: This is usually caused by overcooking the marshmallows or pressing the mixture too firmly into the pan. Make sure to keep the heat low when melting the marshmallows and press the mixture gently into the pan.
- Sticky Rice Krispies Treats: This can be caused by using too much butter or not letting the treats cool completely before cutting. Make sure to use the correct amount of butter and allow the treats to cool completely before cutting.
- Dry Rice Krispies Treats: This can be caused by using too much cereal or not enough marshmallows. Make sure to use the correct ratio of cereal to marshmallows.
- Burnt Marshmallows: This is caused by cooking the marshmallows over too high of heat. Keep the heat low and stir constantly to prevent burning.
- Oreos Sinking to the Bottom: This can happen if the mixture is too loose. Make sure the marshmallow mixture is thick enough to hold the Oreos in place. You can also try chilling the mixture slightly before adding the Oreos.
Equipment You’ll Need
Having the right equipment makes the process much easier:
- Large, non-stick saucepan
- 9×13 inch baking pan
- Spatula
- Measuring cups and spoons
- Sharp knife
- Parchment paper (optional)
Why This Recipe Works
This recipe is a guaranteed success because it focuses on a few key principles:
- Proper Marshmallow Melting: Low and slow is the key. This prevents burning and ensures a smooth, even consistency.
- Gentle Mixing: Overmixing can lead to tough treats. We want to gently fold in the ingredients to maintain a light and airy texture.
- Even Distribution: Ensuring the Oreos and cereal are evenly distributed throughout the mixture guarantees a consistent flavor and texture in every bite.
- Patience: Allowing the treats to cool completely is crucial for easy cutting and a firm, yet chewy texture.
Nutritional Information (Approximate)
Please note that the nutritional information is an estimate and can vary based on specific ingredients and serving sizes.
- Calories: Approximately 250-300 per serving
- Fat: 10-15 grams
- Saturated Fat: 6-8 grams
- Cholesterol: 20-30 mg
- Sodium: 100-150 mg
- Carbohydrates: 35-45 grams
- Sugar: 20-25 grams
- Protein: 2-3 grams
Enjoy your delicious homemade Oreo Rice Krispies Treats! They’re perfect for parties, snacks, or just a sweet treat any time of day.
Conclusion:
Okay, friends, let’s be honest you’ve scrolled this far because you know deep down that Oreo Rice Krispies Treats are calling your name. And trust me, you absolutely need to answer that call! This isn’t just another dessert recipe; it’s a nostalgic trip down memory lane, kicked up a notch with the irresistible crunch of Oreos. The classic, gooey goodness of Rice Krispies Treats gets a serious upgrade, transforming into a decadent, crowd-pleasing masterpiece that’s perfect for everything from bake sales to late-night cravings.
Why is this a must-try? First, it’s ridiculously easy. We’re talking minimal ingredients and a process so simple, even the kids can get involved (and trust me, they’ll want to!). Second, the flavor combination is pure genius. The subtle sweetness of the marshmallows, the satisfying snap of the Rice Krispies, and the rich, chocolatey, creamy goodness of the Oreos create a symphony of textures and tastes that will have everyone begging for more. And third, let’s face it, who can resist an Oreo? They’re practically universally loved, and incorporating them into this classic treat elevates it to a whole new level of deliciousness.
But the fun doesn’t stop there! Feel free to get creative with your Oreo Rice Krispies Treats. Want to add a touch of elegance? Drizzle melted white chocolate over the top and sprinkle with crushed Oreos. Feeling adventurous? Try using different Oreo flavors! Golden Oreos, Mint Oreos, even the limited-edition flavors can add a unique twist. For a truly decadent experience, try adding a layer of Nutella or peanut butter between the Rice Krispies and the Oreo layer. You could even cut them into fun shapes using cookie cutters for a festive touch. Serving suggestions? These treats are perfect on their own, of course, but they’re also fantastic with a scoop of vanilla ice cream, a glass of cold milk, or even a cup of hot coffee. They make a wonderful addition to lunchboxes, party platters, or even a simple weeknight dessert.
Variations to Explore:
- Double Stuffed Delight: Use Double Stuffed Oreos for an extra creamy filling.
- Mint Chocolate Magic: Swap regular Oreos for Mint Oreos for a refreshing twist.
- Peanut Butter Bliss: Add a layer of peanut butter between the Rice Krispies and Oreo layers.
- White Chocolate Dream: Drizzle melted white chocolate over the finished treats.
- Birthday Bash: Add sprinkles to the marshmallow mixture for a festive touch.
I’m absolutely confident that you’re going to love this recipe. It’s a guaranteed crowd-pleaser, and it’s so easy to make that you’ll find yourself whipping up a batch whenever you need a quick and delicious treat. So, what are you waiting for? Gather your ingredients, preheat your oven (just kidding, no oven needed!), and get ready to create some seriously amazing Oreo Rice Krispies Treats. I can’t wait to hear what you think! Please, please, please come back and share your experience in the comments below. Let me know what variations you tried, what your family thought, and any tips or tricks you discovered along the way. Happy baking (or, in this case, no-baking)!
Oreo Rice Krispies Treats: The Ultimate No-Bake Dessert Recipe
Classic Rice Krispies Treats with crushed Oreo cookies! Easy, no-bake dessert perfect for any occasion.
Ingredients
- 1/2 cup (1 stick) unsalted butter
- 10 ounces (about 40 large) marshmallows
- 6 cups Rice Krispies cereal
- 36 Oreo cookies, coarsely crushed (about 3 cups)
- 1 teaspoon vanilla extract
- Pinch of salt
Instructions
- Melt the Butter: In a large, non-stick saucepan, melt the butter over medium-low heat. Make sure the butter doesn’t brown or burn.
- Add the Marshmallows: Once the butter is melted, add the marshmallows to the saucepan. Stir constantly until the marshmallows are completely melted and smooth (3-5 minutes). Keep the heat low to prevent burning.
- Incorporate Vanilla and Salt: Remove the saucepan from the heat. Stir in the vanilla extract and a pinch of salt.
- Add the Rice Krispies Cereal: Pour in the Rice Krispies cereal. Gently fold the cereal into the melted marshmallow mixture until it’s evenly coated.
- Incorporate the Crushed Oreos: Add about 2 1/2 cups of the crushed Oreo cookies to the mixture. Reserve the remaining 1/2 cup for topping. Gently fold the Oreos into the cereal mixture until they are evenly distributed.
- Prepare the Pan: Grease a 9×13 inch baking pan with butter or non-stick cooking spray. Alternatively, line the pan with parchment paper, leaving an overhang.
- Press the Mixture into the Pan: Transfer the Rice Krispies and Oreo mixture to the prepared pan. Using a spatula or your hands (lightly greased or dampened with water), gently press the mixture evenly into the pan.
- Top with Remaining Oreos: Sprinkle the remaining 1/2 cup of crushed Oreo cookies evenly over the top of the treats. Lightly press the Oreos into the surface to help them adhere.
- Cool and Set: Let the Rice Krispies treats cool completely in the pan before cutting (30-60 minutes).
- Cut and Serve: Once the treats are completely cool and set, cut them into squares or rectangles using a sharp knife.
Notes
- Use fresh marshmallows for best results.
- Don’t overcook the marshmallows.
- Adjust the amount of Oreo cookies to your liking.
- Add 1/2 cup of chocolate chips (milk chocolate, dark chocolate, or white chocolate) to the mixture along with the Oreos.
- Drizzle with melted chocolate after the treats have cooled and been cut.
- Experiment with different Oreo flavors, such as Golden Oreos, Mint Oreos, or Peanut Butter Oreos.
- Sprinkle the treats with colorful sprinkles before they cool.
- Use gluten-free Rice Krispies cereal and gluten-free Oreos (if available) to make these treats gluten-free.
- Store the Rice Krispies treats in an airtight container at room temperature for up to 3 days.
- Freeze Rice Krispies treats for longer storage. Wrap them individually in plastic wrap and then place them in a freezer-safe bag or container. They can be frozen for up to 2 months. Thaw them at room temperature before serving.


Leave a Comment