

Authentic Takoyaki, those delightful, golden-brown orbs of savory goodness, are calling your name! Imagine sinking your teeth into a perfectly cooked ball of tender octopus, enveloped in a crispy, slightly chewy batter, and drizzled with tangy takoyaki sauce, creamy Japanese mayonnaise, and a shower of dancing bonito flakes. Sounds heavenly, doesn’t it?
Takoyaki, meaning “fried octopus,” originated in Osaka, Japan, in 1935 and quickly became a beloved street food staple. It’s more than just a snack; it’s an experience! The sizzling sound of the takoyaki grills, the tantalizing aroma wafting through the air, and the communal joy of sharing a plate of these piping hot treats all contribute to its enduring popularity.
What makes authentic takoyaki so irresistible? It’s the symphony of textures and flavors! The crispy exterior gives way to a soft, almost custardy interior, punctuated by the satisfying chew of octopus. The umami-rich takoyaki sauce, the creamy sweetness of Japanese mayonnaise, and the salty, smoky bonito flakes create a flavor explosion that will leave you craving more. Plus, making takoyaki at home is a fun and interactive activity, perfect for gatherings with friends and family. So, are you ready to embark on a culinary adventure and learn how to make this iconic Japanese street food?

Ingredients:
- For the Takoyaki Batter:
- 200g all-purpose flour
- 600ml dashi stock (kombu and bonito flakes)
- 2 large eggs
- 1 tbsp soy sauce
- 1 tbsp mirin
- 1/2 tsp salt
- 1/4 tsp baking powder (optional, for extra fluffiness)
- For the Filling:
- 200g cooked octopus, cut into 1cm pieces
- 100g tempura scraps (tenkasu)
- 50g pickled ginger (beni shoga), finely chopped
- 50g green onions, finely chopped
- For the Toppings:
- Takoyaki sauce
- Japanese mayonnaise (Kewpie)
- Aonori (dried green seaweed flakes)
- Katsuobushi (dried bonito flakes)
- Equipment:
- Takoyaki pan
- Takoyaki picks (or skewers)
- Mixing bowls
- Measuring cups and spoons
- Whisk
- Small pitcher or squeeze bottle (optional, for dispensing batter)
Preparing the Takoyaki Batter:
- Prepare the Dashi Stock: If you’re making dashi from scratch, combine kombu (dried kelp) and bonito flakes in water and simmer. Strain to get a clear broth. Alternatively, you can use instant dashi granules according to package instructions. The dashi stock is the soul of the takoyaki, so don’t skip this step!
- Combine Dry Ingredients: In a large mixing bowl, whisk together the all-purpose flour, salt, and baking powder (if using). The baking powder will give your takoyaki a slightly fluffier texture, but it’s perfectly fine to omit it if you prefer a chewier consistency.
- Whisk in Wet Ingredients: In a separate bowl, whisk together the dashi stock, eggs, soy sauce, and mirin. Make sure the eggs are fully incorporated and the mixture is smooth.
- Combine Wet and Dry: Gradually pour the wet ingredients into the dry ingredients, whisking constantly to avoid lumps. Continue whisking until you have a smooth, thin batter. It should be slightly thinner than pancake batter. Don’t overmix, as this can develop the gluten in the flour and make the takoyaki tough.
- Rest the Batter: Cover the batter with plastic wrap and let it rest in the refrigerator for at least 30 minutes, or even better, for an hour. This allows the gluten to relax and the flavors to meld together. A rested batter will result in a more tender takoyaki.
Preparing the Filling:
- Prepare the Octopus: If you’re using pre-cooked octopus, make sure it’s properly thawed. Cut the octopus into small, bite-sized pieces, about 1cm in size. The smaller the pieces, the easier they will be to distribute evenly in the takoyaki.
- Prepare the Pickled Ginger: Finely chop the pickled ginger (beni shoga). The pickled ginger adds a tangy and slightly spicy flavor that complements the other ingredients perfectly.
- Prepare the Green Onions: Finely chop the green onions. The green onions add a fresh, mild onion flavor and a pop of color to the takoyaki.
- Gather the Tempura Scraps: If you don’t have tempura scraps (tenkasu) on hand, you can make your own by deep-frying small bits of batter. Alternatively, you can sometimes find them at Asian grocery stores. The tempura scraps add a crispy texture and a savory flavor to the takoyaki.
Cooking the Takoyaki:
- Preheat the Takoyaki Pan: Place the takoyaki pan on a stovetop over medium heat. It’s crucial to get the pan hot enough before adding the batter, otherwise the takoyaki will stick and be difficult to turn.
- Grease the Pan: Generously grease each well of the takoyaki pan with oil. You can use vegetable oil, canola oil, or even clarified butter. Make sure to get into all the nooks and crannies of each well. A well-greased pan is essential for preventing sticking.
- Pour in the Batter: Pour the takoyaki batter into each well of the pan, filling it almost to the top. Don’t worry if the batter overflows slightly; it’s part of the process. You can use a small pitcher or squeeze bottle to make this step easier and more precise.
- Add the Fillings: Immediately add the octopus pieces, pickled ginger, green onions, and tempura scraps to each well. Distribute the fillings evenly among the wells. Don’t be shy with the fillings; they’re what make takoyaki so delicious!
- Cook and Turn: Let the takoyaki cook for a few minutes, until the bottom starts to set and turn golden brown. Use a takoyaki pick or skewer to gently loosen the edges of the takoyaki from the pan. Then, carefully flip the takoyaki over, tucking in any loose batter. This requires a bit of practice, but don’t worry if they’re not perfectly round at first.
- Shape and Cook: Continue to turn the takoyaki frequently, using the takoyaki pick to shape them into round balls. Cook them until they are golden brown all over and cooked through. This usually takes about 5-7 minutes, depending on the heat of your stovetop. The key is to keep turning them so they cook evenly and don’t burn.
- Remove and Serve: Once the takoyaki are cooked through and golden brown, remove them from the pan and place them on a serving plate.
Serving and Enjoying:
- Drizzle with Takoyaki Sauce: Generously drizzle the takoyaki with takoyaki sauce. Takoyaki sauce is a sweet and savory sauce that is specifically made for takoyaki. You can find it at most Asian grocery stores.
- Add Japanese Mayonnaise: Add a generous squirt of Japanese mayonnaise (Kewpie) on top of the takoyaki sauce. Kewpie mayonnaise has a richer and tangier flavor than regular mayonnaise.
- Sprinkle with Aonori: Sprinkle the takoyaki with aonori (dried green seaweed flakes). Aonori adds a subtle seaweed flavor and a pop of green color.
- Top with Katsuobushi: Top the takoyaki with katsuobushi (dried bonito flakes). The katsuobushi will dance and wave in the heat, adding a visual appeal and a smoky, umami flavor.
- Serve Immediately: Serve the takoyaki immediately while they are hot and fresh. Be careful, as they can be very hot inside! Enjoy!
Conclusion:
And there you have it! I truly believe this Authentic Takoyaki recipe is a must-try for anyone craving a taste of Japan right in their own kitchen. It’s not just about following instructions; it’s about embarking on a culinary adventure that rewards you with the most delicious, savory, and utterly satisfying little octopus balls imaginable. From the perfectly crisp exterior to the creamy, flavorful interior, every bite is an explosion of textures and tastes that will leave you wanting more.
But why is this recipe so special? Well, beyond the authentic ingredients and techniques, it’s the sheer joy of creating something so unique and delicious from scratch. It’s about mastering a new skill, impressing your friends and family, and experiencing the vibrant culture of Japanese street food firsthand. Trust me, once you’ve tasted homemade takoyaki, you’ll never want to go back to the store-bought variety.
Now, let’s talk serving suggestions and variations! While takoyaki is traditionally served with takoyaki sauce, Japanese mayonnaise, dried seaweed flakes (aonori), and bonito flakes (katsuobushi), feel free to get creative and experiment with different toppings. A drizzle of sriracha mayo adds a spicy kick, while a sprinkle of sesame seeds provides a nutty crunch. You could even try a teriyaki glaze for a sweeter flavor profile.
For variations, consider adding different fillings to your takoyaki. Shrimp, cheese, kimchi, or even small pieces of mochi can all be delicious additions. Just remember to keep the pieces small enough to cook evenly within the takoyaki balls. If you’re feeling adventurous, you could even try making vegetarian takoyaki by substituting the octopus with mushrooms or tofu. The possibilities are endless!
I know making takoyaki might seem a little daunting at first, especially if you’ve never used a takoyaki pan before. But don’t let that intimidate you! With a little practice and patience, you’ll be flipping those little balls like a pro in no time. And remember, even if your first batch isn’t perfect, it will still be delicious. The key is to have fun and enjoy the process.
I’m so confident that you’ll love this recipe that I urge you to give it a try. Gather your ingredients, dust off your takoyaki pan (or invest in one you won’t regret it!), and get ready to create some culinary magic. And most importantly, don’t forget to share your experience with me! I’d love to hear how your takoyaki turned out, what variations you tried, and any tips or tricks you discovered along the way. You can leave a comment below, tag me on social media, or even send me a picture of your delicious creations.
I truly believe that food is meant to be shared, and I can’t wait to see what you come up with. So go ahead, embrace your inner chef, and make some Authentic Takoyaki that will transport you straight to the bustling streets of Osaka. Happy cooking!
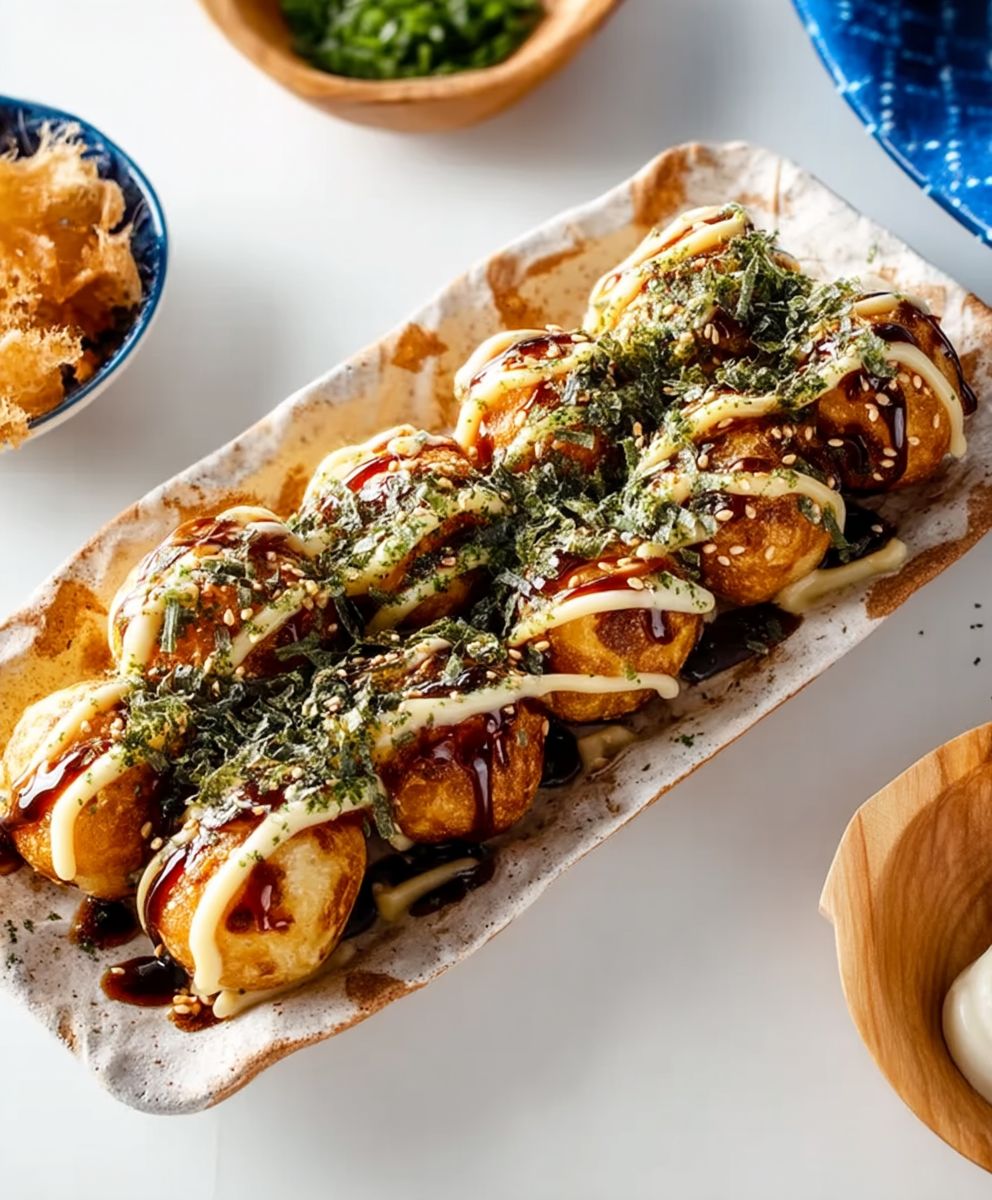
Authentic Takoyaki: Your Guide to Making Perfect Japanese Street Food
Savory Japanese street food: crispy, golden batter encasing tender octopus, topped with flavorful sauces and flakes.
Ingredients
- 200g all-purpose flour
- 600ml dashi stock (kombu and bonito flakes)
- 2 large eggs
- 1 tbsp soy sauce
- 1 tbsp mirin
- 1/2 tsp salt
- 1/4 tsp baking powder (optional, for extra fluffiness)
- 200g cooked octopus, cut into 1cm pieces
- 100g tempura scraps (tenkasu)
- 50g pickled ginger (beni shoga), finely chopped
- 50g green onions, finely chopped
- Takoyaki sauce
- Japanese mayonnaise (Kewpie)
- Aonori (dried green seaweed flakes)
- Katsuobushi (dried bonito flakes)
Instructions
- Prepare the Dashi Stock: If making from scratch, combine kombu and bonito flakes in water and simmer. Strain. Or use instant dashi granules.
- Combine Dry Ingredients: In a large bowl, whisk together flour, salt, and baking powder (if using).
- Whisk in Wet Ingredients: In a separate bowl, whisk together dashi stock, eggs, soy sauce, and mirin until smooth.
- Combine Wet and Dry: Gradually pour wet ingredients into dry ingredients, whisking constantly until smooth. The batter should be slightly thinner than pancake batter. Don’t overmix.
- Rest the Batter: Cover and refrigerate for at least 30 minutes (or up to an hour).
- Prepare the Octopus: Cut cooked octopus into 1cm pieces.
- Prepare the Pickled Ginger: Finely chop the pickled ginger (beni shoga).
- Prepare the Green Onions: Finely chop the green onions.
- Gather the Tempura Scraps: If you don’t have tempura scraps (tenkasu) on hand, you can make your own by deep-frying small bits of batter. Alternatively, you can sometimes find them at Asian grocery stores.
- Preheat the Takoyaki Pan: Place the takoyaki pan on a stovetop over medium heat.
- Grease the Pan: Generously grease each well of the takoyaki pan with oil.
- Pour in the Batter: Pour batter into each well, filling almost to the top.
- Add the Fillings: Immediately add octopus, pickled ginger, green onions, and tempura scraps to each well.
- Cook and Turn: Cook for a few minutes until the bottom sets. Use a takoyaki pick to loosen edges and flip, tucking in loose batter.
- Shape and Cook: Continue to turn frequently, shaping into round balls. Cook until golden brown all over and cooked through (5-7 minutes).
- Remove and Serve: Remove from pan and place on a serving plate.
- Drizzle with Takoyaki Sauce: Generously drizzle the takoyaki with takoyaki sauce.
- Add Japanese Mayonnaise: Add a generous squirt of Japanese mayonnaise (Kewpie) on top of the takoyaki sauce.
- Sprinkle with Aonori: Sprinkle the takoyaki with aonori (dried green seaweed flakes).
- Top with Katsuobushi: Top the takoyaki with katsuobushi (dried bonito flakes).
- Serve Immediately: Serve hot.
Notes
- Resting the batter is crucial for a tender takoyaki.
- A well-greased pan is essential to prevent sticking.
- Don’t be shy with the fillings!
- Turning the takoyaki frequently ensures even cooking.
- Serve immediately while hot and fresh. Be careful, as they can be very hot inside!


Leave a Comment