

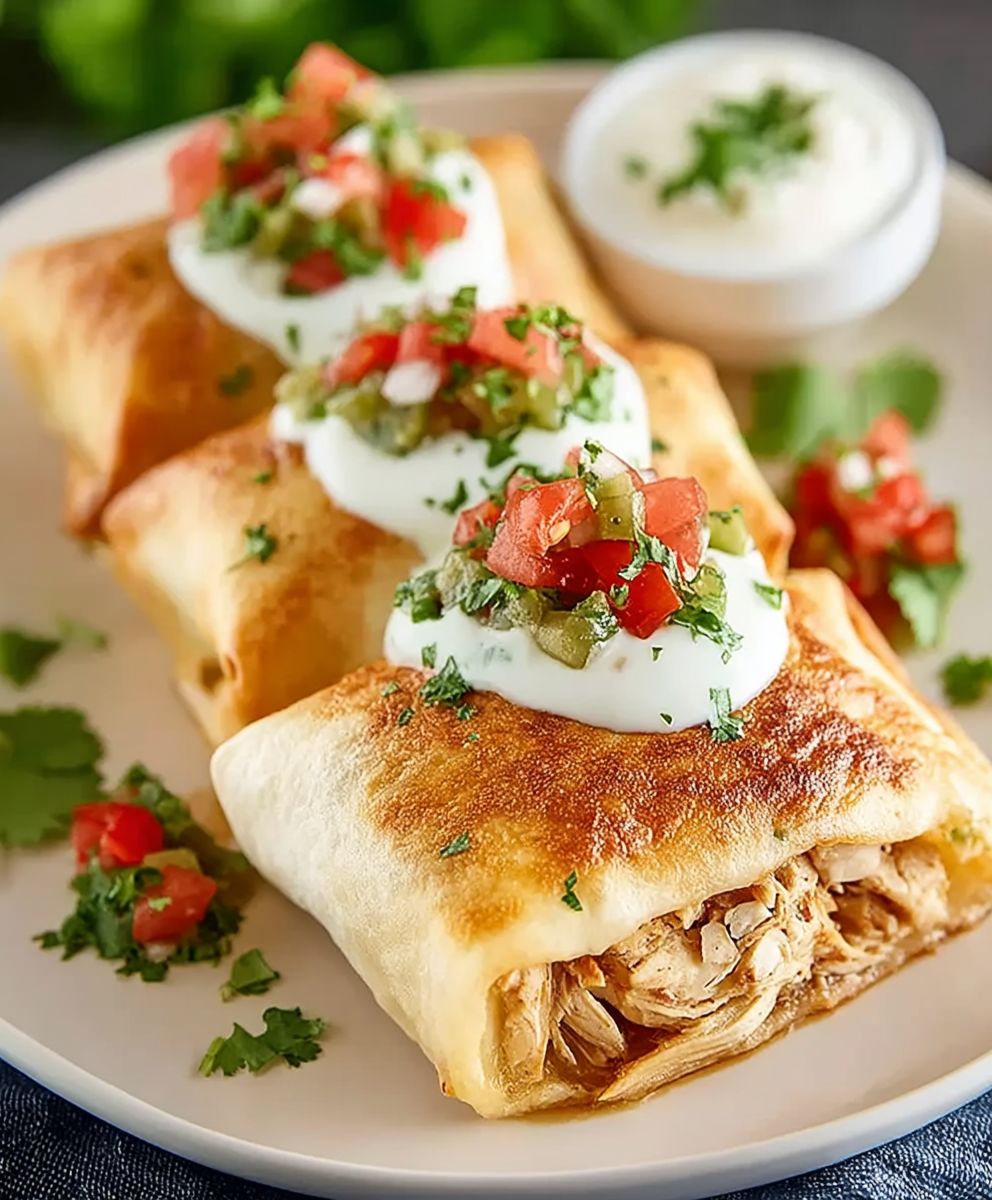
Chicken Chimichangas Baked to golden-brown perfection forget the fryer! Are you craving that satisfying crunch and savory filling of a classic chimichanga, but without the extra grease and calories? Then you’ve come to the right place. I’m thrilled to share my recipe for baked chicken chimichangas, a healthier and equally delicious twist on a beloved Tex-Mex favorite.
The chimichanga, a deep-fried burrito, has a somewhat debated origin story, with claims from both Arizona and California restaurants in the mid-20th century. Regardless of its exact birthplace, this dish quickly gained popularity for its bold flavors and satisfying texture. The combination of a crispy exterior and a warm, flavorful filling is simply irresistible.
What makes these Chicken Chimichangas Baked so special? Well, besides being baked instead of fried, which significantly reduces the fat content, they are incredibly easy to customize. You can adjust the filling to your liking, adding your favorite beans, cheeses, and spices. Plus, baking them ensures a uniformly crispy shell without the mess and fuss of deep-frying. The result is a crowd-pleasing meal that’s perfect for weeknight dinners, game-day gatherings, or any occasion where you want to impress with a flavorful and relatively healthy dish. Get ready to enjoy the ultimate comfort food guilt-free!

Ingredients:
- For the Chicken Filling:
- 2 boneless, skinless chicken breasts (about 1.5 lbs total)
- 1 tablespoon olive oil
- 1 medium onion, chopped
- 2 cloves garlic, minced
- 1 green bell pepper, chopped
- 1 red bell pepper, chopped
- 1 (15 ounce) can black beans, rinsed and drained
- 1 (15 ounce) can corn, drained
- 1 (10 ounce) can diced tomatoes and green chilies (like Rotel), undrained
- 1 packet (1 ounce) taco seasoning
- 1/2 cup chicken broth
- 1/4 cup chopped cilantro
- Salt and pepper to taste
- For the Chimichangas:
- 8 large flour tortillas (burrito size, about 10-12 inches)
- 2 tablespoons melted butter, or olive oil
- For Topping (Optional):
- 1 cup shredded cheddar cheese
- 1 cup shredded Monterey Jack cheese
- Sour cream
- Guacamole
- Salsa
- Chopped green onions
Preparing the Chicken Filling:
- Cook the Chicken: I like to start by cooking the chicken. You can do this in a few ways. My preferred method is to poach the chicken breasts in simmering water until cooked through (about 15-20 minutes). This keeps the chicken moist. Alternatively, you can bake the chicken breasts at 375°F (190°C) for about 20-25 minutes, or until the internal temperature reaches 165°F (74°C). You can also use leftover cooked chicken or rotisserie chicken to save time!
- Shred the Chicken: Once the chicken is cooked, let it cool slightly, then shred it using two forks. You can also use a stand mixer with the paddle attachment on low speed to shred the chicken quickly. Be careful not to over-shred it!
- Sauté the Vegetables: While the chicken is cooking (or after, if you’re using pre-cooked chicken), heat the olive oil in a large skillet over medium heat. Add the chopped onion and cook until softened, about 5 minutes. Then, add the minced garlic and cook for another minute until fragrant. Be careful not to burn the garlic!
- Add the Bell Peppers: Add the chopped green and red bell peppers to the skillet and cook until they are slightly softened, about 5-7 minutes. I love the color and flavor that bell peppers add to this filling!
- Combine the Ingredients: Add the shredded chicken, black beans, corn, and diced tomatoes and green chilies (Rotel) to the skillet. Stir to combine all the ingredients.
- Season the Filling: Sprinkle the taco seasoning over the mixture and stir well to coat everything evenly. Pour in the chicken broth and bring the mixture to a simmer.
- Simmer and Thicken: Reduce the heat to low, cover the skillet, and let the filling simmer for about 10-15 minutes, stirring occasionally. This allows the flavors to meld together and the sauce to thicken slightly. If the filling seems too dry, add a little more chicken broth. If it seems too wet, remove the lid and let it simmer for a few more minutes to evaporate some of the liquid.
- Add Cilantro and Season to Taste: Remove the skillet from the heat and stir in the chopped cilantro. Season with salt and pepper to taste. Remember that taco seasoning can be salty, so taste before adding more salt.
Assembling the Chimichangas:
- Warm the Tortillas: This is a crucial step! Warming the tortillas makes them more pliable and prevents them from cracking when you roll them. You can warm them in a dry skillet over medium heat for about 15-20 seconds per side, or wrap them in a damp paper towel and microwave them for about 30 seconds. I prefer the skillet method for a slightly toasted flavor.
- Fill the Tortillas: Lay a warm tortilla on a flat surface. Spoon about 1/2 to 3/4 cup of the chicken filling into the center of the tortilla. Don’t overfill the tortillas, or they will be difficult to roll and may burst open during baking.
- Fold the Sides: Fold in the sides of the tortilla over the filling, tucking them in tightly. This will help to keep the filling from spilling out.
- Roll the Chimichanga: Starting from the bottom edge, tightly roll the tortilla up and over the filling, like you’re rolling a burrito. Make sure the seam is facing down.
- Repeat: Repeat steps 2-4 with the remaining tortillas and filling.
Baking the Chimichangas:
- Preheat the Oven: Preheat your oven to 400°F (200°C).
- Prepare the Baking Sheet: Lightly grease a baking sheet with cooking spray or line it with parchment paper. This will prevent the chimichangas from sticking to the pan.
- Brush with Butter or Oil: Place the rolled chimichangas seam-side down on the prepared baking sheet. Brush the tops of the chimichangas with melted butter or olive oil. This will help them to get golden brown and crispy in the oven. I find that butter gives a richer flavor, but olive oil works just as well.
- Bake: Bake the chimichangas for 15-20 minutes, or until they are golden brown and crispy. Keep an eye on them, as baking times may vary depending on your oven.
- Add Cheese (Optional): If you want to add cheese, remove the chimichangas from the oven after about 15 minutes and sprinkle them with shredded cheddar and Monterey Jack cheese. Return them to the oven for another 2-3 minutes, or until the cheese is melted and bubbly.
- Let Cool Slightly: Remove the baked chimichangas from the oven and let them cool for a few minutes before serving. This will prevent you from burning your mouth!
Serving Suggestions:
Serve the baked chicken chimichangas hot, with your favorite toppings. Some popular options include:
- Sour cream
- Guacamole
- Salsa
- Chopped green onions
- Shredded lettuce
- Diced tomatoes
I also like to serve them with a side of Mexican rice and refried beans for a complete and satisfying meal. Enjoy!
Tips and Variations:
- Make it spicier: Add a pinch of cayenne pepper or some chopped jalapeños to the chicken filling for a spicier kick.
- Use different beans: Substitute pinto beans or kidney beans for the black beans.
- Add more vegetables: Add other vegetables like zucchini, mushrooms, or spinach to the filling.
- Make it vegetarian: Omit the chicken and add more beans and vegetables for a vegetarian version.
- Freeze for later: Assemble the chimichangas and freeze them before baking. When ready to bake, thaw them in the refrigerator overnight and bake as directed. You may need to add a few extra minutes to the baking time.
- Air Fryer Option: Preheat your air fryer to 375°F (190°C). Place the chimichangas in the air fryer basket in a single layer (you may need to cook them in batches). Cook for 8-10 minutes, flipping halfway through, until golden brown and crispy.
Nutritional Information (approximate, per chimichanga without toppings):
Calories: 400-450
Protein: 25-30g
Fat: 20-25g
Carbohydrates: 40-45g
Enjoy your homemade Baked Chicken Chimichangas!
Conclusion:
This isn’t just another recipe; it’s your new go-to for a satisfying and crowd-pleasing meal. These Chicken Chimichangas Baked are a symphony of textures and flavors, from the crispy, golden-brown tortilla to the savory, perfectly seasoned chicken filling. The ease of baking, rather than frying, makes this a weeknight winner, saving you time and calories without sacrificing that authentic chimichanga experience. Trust me, once you take that first bite, you’ll understand why I’m so excited to share this recipe with you.
But the best part? This recipe is incredibly versatile! Feel free to experiment with the filling. Want to add some heat? Toss in a diced jalapeño or a dash of your favorite hot sauce. Craving more veggies? Corn, black beans, or bell peppers would be fantastic additions. For a vegetarian option, substitute the chicken with seasoned black beans and sweet potatoes. The possibilities are truly endless!
Serving suggestions are just as adaptable. I personally love topping mine with a generous dollop of sour cream, a vibrant scoop of guacamole, and a sprinkle of fresh cilantro. A side of Mexican rice and refried beans completes the meal perfectly. For a lighter option, serve with a fresh salsa and a simple green salad. And don’t forget the cheese! A sprinkle of shredded cheddar or Monterey Jack before baking adds that extra layer of gooey goodness that everyone loves.
Beyond the classic toppings, consider these variations to elevate your Chicken Chimichangas Baked experience:
* Creamy Chipotle Sauce: Blend together sour cream, chipotle peppers in adobo sauce, lime juice, and a touch of honey for a smoky and slightly sweet sauce.
* Queso Dip: Warm up your favorite queso dip and drizzle it over the baked chimichangas for an extra indulgent treat.
* Pico de Gallo: A fresh and vibrant pico de gallo adds a burst of flavor and texture.
* Mango Salsa: For a tropical twist, try a mango salsa with diced mangoes, red onion, cilantro, and lime juice.
I’ve poured my heart into perfecting this recipe, and I’m confident that you’ll love it just as much as I do. It’s a guaranteed hit at potlucks, family dinners, or even a fun solo meal. The satisfaction of creating something so delicious and satisfying is truly rewarding.
So, what are you waiting for? Gather your ingredients, preheat your oven, and get ready to embark on a culinary adventure. I promise you won’t be disappointed.
And most importantly, I want to hear about your experience! Did you try the recipe? Did you make any modifications? What were your favorite toppings? Share your photos and stories in the comments below. I can’t wait to see your creations and learn from your experiences. Let’s build a community of chimichanga enthusiasts! Happy cooking, and enjoy your delicious Chicken Chimichangas Baked!
Chicken Chimichangas Baked: Delicious and Easy Recipe
Crispy baked chicken chimichangas filled with chicken, black beans, corn, and peppers. An easy and flavorful weeknight meal!
Ingredients
- 2 boneless, skinless chicken breasts (about 1.5 lbs total)
- 1 tablespoon olive oil
- 1 medium onion, chopped
- 2 cloves garlic, minced
- 1 green bell pepper, chopped
- 1 red bell pepper, chopped
- 1 (15 ounce) can black beans, rinsed and drained
- 1 (15 ounce) can corn, drained
- 1 (10 ounce) can diced tomatoes and green chilies (like Rotel), undrained
- 1 packet (1 ounce) taco seasoning
- 1/2 cup chicken broth
- 1/4 cup chopped cilantro
- Salt and pepper to taste
- 8 large flour tortillas (burrito size, about 10-12 inches)
- 2 tablespoons melted butter, or olive oil
- 1 cup shredded cheddar cheese
- 1 cup shredded Monterey Jack cheese
- Sour cream
- Guacamole
- Salsa
- Chopped green onions
Instructions
- Poach the chicken breasts in simmering water until cooked through (about 15-20 minutes). Alternatively, bake the chicken breasts at 375°F (190°C) for about 20-25 minutes, or until the internal temperature reaches 165°F (74°C). You can also use leftover cooked chicken or rotisserie chicken to save time!
- Let the cooked chicken cool slightly, then shred it using two forks or a stand mixer with the paddle attachment on low speed.
- Heat the olive oil in a large skillet over medium heat. Add the chopped onion and cook until softened, about 5 minutes. Add the minced garlic and cook for another minute until fragrant.
- Add the chopped green and red bell peppers to the skillet and cook until they are slightly softened, about 5-7 minutes.
- Add the shredded chicken, black beans, corn, and diced tomatoes and green chilies (Rotel) to the skillet. Stir to combine all the ingredients.
- Sprinkle the taco seasoning over the mixture and stir well to coat everything evenly. Pour in the chicken broth and bring the mixture to a simmer.
- Reduce the heat to low, cover the skillet, and let the filling simmer for about 10-15 minutes, stirring occasionally. If the filling seems too dry, add a little more chicken broth. If it seems too wet, remove the lid and let it simmer for a few more minutes to evaporate some of the liquid.
- Remove the skillet from the heat and stir in the chopped cilantro. Season with salt and pepper to taste.
- Warm the tortillas in a dry skillet over medium heat for about 15-20 seconds per side, or wrap them in a damp paper towel and microwave them for about 30 seconds.
- Lay a warm tortilla on a flat surface. Spoon about 1/2 to 3/4 cup of the chicken filling into the center of the tortilla.
- Fold in the sides of the tortilla over the filling, tucking them in tightly.
- Starting from the bottom edge, tightly roll the tortilla up and over the filling, like you’re rolling a burrito. Make sure the seam is facing down.
- Repeat steps 2-4 with the remaining tortillas and filling.
- Preheat your oven to 400°F (200°C).
- Lightly grease a baking sheet with cooking spray or line it with parchment paper.
- Place the rolled chimichangas seam-side down on the prepared baking sheet. Brush the tops of the chimichangas with melted butter or olive oil.
- Bake the chimichangas for 15-20 minutes, or until they are golden brown and crispy.
- If you want to add cheese, remove the chimichangas from the oven after about 15 minutes and sprinkle them with shredded cheddar and Monterey Jack cheese. Return them to the oven for another 2-3 minutes, or until the cheese is melted and bubbly.
- Remove the baked chimichangas from the oven and let them cool for a few minutes before serving.
Notes
- Make it spicier: Add a pinch of cayenne pepper or some chopped jalapeños to the chicken filling for a spicier kick.
- Use different beans: Substitute pinto beans or kidney beans for the black beans.
- Add more vegetables: Add other vegetables like zucchini, mushrooms, or spinach to the filling.
- Make it vegetarian: Omit the chicken and add more beans and vegetables for a vegetarian version.
- Freeze for later: Assemble the chimichangas and freeze them before baking. When ready to bake, thaw them in the refrigerator overnight and bake as directed. You may need to add a few extra minutes to the baking time.
- Air Fryer Option: Preheat your air fryer to 375°F (190°C). Place the chimichangas in the air fryer basket in a single layer (you may need to cook them in batches). Cook for 8-10 minutes, flipping halfway through, until golden brown and crispy.
- Serve with your favorite toppings like sour cream, guacamole, salsa, and chopped green onions.


Leave a Comment