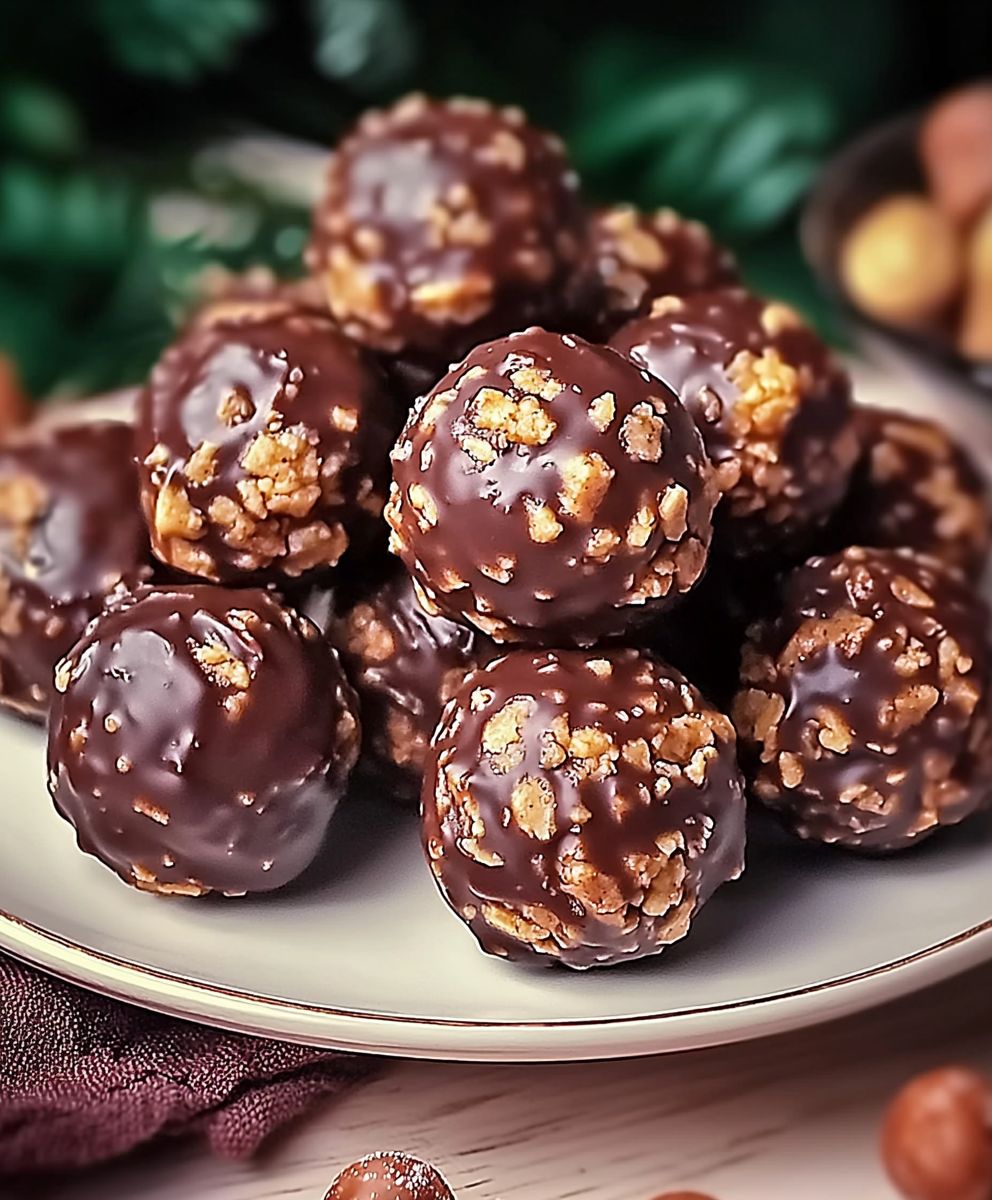
Peanut butter balls, a delightful confection that requires no baking and delivers an explosion of sweet and salty goodness, are about to become your new favorite treat! Imagine biting into a perfectly round sphere, the creamy peanut butter melting in your mouth, complemented by a satisfying crunch from the coating. Are you ready to discover the magic?
While the exact origins of peanut butter balls are shrouded in a bit of mystery, their popularity surged in the mid-20th century, coinciding with the rise of peanut butter as a household staple. They quickly became a beloved homemade candy, passed down through generations and adapted with countless variations. Think of them as the ultimate comfort food, a sweet escape that’s both nostalgic and utterly irresistible.
What makes these little bites of heaven so universally adored? It’s a combination of factors! The rich, nutty flavor of peanut butter is a major draw, of course. But the texture is equally important the smooth, melt-in-your-mouth interior contrasted with the crisp exterior creates a truly satisfying experience. And let’s not forget the convenience! With minimal ingredients and no oven required, peanut butter balls are the perfect treat to whip up for a quick dessert, a potluck contribution, or a sweet gift for friends and family. So, let’s get started and create some peanut butter magic together!
Ingredients:
- 1 cup (2 sticks) unsalted butter, softened
- 1 cup creamy peanut butter
- 3 cups powdered sugar, plus more for dusting
- 3 cups graham cracker crumbs (about 24 graham crackers)
- 1 teaspoon vanilla extract
- 1/2 teaspoon salt
- 12 ounces semi-sweet chocolate chips
- 1 tablespoon vegetable shortening (or coconut oil)
Preparing the Peanut Butter Mixture:
Okay, let’s get started! First, we’re going to create the base of our peanut butter balls. This is where all the magic happens, so pay close attention!
- Cream the Butter and Peanut Butter: In a large mixing bowl, combine the softened butter and peanut butter. It’s crucial that the butter is truly softened, not melted. If it’s melted, the balls won’t hold their shape as well. Use an electric mixer (either a stand mixer or a hand mixer) to cream the butter and peanut butter together until they are light and fluffy. This usually takes about 2-3 minutes. You’ll know it’s ready when the mixture is smooth and has increased slightly in volume. Scrape down the sides of the bowl occasionally to ensure everything is evenly mixed.
- Add the Powdered Sugar: Gradually add the powdered sugar, one cup at a time, to the butter and peanut butter mixture. Mix on low speed to prevent a powdered sugar cloud from erupting in your kitchen! After each addition, mix until just combined. Be careful not to overmix, as this can make the mixture tough. Again, scrape down the sides of the bowl as needed.
- Incorporate the Graham Cracker Crumbs: Now, add the graham cracker crumbs, also one cup at a time. Mix on low speed until just combined after each addition. The graham cracker crumbs will help to bind the mixture together and give the peanut butter balls a nice texture. Make sure the crumbs are finely ground for the best results. If you don’t have pre-made graham cracker crumbs, you can easily make your own by pulsing graham crackers in a food processor until they are finely ground.
- Add Vanilla and Salt: Stir in the vanilla extract and salt. The vanilla enhances the flavor of the peanut butter, and the salt balances the sweetness. Mix until everything is evenly distributed.
Forming the Peanut Butter Balls:
Now comes the fun part rolling the peanut butter mixture into balls! This can be a little messy, but it’s totally worth it.
- Chill the Dough: Cover the mixing bowl with plastic wrap and refrigerate the peanut butter mixture for at least 30 minutes. This will make it easier to handle and prevent the balls from being too sticky. You can chill it for longer, even overnight, if you want to prepare it in advance.
- Shape the Balls: Once the mixture is chilled, remove it from the refrigerator. Use a small cookie scoop or a spoon to scoop out portions of the mixture. Roll each portion between your palms to form a smooth ball. Aim for balls that are about 1 inch in diameter. If the mixture is still too sticky, you can lightly dust your hands with powdered sugar.
- Arrange on a Baking Sheet: Place the formed peanut butter balls on a baking sheet lined with parchment paper or a silicone baking mat. This will prevent them from sticking to the sheet.
- Chill Again (Optional but Recommended): For best results, chill the formed peanut butter balls in the refrigerator for another 15-20 minutes before dipping them in chocolate. This will help the chocolate set more quickly and evenly.
Melting the Chocolate and Dipping:
Time for the chocolate! This is where the peanut butter balls transform into irresistible treats.
- Melt the Chocolate: In a heat-safe bowl set over a saucepan of simmering water (double boiler), combine the semi-sweet chocolate chips and vegetable shortening (or coconut oil). Make sure the bottom of the bowl doesn’t touch the water. Stir constantly until the chocolate is completely melted and smooth. The vegetable shortening or coconut oil helps to thin the chocolate, making it easier to dip the balls. You can also melt the chocolate in the microwave in 30-second intervals, stirring in between, until melted and smooth. Be careful not to overheat the chocolate, as it can seize up.
- Dipping Time: Remove the peanut butter balls from the refrigerator. Using a fork or dipping tools, carefully dip each ball into the melted chocolate, ensuring it is completely coated. Gently tap off any excess chocolate.
- Return to Baking Sheet: Place the chocolate-covered peanut butter balls back on the prepared baking sheet.
- Decorate (Optional): While the chocolate is still wet, you can sprinkle the peanut butter balls with chopped nuts, sprinkles, or a drizzle of white chocolate for added decoration. Get creative!
Setting and Storing:
Almost there! Just a little patience while the chocolate sets.
- Let the Chocolate Set: Allow the chocolate to set completely. You can either let them set at room temperature, which will take a few hours, or you can speed up the process by placing the baking sheet in the refrigerator for about 30 minutes.
- Dust with Powdered Sugar (Optional): Once the chocolate is set, you can lightly dust the peanut butter balls with powdered sugar for a pretty presentation.
- Store Properly: Store the peanut butter balls in an airtight container in the refrigerator. They will keep for up to a week. They can also be frozen for longer storage. Just thaw them in the refrigerator before serving.

Conclusion:
And there you have it! These peanut butter balls are truly a must-try for anyone craving a sweet, satisfying, and incredibly easy-to-make treat. From the creamy, melt-in-your-mouth peanut butter center to the delightful chocolate coating, every bite is an explosion of flavor and texture. I know I’m biased, but I genuinely believe this recipe is a winner, and I’m confident you’ll agree once you’ve tried it.
What makes these little delights so irresistible? It’s the perfect balance of sweet and salty, the simplicity of the ingredients, and the sheer joy of creating something so delicious with minimal effort. Forget complicated baking projects that require hours in the kitchen; these peanut butter balls come together in a snap, making them ideal for a quick dessert fix, a last-minute party snack, or even a thoughtful homemade gift.
But the best part? The versatility! While the classic recipe is fantastic as is, there’s plenty of room for experimentation and personalization. For a richer, more decadent experience, try using dark chocolate for the coating. The slight bitterness of the dark chocolate beautifully complements the sweetness of the peanut butter. Or, if you’re feeling adventurous, add a pinch of sea salt to the peanut butter mixture for an extra layer of flavor.
Serving suggestions are endless. These peanut butter balls are perfect on their own, enjoyed with a glass of cold milk or a cup of hot coffee. You can also arrange them on a platter for a festive dessert display, or package them in small boxes as a charming homemade gift. For a fun twist, try crumbling them over ice cream or using them as a topping for brownies.
Looking for variations? Consider adding chopped nuts, like pecans or walnuts, to the peanut butter mixture for added crunch. Or, for a more festive look, sprinkle the coated balls with colorful sprinkles or edible glitter. You could even try using different types of chocolate, such as white chocolate or milk chocolate, to create a variety of flavors. Another fun idea is to add a touch of honey or maple syrup to the peanut butter mixture for a hint of natural sweetness. If you’re feeling really creative, you could even try adding a layer of caramel between the peanut butter and the chocolate coating. The possibilities are truly endless!
I’ve poured my heart into perfecting this recipe, and I’m so excited for you to try it. I truly believe that these peanut butter balls will become a staple in your household, just as they have in mine. They’re the perfect treat for any occasion, and they’re guaranteed to bring a smile to your face.
So, what are you waiting for? Gather your ingredients, roll up your sleeves, and get ready to create some magic in the kitchen. I promise you won’t be disappointed. And most importantly, don’t forget to share your experience! I’d love to hear how your peanut butter balls turned out, what variations you tried, and any tips or tricks you discovered along the way. Share your photos and stories in the comments below, or tag me on social media. I can’t wait to see your creations! Happy baking (or rather, no-baking)! Let me know what you think of this easy peanut butter balls recipe!
Peanut Butter Balls: Easy Recipe & Tips for Perfect Treats
Easy no-bake peanut butter balls coated in chocolate. Great for holidays, parties, or a sweet treat!
Ingredients
- 1 cup (2 sticks) unsalted butter, softened
- 1 cup creamy peanut butter
- 3 cups powdered sugar, plus more for dusting
- 3 cups graham cracker crumbs (about 24 graham crackers)
- 1 teaspoon vanilla extract
- 1/2 teaspoon salt
- 12 ounces semi-sweet chocolate chips
- 1 tablespoon vegetable shortening (or coconut oil)
Instructions
- In a large mixing bowl, combine the softened butter and peanut butter. Use an electric mixer to cream the butter and peanut butter together until they are light and fluffy (2-3 minutes). Scrape down the sides of the bowl occasionally.
- Gradually add the powdered sugar, one cup at a time, to the butter and peanut butter mixture. Mix on low speed until just combined after each addition. Scrape down the sides of the bowl as needed.
- Add the graham cracker crumbs, also one cup at a time. Mix on low speed until just combined after each addition.
- Stir in the vanilla extract and salt. Mix until everything is evenly distributed.
- Cover the mixing bowl with plastic wrap and refrigerate the peanut butter mixture for at least 30 minutes (or longer, even overnight).
- Once the mixture is chilled, use a small cookie scoop or a spoon to scoop out portions of the mixture. Roll each portion between your palms to form a smooth ball (about 1 inch in diameter). Lightly dust your hands with powdered sugar if the mixture is too sticky.
- Place the formed peanut butter balls on a baking sheet lined with parchment paper or a silicone baking mat.
- Chill the formed peanut butter balls in the refrigerator for another 15-20 minutes before dipping them in chocolate.
- In a heat-safe bowl set over a saucepan of simmering water (double boiler), combine the semi-sweet chocolate chips and vegetable shortening (or coconut oil). Stir constantly until the chocolate is completely melted and smooth. Alternatively, melt in the microwave in 30-second intervals, stirring in between.
- Remove the peanut butter balls from the refrigerator. Using a fork or dipping tools, carefully dip each ball into the melted chocolate, ensuring it is completely coated. Gently tap off any excess chocolate.
- Place the chocolate-covered peanut butter balls back on the prepared baking sheet.
- While the chocolate is still wet, sprinkle with chopped nuts, sprinkles, or a drizzle of white chocolate.
- Allow the chocolate to set completely at room temperature (a few hours) or in the refrigerator (about 30 minutes).
- Lightly dust the peanut butter balls with powdered sugar.
- Store in an airtight container in the refrigerator for up to a week. They can also be frozen for longer storage; thaw in the refrigerator before serving.
Notes
- Make sure the butter is softened, not melted, for the best texture.
- Don’t overmix the peanut butter mixture.
- Chilling the dough and the formed balls helps prevent stickiness and allows the chocolate to set faster.
- Use finely ground graham cracker crumbs.
- Be careful not to overheat the chocolate when melting.


Leave a Comment