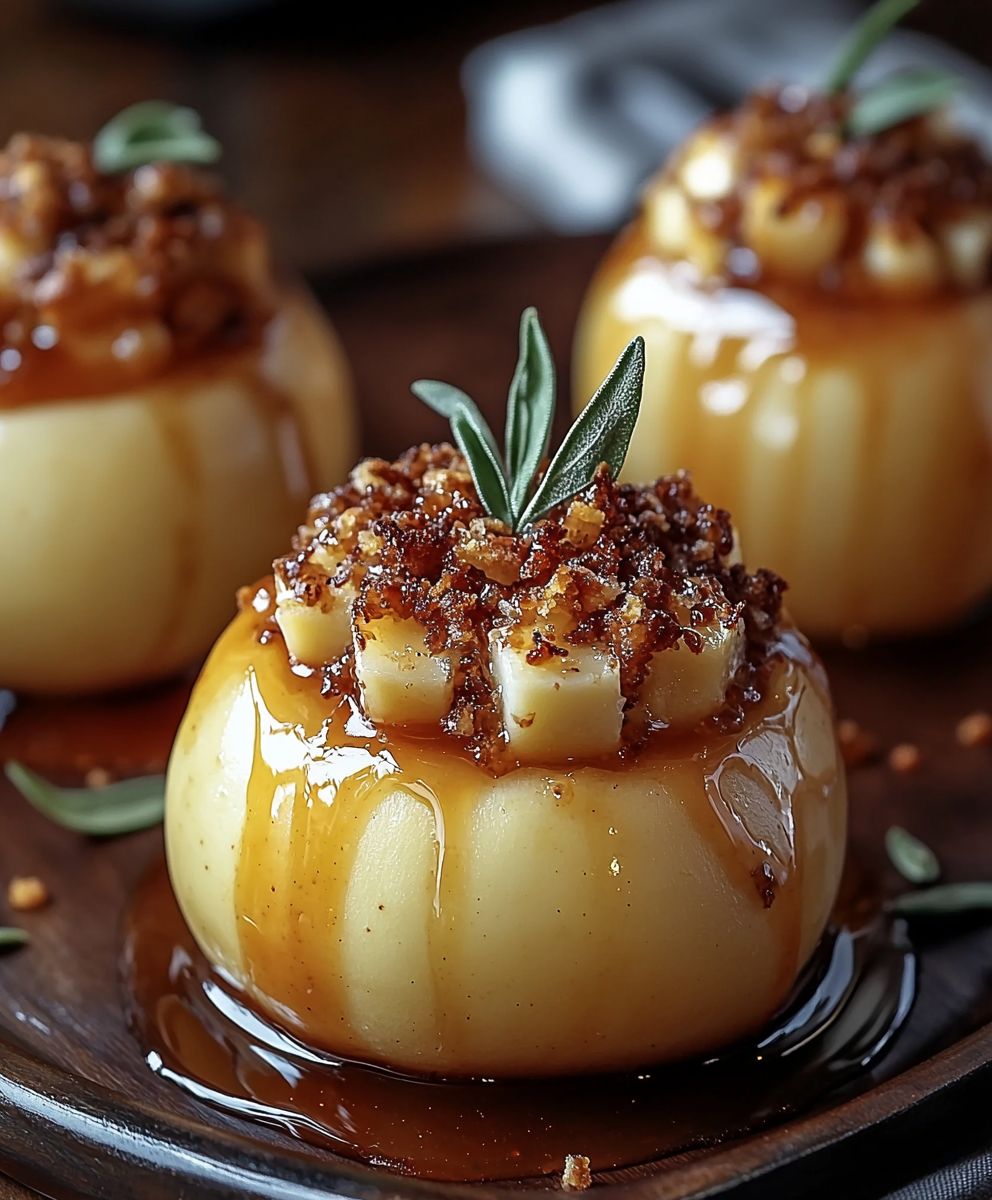
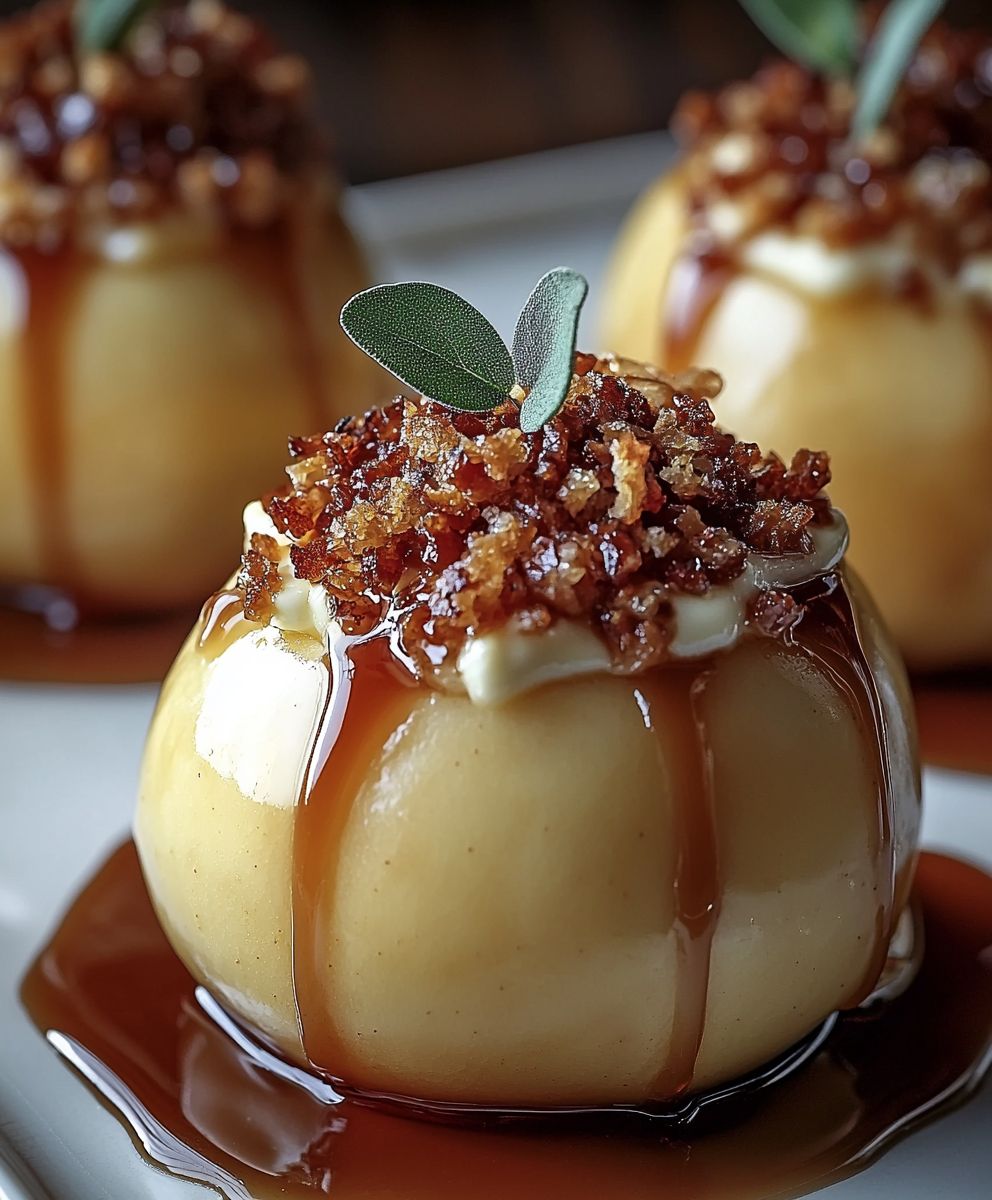
Cheesecake Stuffed Baked Apples: Prepare to be amazed! Imagine biting into a warm, tender baked apple, its cinnamon-spiced skin giving way to a creamy, decadent cheesecake filling. It’s a dessert revelation, and trust me, you’re going to want to make this immediately.
Baked apples, in their simplest form, have been a comforting treat for centuries, enjoyed across various cultures as a way to savor the harvest’s bounty. But this recipe takes that classic comfort food to a whole new level. We’re not just baking apples; we’re creating miniature edible masterpieces!
What makes these Cheesecake Stuffed Baked Apples so irresistible? It’s the perfect marriage of textures and flavors. The soft, slightly tart apple provides a delightful contrast to the rich, smooth cheesecake. The warm spices evoke feelings of cozy autumn evenings, while the creamy filling adds a touch of indulgence that’s hard to resist. Plus, they are surprisingly easy to make, making them perfect for a weeknight treat or an impressive dessert for a special occasion. Get ready to experience a dessert that’s both comforting and sophisticated you won’t be disappointed!
Ingredients:
- For the Cheesecake Filling:
- 8 ounces cream cheese, softened
- 1/4 cup granulated sugar
- 1 large egg
- 1/2 teaspoon vanilla extract
- Pinch of salt
- For the Baked Apples:
- 4 medium-sized apples (Honeycrisp, Gala, or Fuji work well)
- 2 tablespoons butter, melted
- 1/4 cup brown sugar, packed
- 1/4 cup rolled oats
- 1/4 cup chopped pecans or walnuts (optional)
- 1 teaspoon ground cinnamon
- 1/4 teaspoon ground nutmeg
- 2 tablespoons apple cider or apple juice
Preparing the Cheesecake Filling:
Okay, let’s get started with the cheesecake filling. This is the heart of our dessert, so we want to make sure it’s creamy and delicious!
- In a medium-sized bowl, combine the softened cream cheese and granulated sugar. Make sure your cream cheese is really soft! This will prevent lumps and give you a smooth filling. I usually leave mine out for about an hour before starting.
- Using an electric mixer (handheld or stand mixer), beat the cream cheese and sugar together until light and fluffy. This usually takes about 2-3 minutes. Don’t overmix, though! We don’t want to incorporate too much air.
- Add the egg and vanilla extract to the cream cheese mixture. Beat until just combined. Again, be careful not to overmix. Overmixing can lead to a tougher cheesecake filling.
- Add a pinch of salt. This helps to balance the sweetness and enhance the other flavors.
- Give the filling one last gentle stir to ensure everything is well combined. Set aside while you prepare the apples.
Preparing the Apples:
Now for the apples! We want to create a nice little “bowl” for our cheesecake filling. Choose apples that are firm and hold their shape well during baking. I personally love Honeycrisp for this recipe.
- Preheat your oven to 375°F (190°C). This is the perfect temperature for baking the apples until they’re tender but not mushy.
- Wash and dry the apples thoroughly.
- Using an apple corer, remove the core from each apple. Be careful not to cut all the way through the bottom of the apple! We want to create a cavity for the filling, but we need the bottom to remain intact to hold everything in. If you don’t have an apple corer, you can use a sharp knife to carefully cut around the core and remove it.
- Using a spoon, scoop out a little more of the apple flesh from the center of each apple. This will create a larger cavity for the cheesecake filling. Again, be careful not to puncture the bottom of the apple. I usually aim to remove about 1/4 to 1/2 inch of apple flesh from the center.
- In a small bowl, combine the melted butter, brown sugar, rolled oats, chopped pecans or walnuts (if using), cinnamon, and nutmeg. This will be our delicious topping!
- Mix well until everything is evenly coated with the butter.
Stuffing and Baking the Apples:
Alright, the fun part! Let’s stuff those apples and get them into the oven.
- Spoon the cheesecake filling into the cavity of each apple, filling it to the top. Don’t be shy! We want a generous amount of cheesecake filling in each apple.
- Sprinkle the oat mixture evenly over the top of each apple, pressing it down gently to help it adhere.
- Place the stuffed apples in a baking dish. I usually use a 9×13 inch baking dish.
- Pour the apple cider or apple juice into the bottom of the baking dish. This will help to keep the apples moist during baking and add a little extra flavor.
- Cover the baking dish with aluminum foil. This will prevent the apples from browning too quickly.
- Bake for 30 minutes.
- Remove the foil and bake for another 15-20 minutes, or until the apples are tender and the topping is golden brown. The apples should be easily pierced with a fork.
- Remove the baking dish from the oven and let the apples cool slightly before serving. This will allow the cheesecake filling to set up a bit.
Serving Suggestions:
These cheesecake stuffed baked apples are delicious served warm or at room temperature. Here are a few ideas to take them to the next level:
- Top with a scoop of vanilla ice cream or whipped cream. The cold ice cream or whipped cream is a perfect complement to the warm apples and cheesecake filling.
- Drizzle with caramel sauce. A little caramel sauce adds a touch of extra sweetness and richness.
- Sprinkle with chopped nuts. A few chopped pecans or walnuts add a nice crunch.
- Serve with a side of cinnamon sugar. This allows your guests to add a little extra sweetness and spice to their apples.
Tips and Variations:
Want to customize this recipe? Here are a few ideas:
- Use different types of apples. Granny Smith apples will give you a tart flavor, while Fuji apples will be sweeter.
- Add different spices to the topping. Try adding a pinch of ground ginger or cardamom.
- Use different types of nuts. Almonds, macadamia nuts, or even pistachios would be delicious in the topping.
- Add dried fruit to the filling. Raisins, cranberries, or chopped dates would add a nice chewy texture.
- Make it vegan. Use vegan cream cheese, vegan butter, and a flax egg in the filling.
- Add a crumble topping. Instead of the oat topping, try a classic crumble topping made with flour, butter, and sugar.
Storage Instructions:
If you have any leftover cheesecake stuffed baked apples (which is unlikely!), you can store them in the refrigerator for up to 3 days. Reheat them in the oven or microwave before serving.
Troubleshooting:
- Apples are too hard: If your apples are still hard after baking for the recommended time, cover them with foil and continue baking until they are tender.
- Cheesecake filling is too runny: Make sure your cream cheese is softened before you start. Also, don’t overmix the filling.
- Topping is burning: If the topping is browning too quickly, cover the baking dish with foil.
Nutritional Information (Approximate):
Please note that the nutritional information is an estimate and may vary depending on the specific ingredients you use.
- Calories: Approximately 350-400 per apple
- Fat: 20-25 grams
- Saturated Fat: 12-15 grams
- Cholesterol: 75-100 mg
- Sodium: 150-200 mg
- Carbohydrates: 40-45 grams
- Sugar: 30-35 grams
- Protein: 5-7 grams
Why This Recipe Works:
This recipe is a winner because it combines the comforting flavors of baked apples with the creamy richness of cheesecake. The apples provide a natural sweetness and a slightly tart counterpoint to the sweet and tangy cheesecake filling. The oat topping adds a delightful crunch and a hint of cinnamon spice. It’s a relatively easy recipe to make, and it’s always a crowd-pleaser. Plus, it’s a great way to use up those fall apples!
Frequently Asked Questions:
- Can I use a different type of sweetener? Yes, you can substitute the granulated sugar in the cheesecake filling with honey, maple syrup, or a sugar substitute.
- Can I make this recipe ahead of time? Yes, you can prepare the cheesecake filling and the oat topping ahead of time. Store them separately in the refrigerator until you’re ready to assemble the apples.
- Can I freeze these? I don’t recommend freezing these, as the texture of the apples and cheesecake filling may change.
- What if I don’t have apple cider or apple juice? You can use water or even a little bit of white wine in the bottom of the baking dish.
- Can I use a different type of nut? Absolutely!
Conclusion:
And there you have it! These Cheesecake Stuffed Baked Apples are truly a must-try dessert that will impress your family and friends. The combination of warm, tender baked apples with the creamy, tangy cheesecake filling is simply divine. It’s a comforting, yet elegant treat that’s perfect for any occasion, from a cozy weeknight dinner to a festive holiday gathering. I promise, once you take that first bite, you’ll understand why I’m so enthusiastic about this recipe.
Why is this recipe a winner? Well, first, it’s surprisingly easy to make. Don’t let the “cheesecake” part intimidate you. The filling comes together quickly with just a few simple ingredients, and the baking process is straightforward. Second, it’s a crowd-pleaser. Everyone loves baked apples, and the cheesecake filling elevates them to a whole new level of deliciousness. Third, it’s relatively healthy! Compared to a traditional cheesecake, these baked apples are lower in fat and sugar, making them a guilt-free indulgence. And finally, it’s incredibly versatile. You can easily customize the recipe to suit your own taste preferences.
Speaking of versatility, let’s talk about serving suggestions and variations. For a truly decadent experience, serve these warm with a scoop of vanilla ice cream or a dollop of whipped cream. A drizzle of caramel sauce or a sprinkle of chopped pecans would also be fantastic additions. If you’re looking for a lighter option, try serving them with a dollop of Greek yogurt or a sprinkle of cinnamon.
Want to switch things up? Consider using different types of apples. Granny Smith apples will provide a tart contrast to the sweet cheesecake filling, while Honeycrisp apples will offer a more balanced flavor. You could also experiment with different spices. A pinch of nutmeg or allspice would add a warm, cozy touch. For a truly unique twist, try adding a tablespoon of bourbon or rum to the cheesecake filling.
Another fun variation is to add a streusel topping. Simply combine flour, butter, sugar, and oats, and sprinkle it over the apples before baking. This will add a delightful crunch and a touch of sweetness. You could also add chopped nuts, such as walnuts or pecans, to the streusel topping for extra flavor and texture.
If you’re feeling adventurous, you could even try making a savory version of this recipe. Instead of cheesecake filling, try stuffing the apples with a mixture of sausage, breadcrumbs, and herbs. This would make a delicious and unexpected appetizer or side dish.
But honestly, the classic Cheesecake Stuffed Baked Apples recipe is perfect just as it is. It’s a simple, elegant, and incredibly delicious dessert that’s sure to become a new favorite.
So, what are you waiting for? Grab your apples, preheat your oven, and get ready to bake up a batch of these amazing treats. I’m confident that you’ll love them as much as I do.
I truly hope you give this recipe a try. I’m so excited for you to experience the joy of biting into a warm, perfectly baked apple filled with creamy, tangy cheesecake. And please, don’t be shy! Share your creations with me. I’d love to see your photos and hear about your experiences. Tag me on social media and let me know what you think. Happy baking!
Cheesecake Stuffed Baked Apples: A Delicious Fall Dessert Recipe
Warm, tender baked apples filled with creamy cheesecake and topped with a crunchy oat crumble. A delicious and comforting fall dessert!
Ingredients
- 8 ounces cream cheese, softened
- 1/4 cup granulated sugar
- 1 large egg
- 1/2 teaspoon vanilla extract
- Pinch of salt
- 4 medium-sized apples (Honeycrisp, Gala, or Fuji work well)
- 2 tablespoons butter, melted
- 1/4 cup brown sugar, packed
- 1/4 cup rolled oats
- 1/4 cup chopped pecans or walnuts (optional)
- 1 teaspoon ground cinnamon
- 1/4 teaspoon ground nutmeg
- 2 tablespoons apple cider or apple juice
Instructions
- Prepare the Cheesecake Filling: In a medium bowl, combine softened cream cheese and granulated sugar. Beat with an electric mixer until light and fluffy (2-3 minutes). Add egg and vanilla extract; beat until just combined. Add a pinch of salt and gently stir. Set aside.
- Prepare the Apples: Preheat oven to 375°F (190°C). Wash and dry apples. Core each apple, being careful not to cut through the bottom. Scoop out a little more apple flesh from the center to create a larger cavity.
- Make the Topping: In a small bowl, combine melted butter, brown sugar, rolled oats, chopped pecans or walnuts (if using), cinnamon, and nutmeg. Mix well.
- Stuff and Bake: Spoon cheesecake filling into the cavity of each apple, filling to the top. Sprinkle oat mixture evenly over the top of each apple, pressing down gently.
- Place the stuffed apples in a baking dish. Pour the apple cider or apple juice into the bottom of the baking dish.
- Cover the baking dish with aluminum foil. Bake for 30 minutes.
- Remove the foil and bake for another 15-20 minutes, or until the apples are tender and the topping is golden brown. The apples should be easily pierced with a fork.
- Remove from oven and let cool slightly before serving.
Notes
- Make sure your cream cheese is fully softened to prevent lumps in the filling.
- Don’t overmix the cheesecake filling, as this can lead to a tougher texture.
- Be careful when coring the apples not to puncture the bottom.
- Apples are done when they are easily pierced with a fork.
- Serve warm or at room temperature with vanilla ice cream, whipped cream, or caramel sauce for an extra treat.
- Store leftovers in the refrigerator for up to 3 days. Reheat before serving.



Leave a Comment