

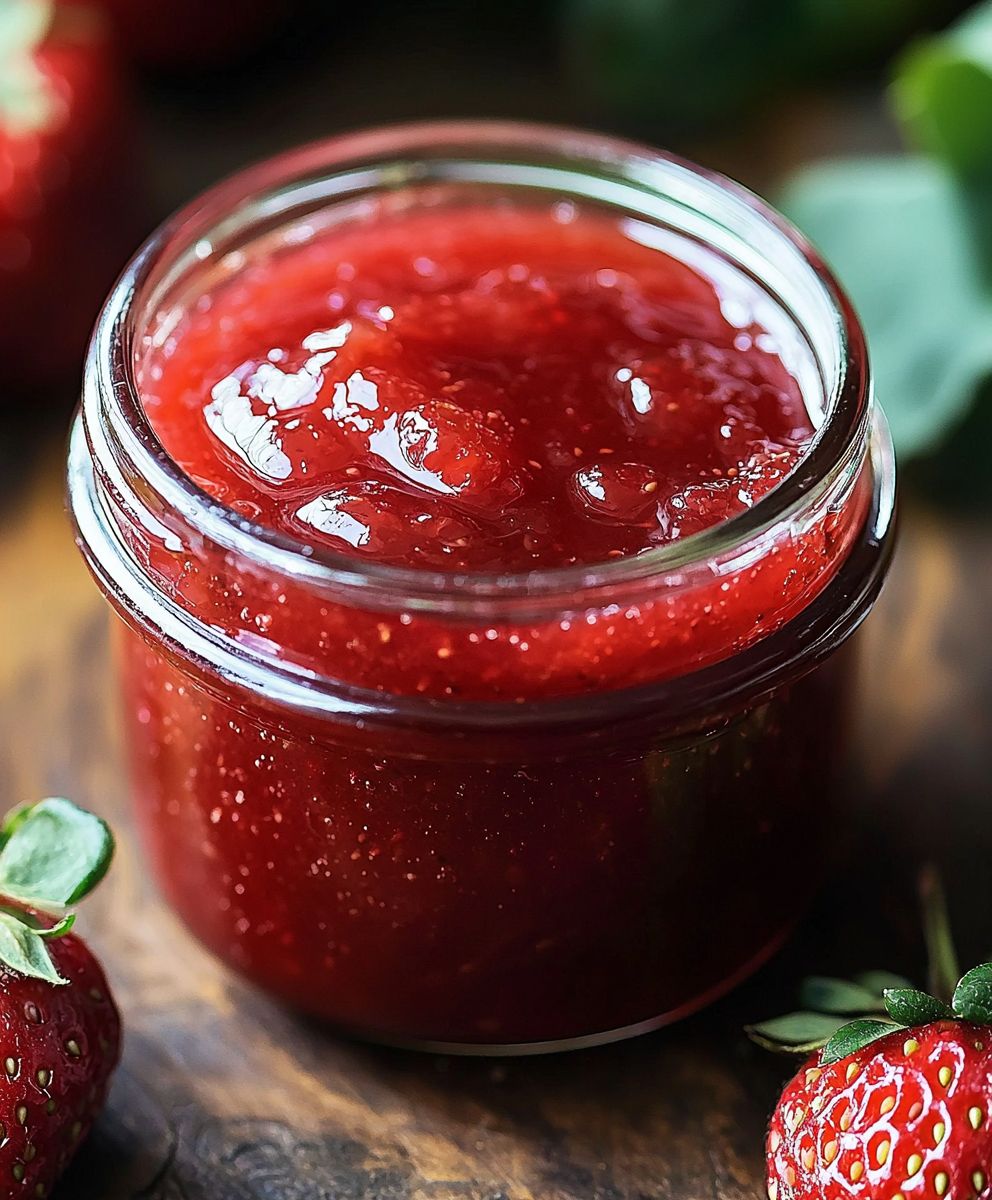
Strawberry Rhubarb Jam: the very words conjure up images of sunny summer days, the sweet-tart aroma filling your kitchen, and the satisfying “pop” of a freshly sealed jar. Have you ever tasted something that instantly transports you back to childhood, to simpler times filled with homemade goodness? This jam does exactly that! It’s a vibrant celebration of two of spring’s most beloved ingredients, perfectly balanced to create a spread that’s both comforting and exciting.
Rhubarb, with its intriguing history as a medicinal plant before becoming a culinary staple, pairs beautifully with the universally adored strawberry. This combination isn’t just about taste; it’s about tradition. For generations, families have been making Strawberry Rhubarb Jam, passing down recipes and creating memories with each batch. The tartness of the rhubarb cuts through the sweetness of the strawberries, resulting in a complex flavor profile that’s far more interesting than your average jam.
What’s not to love? The vibrant color, the delightful tang, and the sheer versatility of this jam make it a winner. Spread it on toast, swirl it into yogurt, use it as a filling for pastries, or even glaze a pork loin with it! The possibilities are endless. Plus, making your own jam is surprisingly easy and incredibly rewarding. So, ditch the store-bought stuff and let’s embark on a jam-making adventure together. I promise, once you taste homemade Strawberry Rhubarb Jam, you’ll never go back!

Ingredients:
- 4 cups fresh rhubarb, chopped into 1/2-inch pieces
- 4 cups fresh strawberries, hulled and quartered
- 6 cups granulated sugar
- 1/4 cup lemon juice (freshly squeezed is best!)
- 1 package (1.75 ounces) powdered pectin
- 1/2 teaspoon butter or margarine (to reduce foaming)
Preparing the Fruit:
Okay, let’s get started! First things first, we need to prep our beautiful fruits. This step is crucial because it sets the stage for a perfectly textured and flavorful jam. Trust me, taking the time to do this right makes all the difference.
- Rhubarb Prep: Wash your rhubarb stalks thoroughly. Even if they look clean, give them a good rinse to remove any lingering dirt. Now, chop the rhubarb into 1/2-inch pieces. Consistency is key here; try to keep the pieces relatively uniform in size so they cook evenly. Smaller pieces will break down more quickly, contributing to the jam’s overall texture.
- Strawberry Prep: Rinse the strawberries under cool water. Hull them (remove the green tops) and then quarter them. If your strawberries are particularly large, you might want to cut them into smaller pieces. Again, aim for consistency in size.
- Combining the Fruit: In a large, heavy-bottomed pot (stainless steel or enamel-coated cast iron is ideal), combine the chopped rhubarb and quartered strawberries. Give them a gentle toss to mix them together. This ensures that the flavors will meld beautifully as they cook.
Cooking the Jam:
Now for the fun part cooking! This is where the magic happens, and our fruit transforms into a luscious, sweet, and tangy jam. Patience is key here; don’t rush the process. We want to achieve that perfect set without burning the jam.
- Adding Pectin and Butter: Add the powdered pectin to the fruit mixture and stir well to combine. Make sure there are no clumps of pectin. The pectin is what helps the jam to thicken and set properly. Then, add the 1/2 teaspoon of butter or margarine. This seemingly small addition helps to reduce foaming during the cooking process, resulting in a clearer, more visually appealing jam.
- Bringing to a Boil: Place the pot over medium-high heat and bring the mixture to a full rolling boil that cannot be stirred down. This is important! A rolling boil ensures that the pectin activates properly and the jam sets correctly. Stir constantly to prevent the fruit from sticking to the bottom of the pot and burning.
- Adding the Sugar: Once you’ve reached a full rolling boil, quickly add all of the granulated sugar. Stir constantly to dissolve the sugar completely. This is a crucial step, as undissolved sugar can result in a grainy texture in your finished jam.
- Reaching the Setting Point: Continue to cook the jam over medium-high heat, stirring constantly, until it reaches the setting point. This usually takes around 10-20 minutes, but it can vary depending on your stove and the size of your pot. How do you know when it’s ready? There are a few methods:
- Candy Thermometer: The most accurate method is to use a candy thermometer. The setting point for jam is 220°F (104°C) at sea level. If you’re at a higher altitude, you’ll need to adjust the temperature accordingly.
- Cold Plate Test: Place a small plate in the freezer before you start cooking the jam. To test for setting, spoon a small amount of jam onto the cold plate and return it to the freezer for about a minute. Then, push the jam with your finger. If it wrinkles and forms a skin, it’s ready. If it’s still runny, continue cooking and test again in a few minutes.
- Spoon Test: Dip a cold metal spoon into the boiling jam. Lift the spoon and let the jam drip off the side. If the drips start to cling together and form a sheet or “apron,” the jam is ready.
- Adding Lemon Juice: Once the jam has reached the setting point, remove it from the heat and stir in the lemon juice. The lemon juice not only adds a bright, tangy flavor but also helps to preserve the color of the jam and acts as a natural preservative.
- Skimming Foam (Optional): If there’s any foam on the surface of the jam, you can skim it off with a spoon. This will result in a clearer, more visually appealing jam.
Canning the Jam (Optional):
If you want to preserve your jam for longer storage, canning is the way to go! This process involves sterilizing jars and lids, filling them with hot jam, and then processing them in a boiling water bath to create a vacuum seal. This prevents spoilage and allows you to enjoy your homemade jam for months to come.
- Sterilizing Jars and Lids: Wash your canning jars and lids in hot, soapy water. Rinse them thoroughly. Then, sterilize the jars by placing them in a boiling water bath for 10 minutes. Keep the jars hot until you’re ready to fill them. Sterilize the lids by simmering them in hot water (not boiling) for 10 minutes.
- Filling the Jars: Remove the hot jars from the boiling water bath using a jar lifter. Place them on a towel-lined surface. Ladle the hot jam into the jars, leaving 1/4 inch of headspace (the space between the top of the jam and the rim of the jar).
- Removing Air Bubbles: Use a non-metallic utensil (like a wooden skewer or plastic spatula) to gently run around the inside of each jar to release any trapped air bubbles.
- Wiping the Rims: Wipe the rims of the jars with a clean, damp cloth to remove any spills or drips. This ensures a good seal.
- Placing the Lids and Rings: Place the sterilized lids on the jars and screw on the rings until they are fingertip tight (not too tight, not too loose).
- Processing in a Boiling Water Bath: Place the filled jars in a boiling water bath canner. Make sure the water covers the jars by at least 1 inch. Bring the water to a rolling boil and process the jars for 10 minutes for half-pint jars and 15 minutes for pint jars. Adjust processing time for altitude.
- Cooling and Sealing: Turn off the heat and let the jars sit in the canner for 5 minutes before removing them. Place the jars on a towel-lined surface to cool completely. As the jars cool, you should hear a “pop” sound as the lids seal.
- Checking the Seals: After the jars have cooled completely (usually 12-24 hours), check the seals. The lids should be concave (curved downward) and should not flex when pressed. If a jar didn’t seal properly, you can either reprocess it with a new lid or store it in the refrigerator and use it within a few weeks.
- Storing the Jam: Store your sealed jars of jam in a cool, dark place. Properly canned jam can last for up to a year.
No-Canning Method (Refrigeration or Freezing):
If you’re not interested in canning, that’s perfectly fine! You can still enjoy your homemade strawberry rhubarb jam by storing it in the refrigerator or freezer. This method is quicker and easier, but the jam won’t last as long as canned jam.
- Cooling the Jam: Allow the jam to cool slightly after cooking.
- Storing in the Refrigerator: Pour the jam into clean jars or containers and store it in the refrigerator. Refrigerated jam will last for about 2-3 weeks.
- Freezing the Jam: Pour the jam into freezer-safe containers, leaving some headspace to allow for expansion during freezing. Frozen jam can last for up to a year. Thaw it in the refrigerator before using.
Serving Suggestions:
Now that you’ve made your delicious strawberry rhubarb jam, it’s time to enjoy it! Here are a few serving suggestions:
- On Toast or Biscuits: The classic way to enjoy jam! Spread it on your favorite toast, biscuits, or scones for a delightful breakfast or snack.
- With Yogurt or Oatmeal: Add a spoonful of jam to your yogurt or oatmeal for a burst of flavor and sweetness.
- As a Filling for Pastries: Use it as a filling for pies, tarts, or pastries.
- With Cheese and Crackers: Serve it with cheese and crackers for a sophisticated appetizer. The sweet and tangy jam pairs beautifully with creamy cheeses like brie or goat cheese.
- 4 cups fresh rhubarb, chopped into 1/2-inch pieces
- 4 cups fresh strawberries, hulled and quartered
- 6 cups granulated sugar
- 1/4 cup lemon juice (freshly squeezed is best!)
- 1 package (1.75 ounces) powdered pectin
- 1/2 teaspoon butter or margarine (to reduce foaming)
- Wash rhubarb stalks thoroughly and chop into 1/2-inch pieces.
- Rinse strawberries, hull, and quarter them.
- In a large, heavy-bottomed pot, combine rhubarb and strawberries.
- Add pectin to the fruit mixture and stir well. Add butter or margarine.
- Place the pot over medium-high heat and bring the mixture to a full rolling boil that cannot be stirred down, stirring constantly.
- Quickly add all of the sugar and stir constantly to dissolve completely.
- Continue to cook over medium-high heat, stirring constantly, until it reaches the setting point (220°F (104°C) on a candy thermometer, or use the cold plate/spoon test).
- Remove from heat and stir in lemon juice.
- Skim off any foam from the surface.
- Sterilize jars and lids. Fill jars with hot jam, leaving 1/4 inch headspace. Remove air bubbles, wipe rims, and place lids and rings on jars. Process in a boiling water bath for 10 minutes (half-pint) or 15 minutes (pint). Cool and check seals.
- Cool jam slightly and store in clean jars in the refrigerator (2-3 weeks) or freezer (up to a year).
- Use a heavy-bottomed pot to prevent burning.
- Stir constantly to prevent sticking and ensure even cooking.
- The setting point is crucial for proper jam consistency. Use a candy thermometer or the cold plate/spoon test to determine when the jam is ready.
- Lemon juice adds flavor and acts as a natural preservative.
- Canning is optional; jam can be refrigerated or frozen.
- Adjust processing time for altitude if canning.
Conclusion:
This Strawberry Rhubarb Jam recipe isn’t just another jam recipe; it’s a taste of sunshine bottled for you to enjoy year-round. The sweet strawberries perfectly balance the tart rhubarb, creating a flavor explosion that’s both comforting and invigorating. If you’re looking for a way to preserve the flavors of spring and early summer, or simply want a homemade treat that’s far superior to anything you can buy in a store, then this is absolutely a must-try. I promise, once you’ve tasted this jam, you’ll never go back to store-bought!
But the deliciousness doesn’t stop there! Think of all the ways you can enjoy this vibrant jam. Spread it generously on warm, crusty bread or flaky croissants for a delightful breakfast. Swirl it into your morning yogurt or oatmeal for a burst of fruity flavor. Use it as a glaze for grilled chicken or pork for a sweet and tangy twist. It’s also fantastic as a filling for thumbprint cookies or layered in a Victoria sponge cake.
For serving suggestions, consider pairing this jam with a creamy cheese like brie or goat cheese on a cracker for an elegant appetizer. Or, get creative and use it as a topping for ice cream or pancakes. If you’re feeling adventurous, try adding a pinch of ginger or a splash of balsamic vinegar to the jam while it’s cooking for an extra layer of complexity. Another variation I love is adding a handful of chopped fresh mint towards the end of the cooking process for a refreshing twist. You could even experiment with different types of berries, like raspberries or blueberries, to create your own unique flavor combinations. The possibilities are truly endless!
I’ve poured my heart into perfecting this recipe, and I’m confident that you’ll love it as much as I do. It’s surprisingly easy to make, even if you’ve never canned before. Just follow the instructions carefully, and you’ll be rewarded with jars of homemade goodness that you can enjoy for months to come. Plus, homemade jam makes a wonderful gift for friends and family. Imagine the joy of sharing a jar of your own handcrafted Strawberry Rhubarb Jam with someone special!
So, what are you waiting for? Gather your ingredients, put on some music, and get ready to embark on a jam-making adventure. I’m so excited for you to try this recipe and experience the magic of homemade jam. And most importantly, I want to hear all about your experience! Did you make any variations? What did you serve it with? What did your friends and family think? Please, share your photos and stories in the comments below. I can’t wait to see what you create! Happy jamming!
Strawberry Rhubarb Jam: The Ultimate Guide to Making & Storing
Sweet and tangy homemade Strawberry Rhubarb Jam, perfect for spreading on toast, biscuits, or enjoying with cheese. Easy to make and can be canned for long-term storage or refrigerated/frozen for shorter-term enjoyment.


Leave a Comment