

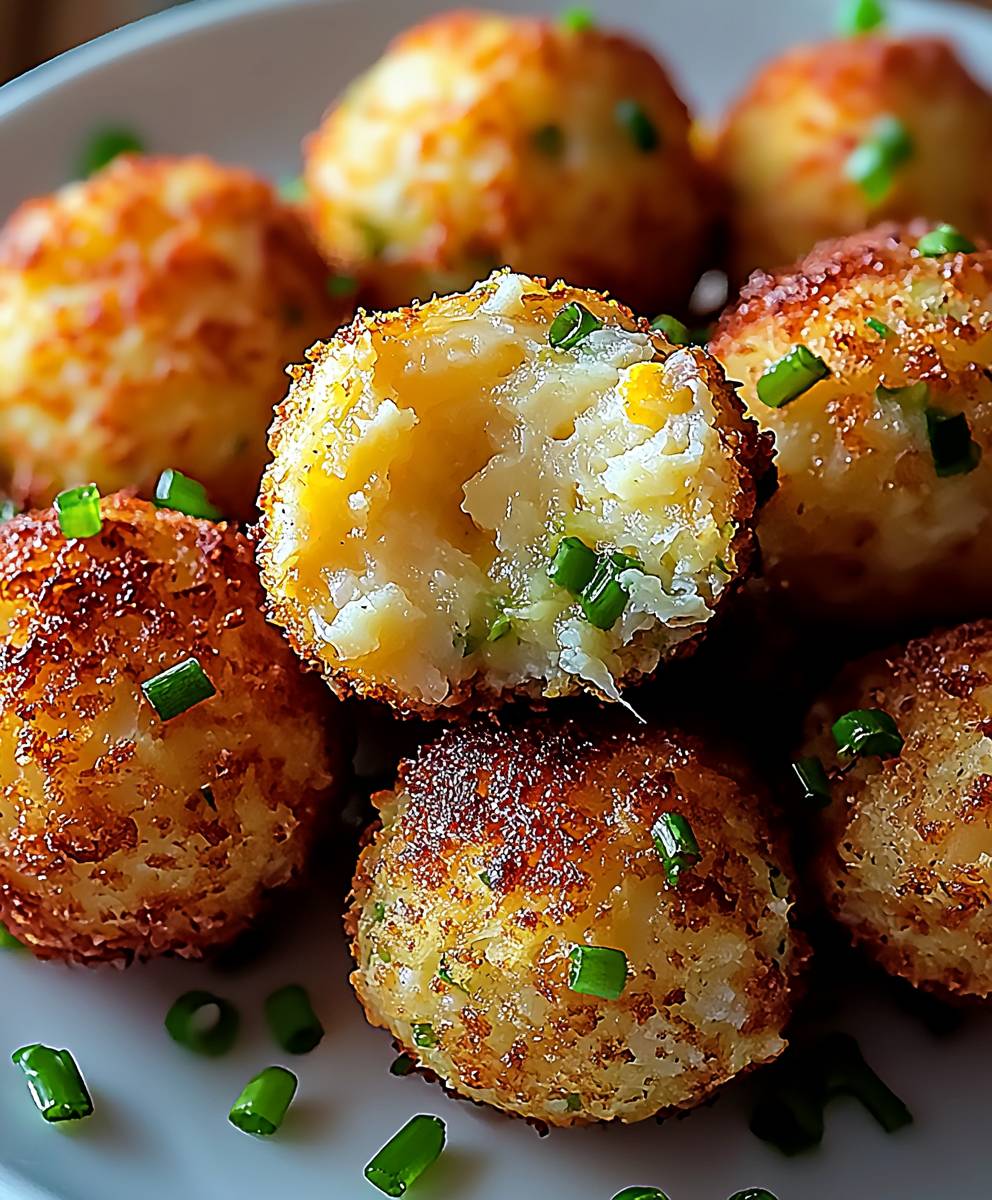
Cheesy Colcannon Balls: Prepare to be transported to the Emerald Isle with a delightful twist on a classic comfort food! Imagine biting into a crispy, golden-brown sphere, only to be greeted by a creamy, savory explosion of mashed potatoes, cabbage, kale, and, of course, plenty of cheese. This isn’t your grandmother’s colcannon although she’d certainly approve!
Colcannon itself boasts a rich history, deeply rooted in Irish tradition. Traditionally served on Halloween, it was believed that charms hidden within the dish could foretell the future. While we might not be divining destinies with our Cheesy Colcannon Balls, we are certainly creating a little bit of magic in the kitchen.
What makes these little bites so irresistible? It’s the perfect marriage of textures and flavors. The crispy exterior gives way to a soft, pillowy interior, while the earthy vegetables are perfectly complemented by the richness of the cheese. They’re incredibly satisfying, easy to make, and perfect as an appetizer, side dish, or even a fun snack. Plus, they’re a fantastic way to use up leftover mashed potatoes and vegetables. So, gather your ingredients, and let’s get ready to create some truly unforgettable Cheesy Colcannon Balls!

Ingredients:
- 1.5 lbs Russet Potatoes, peeled and quartered
- 1 cup Milk
- 4 tbsp Butter, divided
- 1 cup Green Cabbage, finely shredded
- 1/2 cup Cooked Bacon, crumbled
- 1/2 cup Cheddar Cheese, shredded, plus extra for topping
- 1/4 cup Green Onions, thinly sliced
- 1 large Egg, lightly beaten
- 1/2 cup All-Purpose Flour, plus extra for dredging
- 1 cup Breadcrumbs
- Vegetable Oil, for frying
- Salt and Black Pepper to taste
- Optional: Pinch of Nutmeg
Preparing the Colcannon Base:
- Boil the Potatoes: Place the peeled and quartered potatoes in a large pot and cover with cold water. Add a generous pinch of salt. Bring to a boil over high heat, then reduce heat to medium and simmer for 15-20 minutes, or until the potatoes are fork-tender. You should be able to easily pierce them with a fork without resistance.
- Drain and Mash: Once the potatoes are cooked, drain them thoroughly in a colander. Return the potatoes to the pot. Add 2 tablespoons of butter and the milk. Using a potato masher or a ricer, mash the potatoes until smooth and creamy. Be careful not to over-mash, as this can make them gluey. A ricer will give you the smoothest results.
- Sauté the Cabbage: While the potatoes are boiling, melt the remaining 2 tablespoons of butter in a large skillet over medium heat. Add the shredded green cabbage and sauté for 5-7 minutes, or until the cabbage is softened and slightly wilted. Stir frequently to prevent burning. You want it to be tender, not browned.
- Combine and Season: Add the sautéed cabbage, crumbled bacon, shredded cheddar cheese, and sliced green onions to the mashed potatoes. Stir well to combine all the ingredients. Season with salt, black pepper, and a pinch of nutmeg (if using). Taste and adjust seasonings as needed. Remember, the bacon and cheese are already salty, so go easy on the salt at first.
- Cool the Mixture: Spread the colcannon mixture out on a baking sheet or in a shallow dish to cool slightly. This will make it easier to handle when forming the balls. Allow it to cool for at least 30 minutes in the refrigerator. This step is crucial for preventing the balls from falling apart during frying.
Forming the Colcannon Balls:
- Prepare the Breading Station: Set up a breading station with three shallow dishes. In the first dish, place the all-purpose flour. In the second dish, place the lightly beaten egg. In the third dish, place the breadcrumbs. Make sure you have enough of each ingredient to fully coat all the colcannon balls.
- Shape the Balls: Take a heaping tablespoon of the cooled colcannon mixture and roll it into a ball, about 1.5 inches in diameter. The size is up to you, but keep them relatively uniform for even cooking. Repeat until all the colcannon mixture has been used. You should get approximately 15-20 balls, depending on the size.
- Dredge in Flour: Gently roll each colcannon ball in the flour, ensuring it is completely coated. Shake off any excess flour. The flour helps the egg adhere to the ball.
- Dip in Egg: Dip the floured colcannon ball into the beaten egg, making sure it is fully coated. Allow any excess egg to drip off.
- Coat in Breadcrumbs: Roll the egg-coated colcannon ball in the breadcrumbs, pressing gently to ensure the breadcrumbs adhere well. The breadcrumbs will give the balls a crispy, golden-brown crust when fried.
- Chill the Breaded Balls: Place the breaded colcannon balls on a clean baking sheet lined with parchment paper. Cover them loosely with plastic wrap and refrigerate for at least 30 minutes. This helps the breading set and prevents the balls from falling apart during frying. You can even chill them for longer, up to a few hours, if needed.
Frying the Colcannon Balls:
- Heat the Oil: Pour about 2-3 inches of vegetable oil into a large, heavy-bottomed pot or deep fryer. Heat the oil over medium-high heat to 350°F (175°C). Use a thermometer to monitor the oil temperature. Maintaining the correct temperature is essential for achieving crispy, evenly cooked colcannon balls. If the oil is too hot, the balls will brown too quickly on the outside and remain cold in the center. If the oil is not hot enough, they will absorb too much oil and become greasy.
- Fry in Batches: Carefully add the breaded colcannon balls to the hot oil in batches, being careful not to overcrowd the pot. Overcrowding will lower the oil temperature and result in soggy balls. Fry for 2-3 minutes per side, or until the balls are golden brown and heated through.
- Drain on Paper Towels: Use a slotted spoon or spider to remove the fried colcannon balls from the oil and place them on a plate lined with paper towels to drain excess oil.
- Keep Warm (Optional): If you are frying multiple batches, you can keep the cooked colcannon balls warm in a preheated oven at 200°F (95°C) until ready to serve.
Serving:
- Top with Cheese (Optional): While the colcannon balls are still warm, sprinkle them with extra shredded cheddar cheese. The cheese will melt slightly from the heat.
- Garnish: Garnish with a sprinkle of fresh green onions or a dollop of sour cream or crème fraîche.
- Serve Immediately: Serve the cheesy colcannon balls immediately while they are hot and crispy. They are best enjoyed fresh.
- Dipping Sauces (Optional): Offer a variety of dipping sauces, such as ranch dressing, blue cheese dressing, or a spicy aioli.
Conclusion:
And there you have it! These Cheesy Colcannon Balls are so much more than just a side dish; they’re a flavor explosion waiting to happen. I truly believe this recipe is a must-try for anyone looking to elevate their comfort food game. The creamy, cheesy potato base, combined with the savory cabbage and scallions, creates a symphony of textures and tastes that will leave you wanting more. It’s the perfect way to use up leftover mashed potatoes, or a fantastic excuse to make a fresh batch!
But why is this recipe a must-try? Well, beyond the incredible flavor, it’s surprisingly versatile and easy to adapt to your own preferences. It’s also a guaranteed crowd-pleaser, perfect for family dinners, potlucks, or even as a unique appetizer for your next gathering. Imagine serving these warm, golden-brown balls of deliciousness your guests will be begging for the recipe!
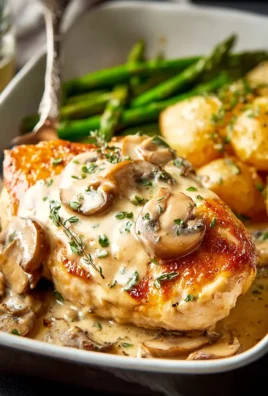
Speaking of serving, the possibilities are endless! I personally love serving these Cheesy Colcannon Balls alongside a juicy roast chicken or a hearty steak. They also pair beautifully with a simple green salad for a lighter meal. For a vegetarian option, try serving them with a flavorful mushroom gravy or a dollop of sour cream and chives.
And don’t be afraid to experiment with variations! Want to add a little kick? Incorporate some finely chopped jalapeños or a pinch of red pepper flakes into the potato mixture. Craving something even cheesier? Try using a blend of different cheeses, such as Gruyere or sharp cheddar, for a more complex flavor profile. You could even add some crispy bacon bits for an extra layer of savory goodness. Another fun variation is to use different types of greens, like kale or spinach, instead of cabbage. The key is to have fun and make it your own!
These Cheesy Colcannon Balls are also incredibly kid-friendly. The cheesy, potatoey goodness is sure to appeal to even the pickiest eaters. You can even get your kids involved in the cooking process they’ll love helping to roll the balls and coat them in breadcrumbs. It’s a great way to teach them about cooking and encourage them to try new foods.
I’ve poured my heart into perfecting this recipe, and I’m confident that you’ll love it as much as I do. It’s a simple, satisfying, and utterly delicious way to enjoy the classic flavors of colcannon with a cheesy twist. So, what are you waiting for? Gather your ingredients, preheat your oven, and get ready to experience the magic of these incredible Cheesy Colcannon Balls.
I’m so excited for you to try this recipe! Once you’ve made them, please come back and share your experience in the comments below. I’d love to hear what you think, what variations you tried, and how you served them. Your feedback is invaluable, and it helps me to continue creating recipes that you’ll love. Don’t forget to snap a picture of your creations and tag me on social media I can’t wait to see your Cheesy Colcannon Ball masterpieces! Happy cooking!
Cheesy Colcannon Balls: A Delicious Irish Recipe
Golden, crispy fried balls of creamy mashed potatoes, cabbage, bacon, and cheese a delicious twist on traditional Irish Colcannon!
Ingredients
- 1.5 lbs Russet Potatoes, peeled and quartered
- 1 cup Milk
- 4 tbsp Butter, divided
- 1 cup Green Cabbage, finely shredded
- 1/2 cup Cooked Bacon, crumbled
- 1/2 cup Cheddar Cheese, shredded, plus extra for topping
- 1/4 cup Green Onions, thinly sliced
- 1 large Egg, lightly beaten
- 1/2 cup All-Purpose Flour, plus extra for dredging
- 1 cup Breadcrumbs
- Vegetable Oil, for frying
- Salt and Black Pepper to taste
- Optional: Pinch of Nutmeg
Instructions
- Place the peeled and quartered potatoes in a large pot and cover with cold water. Add a generous pinch of salt. Bring to a boil over high heat, then reduce heat to medium and simmer for 15-20 minutes, or until the potatoes are fork-tender. You should be able to easily pierce them with a fork without resistance.
- Once the potatoes are cooked, drain them thoroughly in a colander. Return the potatoes to the pot. Add 2 tablespoons of butter and the milk. Using a potato masher or a ricer, mash the potatoes until smooth and creamy. Be careful not to over-mash, as this can make them gluey. A ricer will give you the smoothest results.
- While the potatoes are boiling, melt the remaining 2 tablespoons of butter in a large skillet over medium heat. Add the shredded green cabbage and sauté for 5-7 minutes, or until the cabbage is softened and slightly wilted. Stir frequently to prevent burning. You want it to be tender, not browned.
- Add the sautéed cabbage, crumbled bacon, shredded cheddar cheese, and sliced green onions to the mashed potatoes. Stir well to combine all the ingredients. Season with salt, black pepper, and a pinch of nutmeg (if using). Taste and adjust seasonings as needed. Remember, the bacon and cheese are already salty, so go easy on the salt at first.
- Spread the colcannon mixture out on a baking sheet or in a shallow dish to cool slightly. This will make it easier to handle when forming the balls. Allow it to cool for at least 30 minutes in the refrigerator. This step is crucial for preventing the balls from falling apart during frying.
- Set up a breading station with three shallow dishes. In the first dish, place the all-purpose flour. In the second dish, place the lightly beaten egg. In the third dish, place the breadcrumbs. Make sure you have enough of each ingredient to fully coat all the colcannon balls.
- Take a heaping tablespoon of the cooled colcannon mixture and roll it into a ball, about 1.5 inches in diameter. The size is up to you, but keep them relatively uniform for even cooking. Repeat until all the colcannon mixture has been used. You should get approximately 15-20 balls, depending on the size.
- Gently roll each colcannon ball in the flour, ensuring it is completely coated. Shake off any excess flour. The flour helps the egg adhere to the ball.
- Dip the floured colcannon ball into the beaten egg, making sure it is fully coated. Allow any excess egg to drip off.
- Roll the egg-coated colcannon ball in the breadcrumbs, pressing gently to ensure the breadcrumbs adhere well. The breadcrumbs will give the balls a crispy, golden-brown crust when fried.
- Place the breaded colcannon balls on a clean baking sheet lined with parchment paper. Cover them loosely with plastic wrap and refrigerate for at least 30 minutes. This helps the breading set and prevents the balls from falling apart during frying. You can even chill them for longer, up to a few hours, if needed.
- Pour about 2-3 inches of vegetable oil into a large, heavy-bottomed pot or deep fryer. Heat the oil over medium-high heat to 350°F (175°C). Use a thermometer to monitor the oil temperature. Maintaining the correct temperature is essential for achieving crispy, evenly cooked colcannon balls. If the oil is too hot, the balls will brown too quickly on the outside and remain cold in the center. If the oil is not hot enough, they will absorb too much oil and become greasy.
- Carefully add the breaded colcannon balls to the hot oil in batches, being careful not to overcrowd the pot. Overcrowding will lower the oil temperature and result in soggy balls. Fry for 2-3 minutes per side, or until the balls are golden brown and heated through.
- Use a slotted spoon or spider to remove the fried colcannon balls from the oil and place them on a plate lined with paper towels to drain excess oil.
- If you are frying multiple batches, you can keep the cooked colcannon balls warm in a preheated oven at 200°F (95°C) until ready to serve.
- While the colcannon balls are still warm, sprinkle them with extra shredded cheddar cheese. The cheese will melt slightly from the heat.
- Garnish with a sprinkle of fresh green onions or a dollop of sour cream or crème fraîche.
- Serve the cheesy colcannon balls immediately while they are hot and crispy. They are best enjoyed fresh.
- Offer a variety of dipping sauces, such as ranch dressing, blue cheese dressing, or a spicy aioli.
Notes
- Cooling the colcannon mixture and chilling the breaded balls are crucial for preventing them from falling apart during frying. Don’t skip these steps!
- Use a thermometer to ensure the oil is at the correct temperature for frying.
- Fry in batches to avoid overcrowding the pot and lowering the oil temperature.
- For a smoother mashed potato base, use a ricer instead of a potato masher.
- Feel free to experiment with different cheeses and herbs in the colcannon mixture.


Leave a Comment