

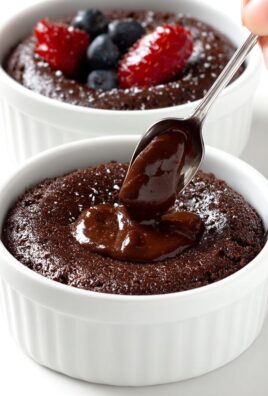
Peanut Butter Blossom Cookies: the very name conjures up images of holiday baking, cheerful gatherings, and that irresistible combination of peanut butter and chocolate. But have you ever wondered about the story behind these iconic treats? These delightful cookies, with their signature Hershey’s Kiss perched perfectly on top, have become a staple in American households, especially during Christmas. While the exact origin is debated, many believe they gained popularity in the 1950s, quickly becoming a beloved classic thanks to their simplicity and crowd-pleasing flavor.
What makes Peanut Butter Blossom Cookies so universally adored? It’s a symphony of textures and tastes! The soft, slightly chewy peanut butter cookie base provides a nutty warmth that perfectly complements the sweet, melt-in-your-mouth chocolate Kiss. They are incredibly easy to make, requiring minimal ingredients and effort, making them perfect for baking with kids or whipping up a batch for a last-minute gathering. The combination of salty and sweet is a timeless winner, and the visual appeal of the blossom shape makes them as beautiful as they are delicious. I’m excited to share my tried-and-true recipe with you, ensuring your cookies turn out perfectly every time. Get ready to experience the joy of baking and savoring these classic treats!

Ingredients:
- 1 1/4 cups all-purpose flour
- 1/2 teaspoon baking soda
- 1/4 teaspoon baking powder
- 1/4 teaspoon salt
- 1/2 cup (1 stick) unsalted butter, softened
- 1/2 cup creamy peanut butter
- 1/2 cup granulated sugar, plus more for rolling
- 1/2 cup packed light brown sugar
- 1 large egg
- 2 tablespoons milk
- 1 teaspoon vanilla extract
- Approximately 48 milk chocolate Hershey’s Kisses, unwrapped
Preparing the Dough:
- Combine the dry ingredients: In a medium bowl, whisk together the flour, baking soda, baking powder, and salt. This ensures that the leavening agents are evenly distributed throughout the dough, resulting in a consistent texture. Set aside for now.
- Cream together the butter and peanut butter: In a large bowl (or the bowl of a stand mixer), cream together the softened butter and peanut butter until light and fluffy. This usually takes about 2-3 minutes. The mixture should be smooth and well combined. This step is crucial for creating a tender cookie.
- Add the sugars: Gradually add the granulated sugar and brown sugar to the butter mixture, beating until well combined. Scrape down the sides of the bowl as needed to ensure everything is incorporated. The sugars will help to create a slightly chewy texture and add sweetness.
- Incorporate the egg, milk, and vanilla: Beat in the egg, followed by the milk and vanilla extract. Mix until everything is well combined. The egg acts as a binder, while the milk adds moisture and the vanilla enhances the flavor.
- Gradually add the dry ingredients: Gradually add the dry ingredients to the wet ingredients, mixing on low speed until just combined. Be careful not to overmix the dough, as this can result in tough cookies. Mix until the flour is just incorporated and no streaks remain.
- Chill the dough: Cover the bowl with plastic wrap and refrigerate the dough for at least 30 minutes. This chilling period allows the gluten to relax, which prevents the cookies from spreading too much during baking. It also makes the dough easier to handle. You can chill it for longer, even overnight, if needed.
Shaping and Baking the Cookies:
- Preheat the oven: Preheat your oven to 375°F (190°C). Line baking sheets with parchment paper or silicone baking mats. This will prevent the cookies from sticking and make cleanup easier.
- Shape the cookies: Remove the chilled dough from the refrigerator. Roll the dough into 1-inch balls. This size will yield cookies that are the perfect size for a Hershey’s Kiss.
- Roll in sugar: Pour some granulated sugar into a small bowl. Roll each dough ball in the sugar, coating it evenly. This adds a touch of sweetness and a beautiful sparkle to the finished cookies.
- Place on baking sheets: Place the sugared dough balls onto the prepared baking sheets, spacing them about 2 inches apart. This allows for proper air circulation and prevents the cookies from sticking together as they bake.
- Bake the cookies: Bake for 8-10 minutes, or until the edges are lightly golden brown. The centers of the cookies will still appear slightly soft. Be careful not to overbake the cookies, as they will become dry and crumbly.
- Cool slightly: Remove the baking sheets from the oven and let the cookies cool on the baking sheets for 2-3 minutes. This allows them to firm up slightly before you add the Hershey’s Kisses.
Adding the Hershey’s Kisses:
- Press in the Hershey’s Kisses: While the cookies are still warm, gently press a Hershey’s Kiss into the center of each cookie. The warmth of the cookie will slightly melt the chocolate, helping it to adhere.
- Cool completely: Transfer the cookies to a wire rack to cool completely. This will prevent them from sticking to the baking sheets and allow them to cool evenly.
- Enjoy! Once the cookies are completely cool, they are ready to enjoy! Store them in an airtight container at room temperature for up to 3 days.
Tips for Perfect Peanut Butter Blossoms:
- Use softened butter: Make sure your butter is properly softened before creaming it with the peanut butter. This will ensure a smooth and creamy mixture.
- Don’t overmix the dough: Overmixing the dough can result in tough cookies. Mix until the flour is just incorporated.
- Chill the dough: Chilling the dough is essential for preventing the cookies from spreading too much during baking.
- Don’t overbake the cookies: Overbaked cookies will be dry and crumbly. Bake until the edges are lightly golden brown and the centers are still slightly soft.
- Press in the Hershey’s Kisses while the cookies are warm: This will help the chocolate adhere to the cookies.
- Variations: You can experiment with different types of Hershey’s Kisses, such as dark chocolate or caramel-filled. You can also add chopped nuts or sprinkles to the dough for extra flavor and texture.
Troubleshooting:
- Cookies are spreading too much: This could be due to not chilling the dough long enough, using too much butter, or overmixing the dough. Make sure to chill the dough for at least 30 minutes and avoid overmixing.
- Cookies are dry: This could be due to overbaking the cookies or using too much flour. Bake until the edges are lightly golden brown and the centers are still slightly soft.
- Hershey’s Kisses are falling off: Make sure to press the Hershey’s Kisses into the cookies while they are still warm. This will help the chocolate adhere.
Storage Instructions:
Store the cooled cookies in an airtight container at room temperature for up to 3 days. They can also be frozen for longer storage. To freeze, place the cookies in a single layer on a baking sheet and freeze until solid. Then, transfer them to a freezer-safe bag or container. Thaw at room temperature before serving.

Conclusion:
And there you have it! These Peanut Butter Blossom Cookies are more than just a sweet treat; they’re a nostalgic trip down memory lane, a guaranteed crowd-pleaser, and surprisingly simple to make. I truly believe this recipe is a must-try for anyone who loves the classic combination of peanut butter and chocolate. The soft, melt-in-your-mouth texture of the peanut butter cookie, perfectly complemented by the rich, creamy Hershey’s Kiss, is an experience your taste buds won’t soon forget.
But what makes these cookies truly special is their versatility. While the traditional recipe is undeniably delicious, there’s plenty of room to get creative and personalize them to your liking.
Serving Suggestions and Variations:
* For a festive touch: Roll the dough in colored sprinkles before baking, especially around the holidays. Red and green for Christmas, pastel shades for Easter, or even team colors for game day!
* Nutty Delight: Add chopped peanuts to the dough for an extra crunch and intensified peanut butter flavor.
* Chocolate Overload: Use dark chocolate Hershey’s Kisses for a richer, more intense chocolate experience. You could even try using caramel-filled Kisses for a gooey surprise!
* Spice it Up: Add a pinch of cinnamon or nutmeg to the dough for a warm, comforting flavor that’s perfect for fall.
* Gluten-Free Option: Substitute the all-purpose flour with a gluten-free blend for a delicious treat that everyone can enjoy. Just be sure to use a blend that’s designed for baking and contains xanthan gum for binding.
* Serving Ideas: These cookies are fantastic on their own, but they also pair beautifully with a cold glass of milk, a warm cup of coffee, or even a scoop of vanilla ice cream. They’re perfect for bake sales, holiday gatherings, or simply a sweet treat to enjoy after dinner. Consider arranging them on a pretty platter for a visually appealing presentation. They also make a wonderful homemade gift!
I’ve made these cookies countless times, and they’re always a hit. The recipe is straightforward, the ingredients are readily available, and the results are consistently delicious. I’m confident that you’ll find them just as easy and enjoyable to make.
So, what are you waiting for? Gather your ingredients, preheat your oven, and get ready to bake up a batch of these irresistible Peanut Butter Blossom Cookies. I promise you won’t regret it!
And most importantly, I’d love to hear about your experience! Did you try any of the variations I suggested? Did you add your own unique twist? Share your photos and stories in the comments below. Let’s spread the joy of baking and create a community of cookie lovers! Happy baking, and enjoy every delicious bite! Don’t forget to rate the recipe once you’ve tried it! Your feedback helps others discover this amazing cookie recipe. I can’t wait to hear how much you love these Peanut Butter Blossom Cookies!
Peanut Butter Blossom Cookies: The Ultimate Recipe & Baking Guide
Soft peanut butter cookies topped with a milk chocolate Hershey's Kiss. Perfect for holidays or anytime!
Ingredients
- 1 1/4 cups all-purpose flour
- 1/2 teaspoon baking soda
- 1/4 teaspoon baking powder
- 1/4 teaspoon salt
- 1/2 cup (1 stick) unsalted butter, softened
- 1/2 cup creamy peanut butter
- 1/2 cup granulated sugar, plus more for rolling
- 1/2 cup packed light brown sugar
- 1 large egg
- 2 tablespoons milk
- 1 teaspoon vanilla extract
- Approximately 48 milk chocolate Hershey’s Kisses, unwrapped
Instructions
- Combine Dry Ingredients: In a medium bowl, whisk together the flour, baking soda, baking powder, and salt. Set aside.
- Cream Butter and Peanut Butter: In a large bowl (or stand mixer), cream together the softened butter and peanut butter until light and fluffy (2-3 minutes).
- Add Sugars: Gradually add the granulated sugar and brown sugar to the butter mixture, beating until well combined. Scrape down the sides of the bowl as needed.
- Incorporate Egg, Milk, and Vanilla: Beat in the egg, followed by the milk and vanilla extract. Mix until well combined.
- Gradually Add Dry Ingredients: Gradually add the dry ingredients to the wet ingredients, mixing on low speed until just combined. Do not overmix.
- Chill Dough: Cover the bowl with plastic wrap and refrigerate the dough for at least 30 minutes (or longer, even overnight).
- Preheat Oven: Preheat oven to 375°F (190°C). Line baking sheets with parchment paper or silicone baking mats.
- Shape Cookies: Remove chilled dough from the refrigerator. Roll the dough into 1-inch balls.
- Roll in Sugar: Pour some granulated sugar into a small bowl. Roll each dough ball in the sugar, coating it evenly.
- Place on Baking Sheets: Place the sugared dough balls onto the prepared baking sheets, spacing them about 2 inches apart.
- Bake Cookies: Bake for 8-10 minutes, or until the edges are lightly golden brown. The centers of the cookies will still appear slightly soft.
- Cool Slightly: Remove the baking sheets from the oven and let the cookies cool on the baking sheets for 2-3 minutes.
- Press in Hershey’s Kisses: While the cookies are still warm, gently press a Hershey’s Kiss into the center of each cookie.
- Cool Completely: Transfer the cookies to a wire rack to cool completely.
- Enjoy! Store in an airtight container at room temperature for up to 3 days.
Notes
- Use softened butter for a smooth and creamy mixture.
- Don’t overmix the dough to avoid tough cookies.
- Chilling the dough is essential to prevent excessive spreading.
- Don’t overbake the cookies; bake until edges are lightly golden brown and centers are slightly soft.
- Press in the Hershey’s Kisses while the cookies are still warm for better adhesion.
- Variations: Experiment with different types of Hershey’s Kisses (dark chocolate, caramel-filled). Add chopped nuts or sprinkles to the dough.
- Troubleshooting:
* Cookies spreading too much: Chill dough longer, use less butter, avoid overmixing.
* Cookies are dry: Don’t overbake, use correct flour amount.
* Hershey’s Kisses falling off: Press into warm cookies. - Storage: Store cooled cookies in an airtight container at room temperature for up to 3 days. Freeze for longer storage: freeze in a single layer, then transfer to a freezer-safe bag. Thaw at room temperature.

Leave a Comment