

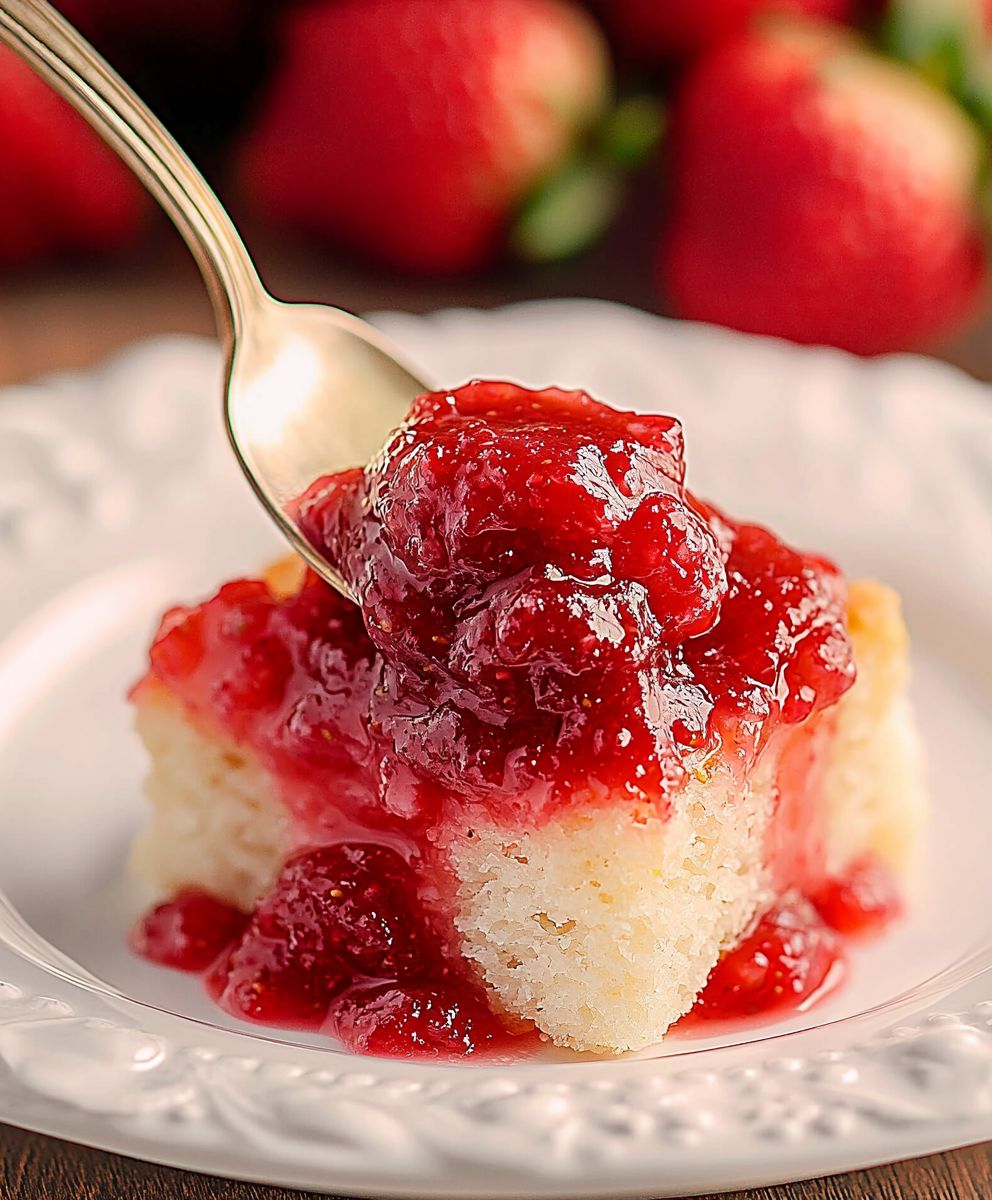
Strawberry Rhubarb Preserves: the taste of sunshine bottled! Imagine spreading a vibrant, ruby-red jam across your morning toast, the sweet-tart flavor exploding on your tongue, instantly transporting you to a sun-drenched summer garden. That’s the magic of homemade strawberry rhubarb preserves, and I’m thrilled to share my foolproof recipe with you.
Rhubarb, often called the “pie plant,” has a fascinating history. While its exact origins are debated, it’s believed to have originated in Asia and made its way to Europe in the Middle Ages. It wasn’t until the 18th and 19th centuries that rhubarb became a popular ingredient in North American desserts and preserves, often paired with strawberries to balance its tartness. This combination is a match made in culinary heaven!
People adore strawberry rhubarb preserves for several reasons. The delightful contrast between the sweet strawberries and the tangy rhubarb creates a complex and irresistible flavor profile. The texture, a perfect balance of chunky fruit and smooth, syrupy goodness, is simply divine. Plus, making your own preserves is incredibly satisfying. It’s a way to capture the fleeting flavors of spring and summer and enjoy them all year round. Whether you’re a seasoned jam maker or a complete beginner, this recipe is easy to follow and guarantees delicious results. Get ready to experience the joy of homemade!

Ingredients:
- 4 cups (about 1 pound) fresh rhubarb, trimmed and cut into 1/2-inch pieces
- 4 cups (about 1 pound) fresh strawberries, hulled and quartered
- 6 cups granulated sugar
- 1/4 cup bottled lemon juice (for pectin activation and preservation)
- 1/2 teaspoon butter or margarine (to reduce foaming)
- Pinch of salt (enhances flavor)
- Optional: 1 teaspoon vanilla extract (added at the end for extra flavor)
Preparing the Fruit:
- Wash and Prepare the Rhubarb: Thoroughly wash the rhubarb stalks under cold running water to remove any dirt or debris. Trim off the leafy ends (rhubarb leaves are poisonous and should not be consumed). Cut the stalks into 1/2-inch pieces. Uniformity in size helps ensure even cooking. Place the chopped rhubarb in a large, heavy-bottomed pot or Dutch oven.
- Wash and Prepare the Strawberries: Rinse the strawberries gently under cold water. Hull the strawberries (remove the green tops) using a strawberry huller or a paring knife. Quarter the strawberries, ensuring they are roughly the same size as the rhubarb pieces. Add the quartered strawberries to the pot with the rhubarb.
Combining and Macerating the Fruit:
- Add Sugar and Lemon Juice: Pour the granulated sugar over the rhubarb and strawberries in the pot. Add the bottled lemon juice. The lemon juice is crucial for activating the pectin in the fruit, which helps the preserves to set properly. It also acts as a natural preservative.
- Macerate the Fruit: Gently stir the mixture to combine the fruit, sugar, and lemon juice. Cover the pot with a lid or plastic wrap and let it sit at room temperature for at least 2-3 hours, or preferably overnight, to macerate. Maceration allows the sugar to draw out the juices from the fruit, creating a naturally sweet and flavorful syrup. This step is essential for achieving a good consistency in the finished preserves. Stir the mixture occasionally during the maceration process to ensure the sugar dissolves evenly. You’ll notice the fruit releasing a significant amount of liquid as it sits.
Cooking the Preserves:
- Bring to a Boil: Place the pot with the macerated fruit mixture over medium-high heat. Add the butter or margarine. This helps to reduce foaming during the cooking process, preventing the preserves from boiling over. Stir the mixture constantly until the sugar is completely dissolved. Once the sugar is dissolved, bring the mixture to a rolling boil. A rolling boil is a boil that continues even when stirred.
- Cook to Setting Point: Continue to cook the preserves at a rolling boil, stirring frequently to prevent sticking and scorching. As the mixture cooks, it will thicken and the fruit will soften. The cooking time will vary depending on the heat of your stove and the moisture content of the fruit, but it typically takes about 20-30 minutes.
- Test for Setting Point: There are several ways to test if the preserves have reached the setting point:
- Cold Plate Test: Place a small plate in the freezer before you start cooking the preserves. To test, spoon a small amount of the hot preserves onto the cold plate. Return the plate to the freezer for 1-2 minutes. Then, push the preserves with your finger. If the surface wrinkles, the preserves are ready. If the preserves are still runny, continue cooking and test again in a few minutes.
- Candy Thermometer: Use a candy thermometer to monitor the temperature of the preserves. The setting point for preserves is typically around 220°F (104°C). Make sure the thermometer is not touching the bottom of the pot.
- Spoon Test: Dip a cold metal spoon into the boiling preserves. Lift the spoon and let the preserves drip off the side. If the drips come together and form a sheet or a thick, slow drip, the preserves are ready.
- Remove from Heat: Once the preserves have reached the setting point, remove the pot from the heat. If using, stir in the vanilla extract. Skim off any foam that may have formed on the surface of the preserves using a clean spoon.
Preparing the Jars and Lids:
- Sterilize Jars: Sterilizing the jars is crucial for preventing spoilage and ensuring the preserves are safe to eat. There are several methods for sterilizing jars:
- Boiling Water Bath: Place the jars in a large pot with enough water to cover them by at least 1 inch. Bring the water to a boil and boil for 10 minutes. Remove the jars from the boiling water using jar lifters and place them on a clean towel-lined surface to dry.
- Dishwasher: Wash the jars in the dishwasher on the hottest setting with a sanitizing cycle. Leave the jars in the dishwasher until you are ready to fill them.
- Oven: Preheat the oven to 250°F (120°C). Place the clean jars on a baking sheet and heat them in the oven for 20 minutes.
- Prepare Lids and Rings: Wash the canning lids and rings in hot, soapy water. The lids do not need to be boiled, but some people prefer to simmer them in hot water to soften the sealing compound. Follow the manufacturer’s instructions for preparing the lids.
Filling and Processing the Jars:
- Fill the Jars: Ladle the hot preserves into the sterilized jars, leaving 1/4 inch of headspace (the space between the top of the preserves and the top of the jar). Use a clean, damp cloth to wipe the rim of each jar to remove any spills or drips.
- Remove Air Bubbles: Insert a clean utensil (like a small spatula or bubble remover) down the sides of the jar to release any trapped air bubbles. Gently tap the jar on the counter to help release any remaining air bubbles.
- Place Lids and Rings: Place a sterilized lid on each jar, ensuring the sealing compound is facing down. Screw on the canning ring until it is fingertip tight (not too tight, not too loose).
- Process in a Boiling Water Bath: Place the filled jars in a boiling water bath canner. Make sure the jars are completely covered with water by at least 1 inch. Bring the water to a rolling boil and process the jars for 10 minutes for half-pint or pint jars. Adjust processing time for altitude:
- 1,001 to 3,000 feet: Add 5 minutes
- 3,001 to 6,000 feet: Add 10 minutes
- 6,001 to 8,000 feet: Add 15 minutes
- 8,001 to 10,000 feet: Add 20 minutes
- Cool and Check Seals: After processing, turn off the heat and carefully remove the jars from the canner using jar lifters. Place the jars on a towel-lined surface, leaving space between them for air circulation. Let the jars cool completely, undisturbed, for 12-24 hours. As the jars cool, you should hear a “popping” sound as the lids seal. After the jars have cooled completely, check the seals by pressing down on the center of each lid. If the lid is concave and does not flex, the jar is properly sealed. If the lid flexes, the jar is not sealed and should be reprocessed with a new lid or stored in the refrigerator and used within a few weeks.
Storing the Preserves:
- Remove Rings: Once you’ve confirmed that the jars are properly sealed, remove the canning rings. This prevents moisture from accumulating under the rings and causing rust.
- Label and Store: Label each jar with the date and contents. Store the sealed jars in a cool, dark, and dry place. Properly processed and sealed preserves can be stored for up to 1 year.
- Refrigerate After Opening: Once a jar is opened, refrigerate it and use it within a few weeks.
Conclusion:
And there you have it! I truly believe this Strawberry Rhubarb Preserves recipe is a must-try, and here’s why: it’s a delightful dance of sweet and tart, capturing the essence of spring and early summer in a single jar. The vibrant color alone is enough to brighten any breakfast table, but the taste? Oh, the taste is simply divine. It’s a nostalgic flavor that evokes memories of grandma’s kitchen, yet it’s sophisticated enough to impress even the most discerning palate. But beyond the incredible flavor, this recipe is also surprisingly easy to make. Don’t let the word “preserves” intimidate you. With just a few simple ingredients and a little bit of patience, you can create a batch of homemade goodness that will last for weeks (if you can resist eating it all at once, that is!). Plus, making your own preserves allows you to control the ingredients, ensuring that you’re using the highest quality fruit and avoiding any unwanted additives or preservatives. It’s a win-win! Why is this Strawberry Rhubarb Preserves recipe a must-try? Because it’s a taste of sunshine in a jar, a celebration of seasonal flavors, and a testament to the simple joys of homemade cooking. Now, let’s talk about serving suggestions and variations. While I personally love spreading this preserves generously on a warm, crusty piece of bread or a freshly baked scone, the possibilities are truly endless. Imagine swirling it into your morning yogurt or oatmeal for a burst of fruity flavor. Or, use it as a glaze for grilled chicken or pork for a sweet and tangy twist. You could even get creative and use it as a filling for thumbprint cookies or a topping for cheesecake. Here are a few other ideas to get your creative juices flowing:Serving Suggestions:
- Classic Toast Topper: Spread generously on toast, bagels, or English muffins.
- Yogurt Parfait Perfection: Layer with yogurt and granola for a delicious and healthy breakfast or snack.
- Baking Buddy: Use as a filling for pies, tarts, or pastries.
- Cheese Board Companion: Serve alongside your favorite cheeses for a sweet and savory pairing.
- Ice Cream Indulgence: Drizzle over vanilla ice cream for a simple yet satisfying dessert.
Variations to Explore:
- Spice it Up: Add a pinch of ground ginger or cinnamon for a warm and comforting flavor.
- Citrus Zest: Incorporate the zest of an orange or lemon for a bright and zesty twist.
- Berry Bonanza: Combine with other berries, such as raspberries or blueberries, for a more complex flavor profile.
- Vanilla Bean Infusion: Add a vanilla bean pod to the pot while cooking for a subtle and aromatic flavor.
- Boozy Boost: Stir in a tablespoon or two of your favorite liqueur, such as Grand Marnier or Kirsch, for an extra kick.
Strawberry Rhubarb Preserves: The Ultimate Guide to Making Delicious Homemade Jam
- Total Time: 50 minutes – 2 hours 50 minutes
- Yield: 4–6 half-pint jars 1x
Description
Homemade Strawberry Rhubarb Preserves bursting with fresh flavor. This classic recipe is perfect for spreading on toast, scones, or enjoying with yogurt.
Ingredients
- 4 cups (about 1 pound) fresh rhubarb, trimmed and cut into 1/2-inch pieces
- 4 cups (about 1 pound) fresh strawberries, hulled and quartered
- 6 cups granulated sugar
- 1/4 cup bottled lemon juice (for pectin activation and preservation)
- 1/2 teaspoon butter or margarine (to reduce foaming)
- Pinch of salt (enhances flavor)
- Optional: 1 teaspoon vanilla extract (added at the end for extra flavor)
Instructions
- Wash and Prepare the Rhubarb: Thoroughly wash the rhubarb stalks under cold running water to remove any dirt or debris. Trim off the leafy ends (rhubarb leaves are poisonous and should not be consumed). Cut the stalks into 1/2-inch pieces. Uniformity in size helps ensure even cooking. Place the chopped rhubarb in a large, heavy-bottomed pot or Dutch oven.
- Wash and Prepare the Strawberries: Rinse the strawberries gently under cold water. Hull the strawberries (remove the green tops) using a strawberry huller or a paring knife. Quarter the strawberries, ensuring they are roughly the same size as the rhubarb pieces. Add the quartered strawberries to the pot with the rhubarb.
- Add Sugar and Lemon Juice: Pour the granulated sugar over the rhubarb and strawberries in the pot. Add the bottled lemon juice. The lemon juice is crucial for activating the pectin in the fruit, which helps the preserves to set properly. It also acts as a natural preservative.
- Macerate the Fruit: Gently stir the mixture to combine the fruit, sugar, and lemon juice. Cover the pot with a lid or plastic wrap and let it sit at room temperature for at least 2-3 hours, or preferably overnight, to macerate. Maceration allows the sugar to draw out the juices from the fruit, creating a naturally sweet and flavorful syrup. This step is essential for achieving a good consistency in the finished preserves. Stir the mixture occasionally during the maceration process to ensure the sugar dissolves evenly. You’ll notice the fruit releasing a significant amount of liquid as it sits.
- Bring to a Boil: Place the pot with the macerated fruit mixture over medium-high heat. Add the butter or margarine. This helps to reduce foaming during the cooking process, preventing the preserves from boiling over. Stir the mixture constantly until the sugar is completely dissolved. Once the sugar is dissolved, bring the mixture to a rolling boil. A rolling boil is a boil that continues even when stirred.
- Cook to Setting Point: Continue to cook the preserves at a rolling boil, stirring frequently to prevent sticking and scorching. As the mixture cooks, it will thicken and the fruit will soften. The cooking time will vary depending on the heat of your stove and the moisture content of the fruit, but it typically takes about 20-30 minutes.
- Test for Setting Point: There are several ways to test if the preserves have reached the setting point:
- Cold Plate Test: Place a small plate in the freezer before you start cooking the preserves. To test, spoon a small amount of the hot preserves onto the cold plate. Return the plate to the freezer for 1-2 minutes. Then, push the preserves with your finger. If the surface wrinkles, the preserves are ready. If the preserves are still runny, continue cooking and test again in a few minutes.
- Candy Thermometer: Use a candy thermometer to monitor the temperature of the preserves. The setting point for preserves is typically around 220°F (104°C). Make sure the thermometer is not touching the bottom of the pot.
- Spoon Test: Dip a cold metal spoon into the boiling preserves. Lift the spoon and let the preserves drip off the side. If the drips come together and form a sheet or a thick, slow drip, the preserves are ready.
- Remove from Heat: Once the preserves have reached the setting point, remove the pot from the heat. If using, stir in the vanilla extract. Skim off any foam that may have formed on the surface of the preserves using a clean spoon.
- Sterilize Jars: Sterilizing the jars is crucial for preventing spoilage and ensuring the preserves are safe to eat. There are several methods for sterilizing jars:
- Boiling Water Bath: Place the jars in a large pot with enough water to cover them by at least 1 inch. Bring the water to a boil and boil for 10 minutes. Remove the jars from the boiling water using jar lifters and place them on a clean towel-lined surface to dry.
- Dishwasher: Wash the jars in the dishwasher on the hottest setting with a sanitizing cycle. Leave the jars in the dishwasher until you are ready to fill them.
- Oven: Preheat the oven to 250°F (120°C). Place the clean jars on a baking sheet and heat them in the oven for 20 minutes.
- Prepare Lids and Rings: Wash the canning lids and rings in hot, soapy water. The lids do not need to be boiled, but some people prefer to simmer them in hot water to soften the sealing compound. Follow the manufacturer’s instructions for preparing the lids.
- Fill the Jars: Ladle the hot preserves into the sterilized jars, leaving 1/4 inch of headspace (the space between the top of the preserves and the top of the jar). Use a clean, damp cloth to wipe the rim of each jar to remove any spills or drips.
- Remove Air Bubbles: Insert a clean utensil (like a small spatula or bubble remover) down the sides of the jar to release any trapped air bubbles. Gently tap the jar on the counter to help release any remaining air bubbles.
- Place Lids and Rings: Place a sterilized lid on each jar, ensuring the sealing compound is facing down. Screw on the canning ring until it is fingertip tight (not too tight, not too loose).
- Process in a Boiling Water Bath: Place the filled jars in a boiling water bath canner. Make sure the jars are completely covered with water by at least 1 inch. Bring the water to a rolling boil and process the jars for 10 minutes for half-pint or pint jars. Adjust processing time for altitude:
- 1,001 to 3,000 feet: Add 5 minutes
- 3,001 to 6,000 feet: Add 10 minutes
- 6,001 to 8,000 feet: Add 15 minutes
- 8,001 to 10,000 feet: Add 20 minutes
- Cool and Check Seals: After processing, turn off the heat and carefully remove the jars from the canner using jar lifters. Place the jars on a towel-lined surface, leaving space between them for air circulation. Let the jars cool completely, undisturbed, for 12-24 hours. As the jars cool, you should hear a “popping” sound as the lids seal. After the jars have cooled completely, check the seals by pressing down on the center of each lid. If the lid is concave and does not flex, the jar is properly sealed. If the lid flexes, the jar is not sealed and should be reprocessed with a new lid or stored in the refrigerator and used within a few weeks.
- Remove Rings: Once you’ve confirmed that the jars are properly sealed, remove the canning rings. This prevents moisture from accumulating under the rings and causing rust.
- Label and Store: Label each jar with the date and contents. Store the sealed jars in a cool, dark, and dry place. Properly processed and sealed preserves can be stored for up to 1 year.
- Refrigerate After Opening: Once a jar is opened, refrigerate it and use it within a few weeks.
Notes
- Rhubarb leaves are poisonous and should not be consumed.
- Macerating the fruit is essential for achieving a good consistency in the finished preserves.
- The setting point for preserves is typically around 220°F (104°C) if using a candy thermometer.
- Sterilizing the jars is crucial for preventing spoilage.
- Adjust processing time for altitude as indicated.
- If a jar does not seal properly, reprocess with a new lid or store in the refrigerator and use within a few weeks.
- Prep Time: 30 minutes
- Cook Time: 20 minutes

Leave a Comment