

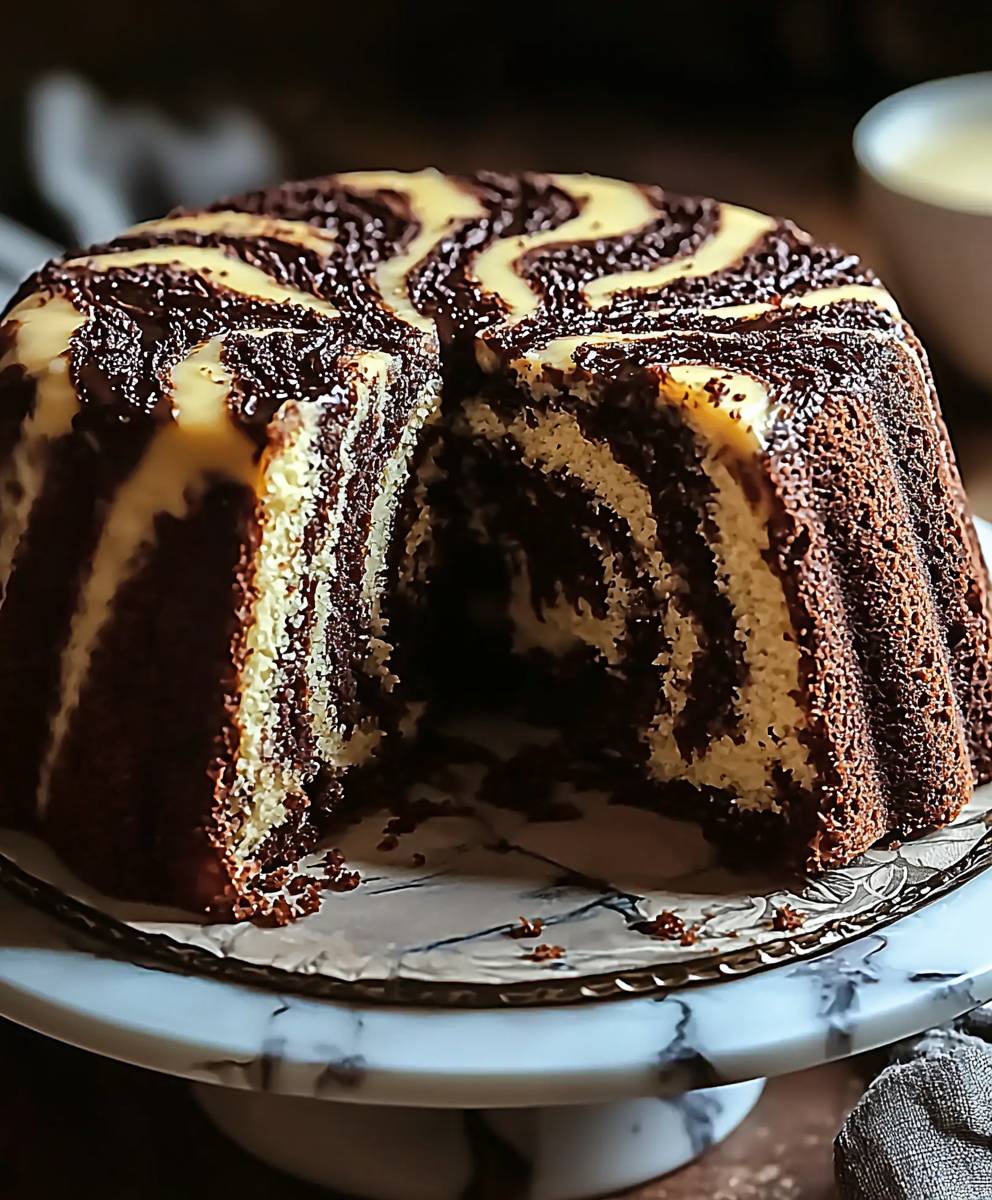
Marble Cake: Just the name conjures up images of swirling chocolate and vanilla, a delightful dance of flavors in every bite. Have you ever wondered how such a simple cake could be so visually stunning and utterly delicious? This isn’t just any cake; it’s a classic that has graced tables for generations, a testament to its enduring appeal.
The history of Marble Cake is as rich and varied as its appearance. While its exact origins are debated, similar swirled cakes have been found in European baking traditions dating back centuries. It gained immense popularity in America during the 19th century, becoming a staple in home kitchens and bakeries alike. The beauty of marble cake lies in its simplicity and the satisfying contrast of flavors. The gentle blend of vanilla and chocolate creates a harmonious balance that’s neither too rich nor too bland, making it a crowd-pleaser for all ages.
What makes this cake so beloved? It’s the moist, tender crumb, the beautiful marbled effect, and the comforting flavors that evoke feelings of nostalgia and warmth. It’s perfect for a casual afternoon tea, a celebratory birthday, or simply a sweet treat to brighten your day. Plus, it’s surprisingly easy to make! So, let’s dive into this timeless recipe and create a stunning marble cake that will impress your family and friends.

Ingredients:
- 2 1/2 cups (300g) all-purpose flour, plus more for dusting
- 1 teaspoon baking powder
- 1/2 teaspoon baking soda
- 1/4 teaspoon salt
- 1 cup (2 sticks or 226g) unsalted butter, softened
- 1 3/4 cups (350g) granulated sugar
- 2 large eggs
- 2 large egg yolks
- 1 teaspoon vanilla extract
- 1 cup (240ml) buttermilk
- 3 tablespoons unsweetened cocoa powder
- 2 tablespoons hot water
Preparing the Batter:
- Preheat your oven and prepare your pan. First things first, let’s get that oven preheating to 350°F (175°C). While it’s warming up, grease and flour a 9×13 inch baking pan. Make sure you get into all the corners! This will prevent the cake from sticking and make it easier to remove later. I like to use a baking spray that already contains flour for extra insurance.
- Whisk together the dry ingredients. In a medium bowl, whisk together the flour, baking powder, baking soda, and salt. Whisking ensures that everything is evenly distributed, which is crucial for a good rise and texture. Set this aside for now.
- Cream the butter and sugar. In a large bowl (or the bowl of your stand mixer), cream together the softened butter and granulated sugar until light and fluffy. This usually takes about 3-5 minutes on medium speed. The mixture should be noticeably lighter in color and have a smooth, almost whipped texture. This step is important because it incorporates air into the batter, which helps create a tender cake.
- Add the eggs and egg yolks. Beat in the eggs one at a time, followed by the egg yolks. Make sure each egg is fully incorporated before adding the next. The egg yolks add richness and moisture to the cake.
- Stir in the vanilla extract. Add the vanilla extract and mix until combined. Vanilla enhances the flavor of the cake and adds a lovely aroma.
- Alternate adding the dry and wet ingredients. Gradually add the dry ingredients to the wet ingredients, alternating with the buttermilk, beginning and ending with the dry ingredients. I usually add the dry ingredients in three additions and the buttermilk in two. So, add about 1/3 of the dry ingredients, mix until just combined, then add half of the buttermilk, mix until just combined, then another 1/3 of the dry ingredients, mix until just combined, then the remaining buttermilk, mix until just combined, and finally the remaining dry ingredients, mixing until just combined. Be careful not to overmix the batter, as this can develop the gluten in the flour and result in a tough cake.
- Divide the batter. Divide the batter evenly into two separate bowls. I like to use a kitchen scale to ensure that the portions are exactly the same. This will help create a more visually appealing marble effect.
Creating the Chocolate Batter:
- Prepare the chocolate mixture. In a small bowl, whisk together the cocoa powder and hot water until smooth. This creates a chocolate paste that will easily incorporate into the batter.
- Add the chocolate mixture to one bowl of batter. Add the chocolate mixture to one of the bowls of batter and mix until just combined. Be careful not to overmix. You want the chocolate to be evenly distributed, but you don’t want to develop the gluten in the flour.
Marbling and Baking:
- Spoon the batters into the prepared pan. Drop spoonfuls of the vanilla batter and the chocolate batter randomly into the prepared baking pan. Alternate between the two batters, creating a marbled effect. Don’t worry about being too precise; the more random, the better the marble effect will be.
- Swirl the batters together. Use a knife or skewer to gently swirl the batters together. Be careful not to overmix, as this can muddy the colors and result in a less defined marble pattern. A few swirls are all you need.
- Bake the cake. Bake in the preheated oven for 30-35 minutes, or until a wooden skewer inserted into the center comes out clean. The baking time may vary depending on your oven, so keep an eye on it.
- Cool the cake. Let the cake cool in the pan for 10-15 minutes before inverting it onto a wire rack to cool completely. This will prevent the cake from sticking to the pan and make it easier to slice.
Optional: Preparing the Glaze (Vanilla or Chocolate):
While the cake is cooling, you can prepare a simple glaze to drizzle over the top. Here are two options:
Vanilla Glaze:
- 1 cup (120g) powdered sugar
- 2-3 tablespoons milk
- 1/2 teaspoon vanilla extract
- Whisk together the ingredients. In a small bowl, whisk together the powdered sugar, milk, and vanilla extract until smooth. Add more milk if needed to reach your desired consistency.
Chocolate Glaze:
- 1 cup (120g) powdered sugar
- 2 tablespoons unsweetened cocoa powder
- 2-3 tablespoons milk
- 1/2 teaspoon vanilla extract
- Whisk together the ingredients. In a small bowl, whisk together the powdered sugar, cocoa powder, milk, and vanilla extract until smooth. Add more milk if needed to reach your desired consistency.
Finishing Touches:
- Drizzle the glaze over the cooled cake. Once the cake is completely cooled, drizzle the glaze evenly over the top. You can use a spoon or a whisk to drizzle the glaze.
- Let the glaze set. Let the glaze set for a few minutes before slicing and serving. This will allow the glaze to harden slightly and prevent it from running.
- Slice and serve. Slice the cake into squares or rectangles and serve. Enjoy! This marble cake is delicious on its own, or you can serve it with a scoop of ice cream or a dollop of whipped cream.
Tips and Variations:
- Use room temperature ingredients. Using room temperature ingredients, especially the butter and eggs, helps the batter come together more easily and creates a smoother, more even texture.
- Don’t overmix the batter. Overmixing the batter can develop the gluten in the flour and result in a tough cake. Mix until just combined.
- Customize the flavors. You can customize the flavors of this cake by adding different extracts, such as almond extract or lemon extract. You can also add chopped nuts or chocolate chips to the batter.
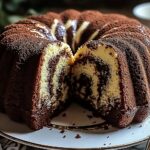
- Make it a bundt cake. This recipe can also be made in a bundt pan. Just be sure to grease and flour the pan thoroughly to prevent the cake from sticking. You may need to adjust the baking time slightly.
- Add coffee to the chocolate batter. For a richer chocolate flavor, add a teaspoon of instant coffee powder to the hot water when preparing the chocolate mixture. This will enhance the chocolate flavor and add a subtle depth.
- Use different types of chocolate. Experiment with different types of chocolate, such as dark chocolate or milk chocolate, for a unique flavor profile. You can melt the chocolate and add it to the batter instead of cocoa powder.
- Add a layer of frosting. For an extra special treat, add a layer of frosting to the cake. A simple buttercream frosting or a cream cheese frosting would be delicious.
- Store the cake properly. Store the cake in an airtight container at room temperature for up to 3 days. You can also freeze the cake for longer storage. Wrap the cake tightly in plastic wrap and then in aluminum foil before freezing.
- Adjust sugar levels. If you prefer a less sweet cake, reduce the amount of sugar by 1/4 cup.
- Buttermilk substitute. If you don’t have buttermilk, you can make a substitute by adding 1 tablespoon of lemon juice or white vinegar to 1 cup of milk. Let it sit for 5 minutes before using.
Conclusion:
And there you have it! This isn’t just any cake; it’s a slice of edible art, a testament to the simple joys of baking, and a guaranteed crowd-pleaser. I truly believe this Marble Cake recipe is a must-try for anyone who loves a classic dessert with a touch of elegance. The moist, tender crumb, the beautiful swirls of vanilla and chocolate, and the comforting aroma that fills your kitchen as it bakes it’s an experience you won’t soon forget. But why is it a must-try, you ask? Beyond the visual appeal, it’s the perfect balance of flavors. The rich chocolate complements the delicate vanilla in a way that’s both satisfying and not overly sweet. It’s a cake that can be enjoyed any time of day, with a cup of coffee in the morning, as an afternoon treat, or as a delightful dessert after dinner. Plus, it’s surprisingly easy to make! Don’t let the intricate swirls intimidate you; the instructions are straightforward, and I’ve included plenty of tips to ensure your success. Now, let’s talk serving suggestions and variations! While this Marble Cake is delicious on its own, a few simple additions can elevate it to the next level. A dusting of powdered sugar adds a touch of sweetness and elegance. A scoop of vanilla ice cream or a dollop of whipped cream is always a welcome addition. For a more decadent treat, try drizzling it with chocolate ganache or a simple glaze made from powdered sugar and milk. If you’re feeling adventurous, there are endless possibilities for variations. You could add a hint of coffee extract to the chocolate batter for a mocha marble cake. Or, try incorporating some chopped nuts, such as walnuts or pecans, for added texture and flavor. For a festive twist, you could use different food colorings to create a rainbow marble cake. Imagine the possibilities!Serving Suggestions:
- Dust with powdered sugar for a classic look.
- Serve with a scoop of vanilla ice cream or whipped cream.
- Drizzle with chocolate ganache or a simple glaze.
- Pair with fresh berries for a burst of flavor.
Variations:
- Add coffee extract to the chocolate batter for a mocha flavor.
- Incorporate chopped nuts for added texture.
- Use different food colorings for a rainbow effect.
- Add a layer of cream cheese frosting for extra richness.
Marble Cake: A Swirl of Flavor and Baking Perfection
- Total Time: 55 minutes
- Yield: 12–16 servings 1x
Description
Classic marble cake with a beautiful swirl of vanilla and chocolate, perfect for any occasion.
Ingredients
- 2 1/2 cups (300g) all-purpose flour, plus more for dusting
- 1 teaspoon baking powder
- 1/2 teaspoon baking soda
- 1/4 teaspoon salt
- 1 cup (2 sticks or 226g) unsalted butter, softened
- 1 3/4 cups (350g) granulated sugar
- 2 large eggs
- 2 large egg yolks
- 1 teaspoon vanilla extract
- 1 cup (240ml) buttermilk
- 3 tablespoons unsweetened cocoa powder
- 2 tablespoons hot water
- 1 cup (120g) powdered sugar
- 2–3 tablespoons milk
- 1/2 teaspoon vanilla extract
- 1 cup (120g) powdered sugar
- 2 tablespoons unsweetened cocoa powder
- 2–3 tablespoons milk
- 1/2 teaspoon vanilla extract
Instructions
- Preheat oven to 350°F (175°C). Grease and flour a 9×13 inch baking pan.
- In a medium bowl, whisk together flour, baking powder, baking soda, and salt. Set aside.
- In a large bowl (or stand mixer), cream together softened butter and sugar until light and fluffy (3-5 minutes).
- Beat in eggs one at a time, followed by egg yolks, ensuring each is fully incorporated.
- Stir in vanilla extract until combined.
- Gradually add dry ingredients to wet ingredients, alternating with buttermilk, beginning and ending with dry ingredients. Mix until just combined after each addition. Be careful not to overmix.
- Divide batter evenly into two separate bowls.
- In a small bowl, whisk together cocoa powder and hot water until smooth.
- Add chocolate mixture to one bowl of batter and mix until just combined.
- Drop spoonfuls of vanilla and chocolate batter randomly into the prepared pan.
- Use a knife or skewer to gently swirl the batters together. Be careful not to overmix.
- Bake for 30-35 minutes, or until a wooden skewer inserted into the center comes out clean.
- Let the cake cool in the pan for 10-15 minutes before inverting it onto a wire rack to cool completely.
- While the cake is cooling, prepare either the vanilla or chocolate glaze by whisking together the ingredients until smooth. Add more milk if needed to reach your desired consistency.
- Once the cake is completely cooled, drizzle the glaze evenly over the top.
- Let the glaze set for a few minutes before slicing and serving.
- Slice and serve.
Notes
- Use room temperature ingredients for best results.
- Don’t overmix the batter.
- Customize flavors with different extracts, nuts, or chocolate chips.
- Can be made in a bundt pan (adjust baking time as needed).
- Add instant coffee powder to the chocolate mixture for a richer flavor.
- Experiment with different types of chocolate.
- Add a layer of frosting for an extra special treat.
- Store in an airtight container at room temperature for up to 3 days or freeze for longer storage.
- Adjust sugar levels to your preference.
- Buttermilk substitute: 1 tablespoon lemon juice or white vinegar to 1 cup of milk, let sit for 5 minutes.
- Prep Time: 20 minutes
- Cook Time: 30

Leave a Comment