

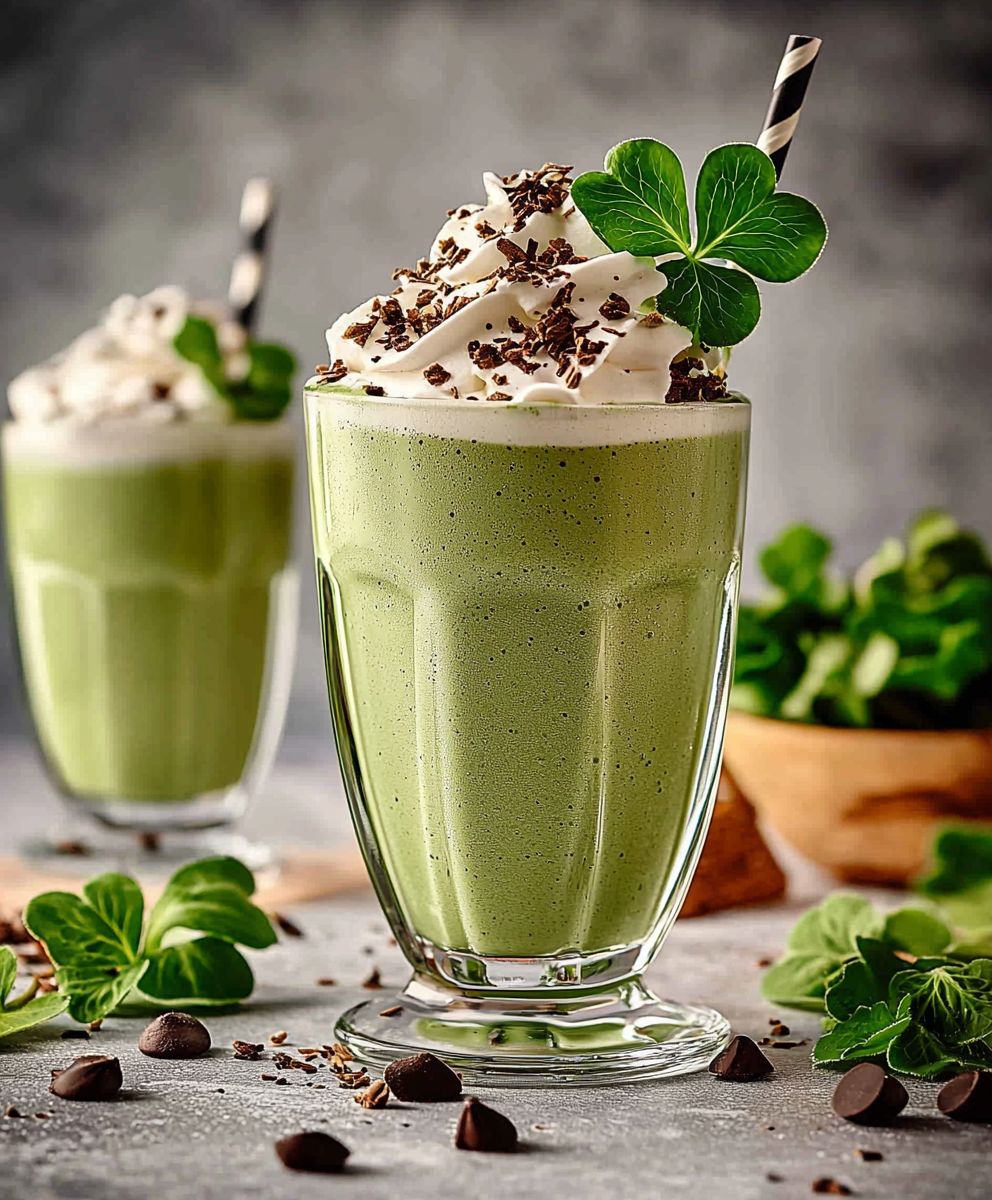
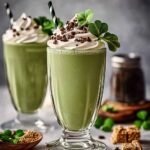
Dairy Free Shamrock Shake: The minty, creamy delight you thought you had to give up? Think again! St. Patrick’s Day just got a whole lot more inclusive (and delicious) with this easy-to-make, allergy-friendly version of the iconic green treat. For years, the Shamrock Shake has been a symbol of springtime and Irish-American heritage, a fleeting indulgence that many eagerly anticipate each March. But what if you’re dairy-free? Does that mean missing out on all the fun?
Absolutely not! This Dairy Free Shamrock Shake recipe captures all the refreshing flavor and smooth texture of the original, without any of the dairy. We’re talking a vibrant green hue, a cool minty blast, and a satisfyingly thick consistency that will have you feeling like you’ve struck gold at the end of the rainbow. People adore the Shamrock Shake for its nostalgic appeal, its festive spirit, and its undeniably delicious combination of mint and sweetness. Now, everyone can enjoy this seasonal favorite, regardless of dietary restrictions. Get ready to blend up some magic and celebrate St. Patrick’s Day in style!

Ingredients:
- 2 cups dairy-free vanilla ice cream (such as coconut milk, almond milk, or oat milk based)
- 1 cup dairy-free milk (same base as ice cream, or a different one if preferred)
- 1/4 teaspoon peppermint extract (adjust to taste)
- 1/4 teaspoon vanilla extract
- 1/8 teaspoon spirulina powder (for natural green color, optional)
- 1-2 drops green food coloring (optional, for a more vibrant green)
- 2 tablespoons dairy-free whipped topping (such as coconut whipped cream), for garnish
- Dairy-free chocolate shavings or sprinkles, for garnish (optional)
- Ice cubes (optional, for a thicker shake)
- 2 tablespoons simple syrup or maple syrup (optional, for added sweetness)
Preparing the Shamrock Shake
Okay, let’s get started on making this delicious and refreshing Dairy-Free Shamrock Shake! It’s surprisingly easy, and you won’t believe how close it tastes to the real deal. I promise, even your non-dairy-free friends will love it!
- Chill Your Glasses: Before you even start blending, pop your serving glasses into the freezer for about 10-15 minutes. This will help keep your shake nice and cold while you enjoy it. Trust me, it makes a difference!
- Soften the Ice Cream: Take your dairy-free vanilla ice cream out of the freezer and let it sit at room temperature for about 5-10 minutes to soften slightly. This will make it easier to blend and prevent your blender from struggling. You don’t want it completely melted, just soft enough to scoop easily.
- Combine Ingredients in the Blender: Now, it’s time to load up your blender! Add the softened dairy-free vanilla ice cream, dairy-free milk, peppermint extract, and vanilla extract to the blender. If you’re using spirulina powder or green food coloring, add that in now too. Remember, a little spirulina goes a long way, so start with 1/8 teaspoon and add more if needed to achieve your desired shade of green. For the food coloring, start with just one drop and add another if you want a more vibrant color.
- Add Sweetener (Optional): If you prefer a sweeter shake, add the simple syrup or maple syrup to the blender. Start with 2 tablespoons and taste as you go, adding more if needed. Keep in mind that the ice cream already contains some sugar, so you might not need much extra sweetener.
- Add Ice (Optional): If you like a thicker shake, add a handful of ice cubes to the blender. Start with about 1/2 cup of ice and add more if needed to reach your desired consistency. Be careful not to add too much ice, as it can dilute the flavor of the shake.
- Blend Until Smooth: Now for the fun part! Put the lid on your blender and blend on high speed until the shake is completely smooth and creamy. This should take about 30-60 seconds, depending on the power of your blender. If the shake is too thick, add a little more dairy-free milk. If it’s too thin, add a few more ice cubes.
- Taste and Adjust: Once the shake is blended, give it a taste and adjust the flavors as needed. If you want more peppermint flavor, add a tiny bit more peppermint extract. If you want it sweeter, add more simple syrup or maple syrup. If you want it greener, add a touch more spirulina powder or green food coloring.
Serving and Garnishing
Alright, the shake is ready! Now let’s make it look as good as it tastes. Presentation is key, right?
- Pour into Chilled Glasses: Carefully pour the Shamrock Shake into your chilled glasses. Fill them almost to the top, leaving a little room for the whipped topping.
- Add Whipped Topping: Top each shake with a generous dollop of dairy-free whipped topping. You can use a piping bag for a fancy swirl, or just spoon it on top.
- Garnish (Optional): If you’re feeling extra festive, sprinkle some dairy-free chocolate shavings or sprinkles on top of the whipped topping. You could also add a few drops of green food coloring to the whipped topping for a fun, colorful effect.
- Serve Immediately: Serve your Dairy-Free Shamrock Shake immediately and enjoy! It’s best when it’s cold and creamy.
Tips and Variations
Want to customize your Shamrock Shake even further? Here are a few ideas to get you started:
- Chocolate Shamrock Shake: Add 1-2 tablespoons of dairy-free chocolate syrup or cocoa powder to the blender for a chocolatey twist.
- Mint Chocolate Chip Shamrock Shake: Add 1/4 cup of dairy-free chocolate chips to the blender for a mint chocolate chip version.
- Shamrock Smoothie: Add a handful of spinach or kale to the blender for a healthier, green smoothie version. You won’t taste the spinach, I promise!
- Boozy Shamrock Shake: Add a shot of Irish cream liqueur or peppermint schnapps to the blender for an adult version. Please drink responsibly!
- Different Extracts: Experiment with other extracts, such as almond extract or coconut extract, for a unique flavor profile.
- Different Sweeteners: Try using agave nectar, stevia, or monk fruit sweetener instead of simple syrup or maple syrup.
- Make it Thicker: For an even thicker shake, freeze the dairy-free milk into ice cubes before blending.
- Make it Ahead: You can prepare the shake ahead of time and store it in the freezer for up to 2 hours. Just be sure to stir it well before serving.
Choosing Your Dairy-Free Ice Cream and Milk
The key to a great Dairy-Free Shamrock Shake is using high-quality dairy-free ice cream and milk. Here’s a breakdown of some popular options:
Coconut Milk Ice Cream and Milk:
Coconut milk ice cream is rich and creamy, with a slightly coconutty flavor. It’s a great option if you’re looking for a decadent treat. Coconut milk also works well as the milk base, complementing the ice cream’s flavor.
Almond Milk Ice Cream and Milk:
Almond milk ice cream is lighter and less creamy than coconut milk ice cream, but it still has a good flavor. Almond milk is a good option if you’re looking for a lower-calorie shake. Be aware that almond milk can sometimes have a slightly bitter aftertaste.
Oat Milk Ice Cream and Milk:
Oat milk ice cream is becoming increasingly popular due to its creamy texture and neutral flavor. Oat milk is also a great option for the milk base, as it doesn’t overpower the other flavors in the shake.
Other Dairy-Free Options:
There are also other dairy-free ice cream and milk options available, such as soy milk, cashew milk, and rice milk. Experiment with different options to find your favorite!
Troubleshooting Your Shamrock Shake
Sometimes things don’t go exactly as planned. Here are a few common problems and how to fix them:
- Shake is too thick: Add a little more dairy-free milk until it reaches your desired consistency.
- Shake is too thin: Add a few more ice cubes or a scoop of frozen dairy-free ice cream.
- Shake isn’t green enough: Add a little more spirulina powder or green food coloring. Be careful not to add too much food coloring, as it can affect the flavor.
- Shake isn’t sweet enough: Add more simple syrup or maple syrup.
- Shake is too pepperminty: Add a little more dairy-free milk or vanilla extract to balance out the flavor.
- Blender is struggling: Make sure the ice cream is softened slightly before blending. You can also try adding the ingredients in stages, starting with the liquid ingredients.
Nutritional Information (Approximate):
Please note that the nutritional information is an estimate and may vary depending on the specific ingredients you use.
- Calories: 300-400
- Fat: 15-25g
- Saturated Fat: 10-15g
- Cholesterol: 0mg
- Sodium: 50-100mg
- Carbohydrates: 40-50g
- Sugar: 30-40g
- Protein: 2-4g
This Dairy-Free Shamrock Shake is a delicious and refreshing treat that you can enjoy any time of year. It’s perfect for St. Patrick’s Day, or just when
Conclusion:
So there you have it! This Dairy Free Shamrock Shake is more than just a festive treat; it’s a creamy, dreamy, minty masterpiece that everyone can enjoy, regardless of dietary restrictions. I truly believe this recipe is a must-try, and here’s why: it’s incredibly easy to make, requiring minimal ingredients and effort. It delivers that classic Shamrock Shake flavor we all crave, without any of the dairy that can leave some feeling less than lucky. Plus, it’s a fun way to celebrate St. Patrick’s Day (or any day you’re feeling a little green!). But the best part? It’s completely customizable! Feel free to experiment with different variations to find your perfect shake. For a richer, more decadent experience, try adding a tablespoon of cashew butter or almond butter. This will not only enhance the creaminess but also add a subtle nutty flavor that complements the mint beautifully. If you’re looking for an extra boost of green goodness, a handful of spinach or kale blends in seamlessly and adds a dose of vitamins without affecting the taste. Trust me, you won’t even know it’s there! For serving suggestions, the possibilities are endless. Of course, a tall glass topped with dairy-free whipped cream and a sprinkle of green sprinkles is always a classic choice. But you could also get creative and use this shake as a base for a delicious dairy-free ice cream float. Simply pour it over a scoop of your favorite dairy-free vanilla ice cream for a truly indulgent treat. Or, for a lighter option, blend it with some frozen banana slices for a thicker, smoothie-like consistency. And don’t forget the garnishes! A few fresh mint leaves add a touch of elegance, while a drizzle of dairy-free chocolate syrup takes it to the next level. You could even rim the glass with crushed dairy-free chocolate cookies for a fun and festive touch.Serving Suggestions:
- Classic: Tall glass, dairy-free whipped cream, green sprinkles.
- Float: Over dairy-free vanilla ice cream.
- Smoothie: Blended with frozen banana.
Variations:
- Nutty: Add cashew or almond butter.
- Green Boost: Blend in spinach or kale.
- Extra Decadent: Dairy-free chocolate syrup drizzle.
Dairy Free Shamrock Shake: The Ultimate Guide & Recipe
- Total Time: 7 minutes
- Yield: 2 servings 1x
Description
Creamy, refreshing, dairy-free Shamrock Shake! Easy recipe using dairy-free ice cream and milk for a delicious treat.
Ingredients
- 2 cups dairy-free vanilla ice cream (such as coconut milk, almond milk, or oat milk based)
- 1 cup dairy-free milk (same base as ice cream, or a different one if preferred)
- 1/4 teaspoon peppermint extract (adjust to taste)
- 1/4 teaspoon vanilla extract
- 1/8 teaspoon spirulina powder (for natural green color, optional)
- 1–2 drops green food coloring (optional, for a more vibrant green)
- 2 tablespoons dairy-free whipped topping (such as coconut whipped cream), for garnish
- Dairy-free chocolate shavings or sprinkles, for garnish (optional)
- Ice cubes (optional, for a thicker shake)
- 2 tablespoons simple syrup or maple syrup (optional, for added sweetness)
Instructions
- Chill Your Glasses: Place your serving glasses in the freezer for 10-15 minutes to chill.
- Soften the Ice Cream: Let the dairy-free vanilla ice cream soften at room temperature for 5-10 minutes.
- Combine Ingredients: Add the softened ice cream, dairy-free milk, peppermint extract, vanilla extract, spirulina powder (if using), and green food coloring (if using) to a blender.
- Add Sweetener (Optional): Add simple syrup or maple syrup to the blender, starting with 2 tablespoons and adjusting to taste.
- Add Ice (Optional): Add a handful of ice cubes (about 1/2 cup) for a thicker shake.
- Blend Until Smooth: Blend on high speed until smooth and creamy, about 30-60 seconds. Add more dairy-free milk if too thick, or more ice if too thin.
- Taste and Adjust: Taste and adjust flavors as needed, adding more peppermint extract, sweetener, or green coloring.
- Pour into Chilled Glasses: Carefully pour the shake into the chilled glasses.
- Add Whipped Topping: Top each shake with dairy-free whipped topping.
- Garnish (Optional): Sprinkle with dairy-free chocolate shavings or sprinkles.
- Serve Immediately: Serve and enjoy!
Notes
- For a Chocolate Shamrock Shake, add 1-2 tablespoons of dairy-free chocolate syrup or cocoa powder.
- For a Mint Chocolate Chip Shamrock Shake, add 1/4 cup of dairy-free chocolate chips.
- For a healthier version, add a handful of spinach or kale.
- For an adult version, add a shot of Irish cream liqueur or peppermint schnapps (drink responsibly).
- Experiment with different extracts like almond or coconut.
- Use agave nectar, stevia, or monk fruit sweetener as alternatives to simple syrup or maple syrup.
- Freeze dairy-free milk into ice cubes for an even thicker shake.
- Prepare the shake ahead of time and store it in the freezer for up to 2 hours, stirring well before serving.
- Adjust the amount of peppermint extract to your liking.
- Use high-quality dairy-free ice cream and milk for the best results.
- If the shake is too thick, add more dairy-free milk. If it’s too thin, add more ice.
- If the shake isn’t green enough, add more spirulina powder or green food coloring.
- If the shake isn’t sweet enough, add more simple syrup or maple syrup.
- If the shake is too pepperminty, add more dairy-free milk or vanilla extract.
- If the blender is struggling, make sure the ice cream is softened slightly before blending.
- Prep Time: 5 minutes
- Cook Time: 2 minutes
Leave a Comment