

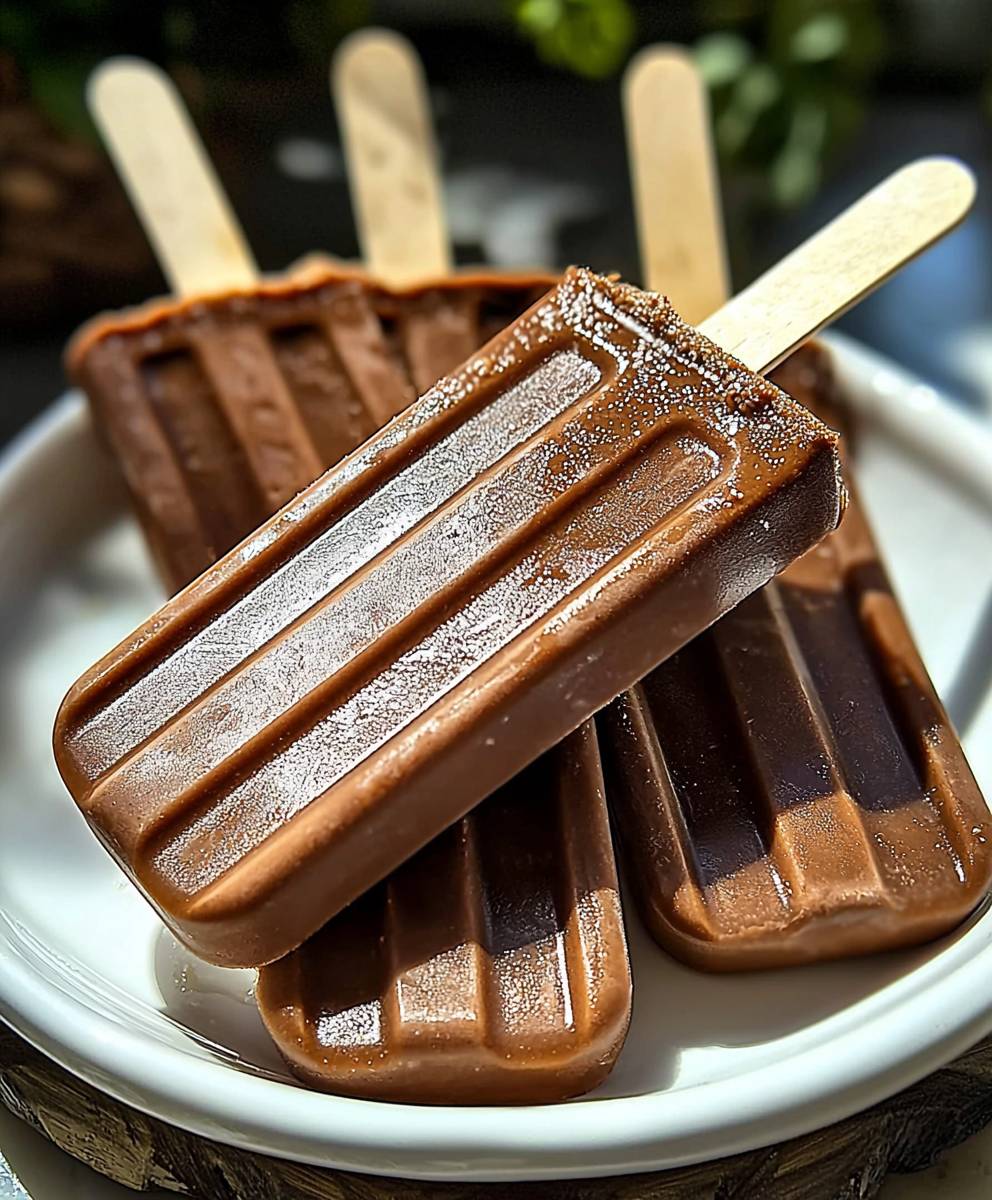
Homemade Fudgesicles, a nostalgic treat that brings back childhood memories with every creamy, chocolatey bite! Forget the store-bought versions loaded with artificial ingredients; we’re diving headfirst into a world of pure, unadulterated fudgesicle bliss. Imagine sinking your teeth into a frozen delight so rich and decadent, yet surprisingly simple to make.
While the exact origins of the fudgesicle are debated, its popularity soared in the mid-20th century, becoming a quintessential summer staple. It represents carefree days, dripping chins, and the simple joy of a frozen treat on a hot afternoon. But beyond the nostalgia, the enduring appeal of the fudgesicle lies in its perfect balance of textures and flavors. The smooth, almost velvety texture melts in your mouth, releasing a wave of intense chocolate flavor that’s both comforting and satisfying.
What’s even better? Making homemade fudgesicles allows you to control the ingredients, ensuring a healthier and even more delicious outcome. We’re talking real chocolate, creamy milk, and just the right amount of sweetness. Plus, they’re incredibly convenient to make ahead of time, making them the perfect grab-and-go dessert for busy weeknights or impromptu gatherings. Get ready to experience the ultimate fudgesicle, reimagined for the modern palate!

Ingredients:
- 1 cup granulated sugar
- 1/4 cup unsweetened cocoa powder
- 1/4 teaspoon salt
- 1 cup whole milk
- 1 cup heavy cream
- 1 teaspoon vanilla extract
- 1/2 teaspoon instant coffee powder (optional, enhances chocolate flavor)
- 2 tablespoons cornstarch
- 2 tablespoons cold water
Preparing the Chocolate Base:
Okay, let’s get started with the fudgesicle magic! The first step is creating that rich, chocolatey base that will make these frozen treats so irresistible. Don’t worry, it’s easier than you think!
- Combine Dry Ingredients: In a medium saucepan, whisk together the granulated sugar, unsweetened cocoa powder, and salt. Make sure there are no lumps of cocoa powder we want a smooth and even chocolate flavor throughout.
- Add Milk and Cream: Gradually pour in the whole milk and heavy cream, whisking constantly to prevent any clumping. Keep whisking until everything is well combined and the mixture looks smooth and homogenous.
- Heat the Mixture: Place the saucepan over medium heat. Stir the mixture frequently, scraping the bottom of the pan to prevent scorching. We want to bring the mixture to a gentle simmer, but not a full boil.
- Simmer and Thicken: Once the mixture starts to simmer, reduce the heat to low and continue to simmer for about 5 minutes, stirring constantly. This step is crucial for developing a deeper, richer chocolate flavor and slightly thickening the base. You’ll notice the mixture becoming a bit more viscous.
- Prepare the Cornstarch Slurry: While the chocolate mixture is simmering, in a small bowl, whisk together the cornstarch and cold water until the cornstarch is completely dissolved and you have a smooth slurry. This is our thickening agent, and we want to make sure it’s lump-free before adding it to the hot mixture.
- Thicken with Cornstarch: Slowly pour the cornstarch slurry into the simmering chocolate mixture, whisking constantly. Continue to whisk vigorously for about 1-2 minutes, or until the mixture has thickened to your desired consistency. It should be thick enough to coat the back of a spoon. Be careful not to overcook it, as it can become too thick.
- Remove from Heat: Once the mixture has thickened, remove the saucepan from the heat.
- Add Flavor Enhancers: Stir in the vanilla extract and instant coffee powder (if using). The vanilla adds a lovely warmth and complexity, while the instant coffee enhances the chocolate flavor without making the fudgesicles taste like coffee.
- Cool Slightly: Let the chocolate mixture cool slightly for about 10-15 minutes before pouring it into the popsicle molds. This will help prevent condensation from forming on the inside of the molds, which can lead to icy fudgesicles.
Preparing and Filling the Molds:
Now that we have our delicious chocolate base, it’s time to get those popsicle molds ready! This is where the magic really starts to happen.
- Prepare Your Molds: Make sure your popsicle molds are clean and dry. If you’re using reusable molds, give them a quick rinse with warm water.
- Pour the Mixture: Carefully pour the slightly cooled chocolate mixture into the popsicle molds, leaving a little bit of space at the top for expansion during freezing. You can use a small ladle or a measuring cup with a spout to make this process easier and less messy.
- Remove Air Bubbles: Gently tap the molds on the counter to release any trapped air bubbles. This will help ensure that your fudgesicles have a smooth and even texture.
- Insert Popsicle Sticks: Insert the popsicle sticks into the center of each mold. Make sure the sticks are securely in place. If they tend to lean to one side, you can use a piece of tape to hold them in place until the mixture starts to freeze.
- Cover the Molds (Optional): If your popsicle molds don’t have a built-in cover, you can cover them with plastic wrap to prevent freezer burn.
Freezing and Enjoying Your Fudgesicles:
The final step is the most important: freezing! This is where patience comes in, but trust me, the wait is worth it.
- Freeze Completely: Place the filled popsicle molds in the freezer and freeze for at least 6 hours, or preferably overnight. This will ensure that the fudgesicles are completely frozen solid.
- Unmold the Fudgesicles: Once the fudgesicles are frozen solid, it’s time to unmold them. There are a few ways to do this:
- Warm Water Method: The easiest way is to run the molds under warm water for a few seconds. This will loosen the fudgesicles from the sides of the molds. Be careful not to hold them under the water for too long, or they will start to melt.
- Room Temperature Method: You can also let the molds sit at room temperature for a few minutes until the fudgesicles loosen.
- Gently Remove: Gently pull the fudgesicles out of the molds by the popsicle sticks. If they’re still stuck, try running the molds under warm water for a few more seconds.
- Enjoy Immediately: Serve your homemade fudgesicles immediately and enjoy! They’re best enjoyed on a hot day, but honestly, they’re delicious any time of year.
- Storage: If you have any leftover fudgesicles (which is unlikely!), you can store them in a freezer-safe bag or container for up to a week.
Tips and Variations:
Want to take your fudgesicles to the next level? Here are a few tips and variations to try:
- Adjust Sweetness: If you prefer a less sweet fudgesicle, you can reduce the amount of sugar slightly.
- Dark Chocolate: For a richer, more intense chocolate flavor, use dark cocoa powder instead of unsweetened cocoa powder.
- Add Chocolate Chips: Stir in some mini chocolate chips into the chocolate mixture before pouring it into the molds for a little extra chocolatey goodness.
- Peanut Butter Swirl: Swirl in a spoonful of peanut butter into each mold before freezing for a delicious peanut butter chocolate combination.
- Espresso Fudgesicles: Add a teaspoon of espresso powder to the chocolate mixture for a coffee-flavored twist.
- Mint Chocolate Fudgesicles: Add a few drops of peppermint extract to the chocolate mixture for a refreshing mint chocolate flavor.
- Vegan Fudgesicles: Substitute the whole milk and heavy cream with plant-based alternatives like almond milk and coconut cream for a vegan version. Make sure to use vegan chocolate as well.
- Double Chocolate: Add melted dark chocolate to the mixture for an even richer chocolate experience.
- Use High-Quality Cocoa: The quality of your cocoa powder will greatly impact the flavor of your fudgesicles. Opt for a Dutch-processed cocoa powder for a smoother, less bitter flavor.
- Don’t Overcook: Be careful not to overcook the chocolate mixture, as it can become grainy.
- Strain the Mixture: For an extra smooth texture, you can strain the chocolate mixture through a fine-mesh sieve before pouring it into the molds.
- Experiment with Flavors: Don’t be afraid to experiment with different flavors and ingredients to create your own unique fudgesicle creations!
Troubleshooting:
Sometimes things don’t go exactly as planned. Here are a few common issues and how to fix them:
- Fudgesicles are Icy: This can happen if the mixture wasn’t thick enough before freezing or if there was too much water in the mixture. Make sure to simmer the mixture long enough to thicken it properly and avoid adding too much water.
- Fudgesicles are Too Hard: This can happen if the mixture was overcooked or if there wasn’t enough fat in the mixture. Make sure to use the correct ratio of milk and cream and avoid overcooking the mixture.
- Fudgesicles are Difficult to Unmold: Run the molds under warm water for a few seconds to loosen the fudgesicles. If they’re still stuck, try letting the molds sit at room temperature for a few minutes.
- Popsicle Sticks Keep Falling Out: Make sure the popsicle sticks are securely inserted into the center of the molds. You can use a piece of tape to hold them in place until the mixture starts to freeze.
Enjoy your fudgesicles!
Conclusion:
And there you have it! These Homemade Fudgesicles are so much more than just a frozen treat; they’re a nostalgic trip down memory lane, a healthy-ish indulgence, and a guaranteed crowd-pleaser, all rolled into one delicious package. Seriously, what’s not to love? I know, I know, there are a million dessert recipes out there vying for your attention. But trust me on this one. The rich, chocolatey flavor, the creamy texture, and the sheer simplicity of making these fudgesicles from scratch will completely win you over. Forget those store-bought versions loaded with artificial ingredients and questionable additives. With this recipe, you’re in complete control of what goes into your fudgesicles, ensuring a treat that’s both satisfying and wholesome. But the best part? The possibilities are endless! Feel free to get creative with your fudgesicle creations. For a richer, more decadent experience, try using dark chocolate or adding a swirl of peanut butter. If you’re feeling adventurous, throw in some chopped nuts, mini chocolate chips, or even a dash of espresso powder for a mocha twist. For a lighter, fruitier option, blend in some fresh berries or a banana before freezing. You could even experiment with different types of milk, like almond milk or coconut milk, to create a vegan-friendly version.Serving Suggestions and Variations:
* Classic Fudgesicle: Enjoy them straight from the freezer for a refreshing and satisfying treat. * Peanut Butter Swirl: Add a spoonful of peanut butter to each mold before freezing for a nutty twist. * Chocolate Chip Fudgesicle: Sprinkle mini chocolate chips into the molds for added texture and flavor. * Berry Blast: Blend in fresh raspberries or strawberries for a fruity and vibrant fudgesicle. * Mocha Magic: Add a teaspoon of espresso powder to the mixture for a coffee-infused delight. * Vegan Delight: Use almond milk or coconut milk for a dairy-free and vegan-friendly option. * Adults Only: Add a splash of your favorite liqueur, like Kahlua or Baileys, for a boozy treat (consume responsibly, of course!). I truly believe that once you try this recipe, you’ll never go back to store-bought fudgesicles again. The taste is simply incomparable, and the satisfaction of knowing you made them yourself is an added bonus. Plus, it’s a fantastic activity to do with kids they’ll love helping you measure, mix, and pour the ingredients, and they’ll be even more excited to enjoy the finished product. So, what are you waiting for? Gather your ingredients, dust off your popsicle molds, and get ready to embark on a fudgesicle-making adventure! I’m confident that you’ll be delighted with the results. And please, don’t be shy about sharing your creations with me! I’d love to see your photos and hear about your variations. Tag me on social media using [Your Social Media Handle] and let me know what you think. I can’t wait to see your Homemade Fudgesicles masterpieces! Happy freezing! Print
Homemade Fudgesicles: The Ultimate Guide to Delicious Frozen Treats
- Total Time: 385 minutes
- Yield: 6–8 popsicles 1x
Description
Rich and creamy homemade fudgesicles, perfect for a hot day! Made with simple ingredients, these frozen treats are easy to customize with your favorite flavors.
Ingredients
- 1 cup granulated sugar
- 1/4 cup unsweetened cocoa powder
- 1/4 teaspoon salt
- 1 cup whole milk
- 1 cup heavy cream
- 1 teaspoon vanilla extract
- 1/2 teaspoon instant coffee powder (optional, enhances chocolate flavor)
- 2 tablespoons cornstarch
- 2 tablespoons cold water
Instructions
- Combine Dry Ingredients: In a medium saucepan, whisk together the granulated sugar, unsweetened cocoa powder, and salt.
- Add Milk and Cream: Gradually pour in the whole milk and heavy cream, whisking constantly to prevent clumping.
- Heat the Mixture: Place the saucepan over medium heat. Stir frequently, scraping the bottom, until the mixture reaches a gentle simmer.
- Simmer and Thicken: Reduce heat to low and simmer for about 5 minutes, stirring constantly, to develop flavor and slightly thicken the base.
- Prepare Cornstarch Slurry: In a small bowl, whisk together the cornstarch and cold water until smooth.
- Thicken with Cornstarch: Slowly pour the cornstarch slurry into the simmering chocolate mixture, whisking constantly. Continue whisking for 1-2 minutes, or until the mixture has thickened enough to coat the back of a spoon.
- Remove from Heat: Once thickened, remove the saucepan from the heat.
- Add Flavor Enhancers: Stir in the vanilla extract and instant coffee powder (if using).
- Cool Slightly: Let the chocolate mixture cool slightly for about 10-15 minutes.
- Prepare Molds: Make sure your popsicle molds are clean and dry.
- Pour the Mixture: Carefully pour the slightly cooled chocolate mixture into the popsicle molds, leaving a little bit of space at the top for expansion during freezing.
- Remove Air Bubbles: Gently tap the molds on the counter to release any trapped air bubbles.
- Insert Popsicle Sticks: Insert the popsicle sticks into the center of each mold.
- Cover the Molds (Optional): If your popsicle molds don’t have a built-in cover, you can cover them with plastic wrap to prevent freezer burn.
- Freeze Completely: Place the filled popsicle molds in the freezer and freeze for at least 6 hours, or preferably overnight.
- Unmold the Fudgesicles: Run the molds under warm water for a few seconds to loosen the fudgesicles from the sides of the molds.
- Gently Remove: Gently pull the fudgesicles out of the molds by the popsicle sticks.
- Enjoy Immediately: Serve your homemade fudgesicles immediately and enjoy!
- Storage: If you have any leftover fudgesicles (which is unlikely!), you can store them in a freezer-safe bag or container for up to a week.
Notes
- Adjust sweetness to your preference.
- Use dark cocoa powder for a richer flavor.
- Add mini chocolate chips or a peanut butter swirl for extra flavor.
- For vegan fudgesicles, substitute milk and cream with plant-based alternatives.
- Strain the mixture for an extra smooth texture.
- If fudgesicles are icy, make sure the mixture was thick enough before freezing.
- If fudgesicles are too hard, avoid overcooking the mixture.
- If popsicle sticks keep falling out, use tape to hold them in place until the mixture starts to freeze.
- Prep Time: 15 minutes
- Cook Time: 10 minutes
Leave a Comment