

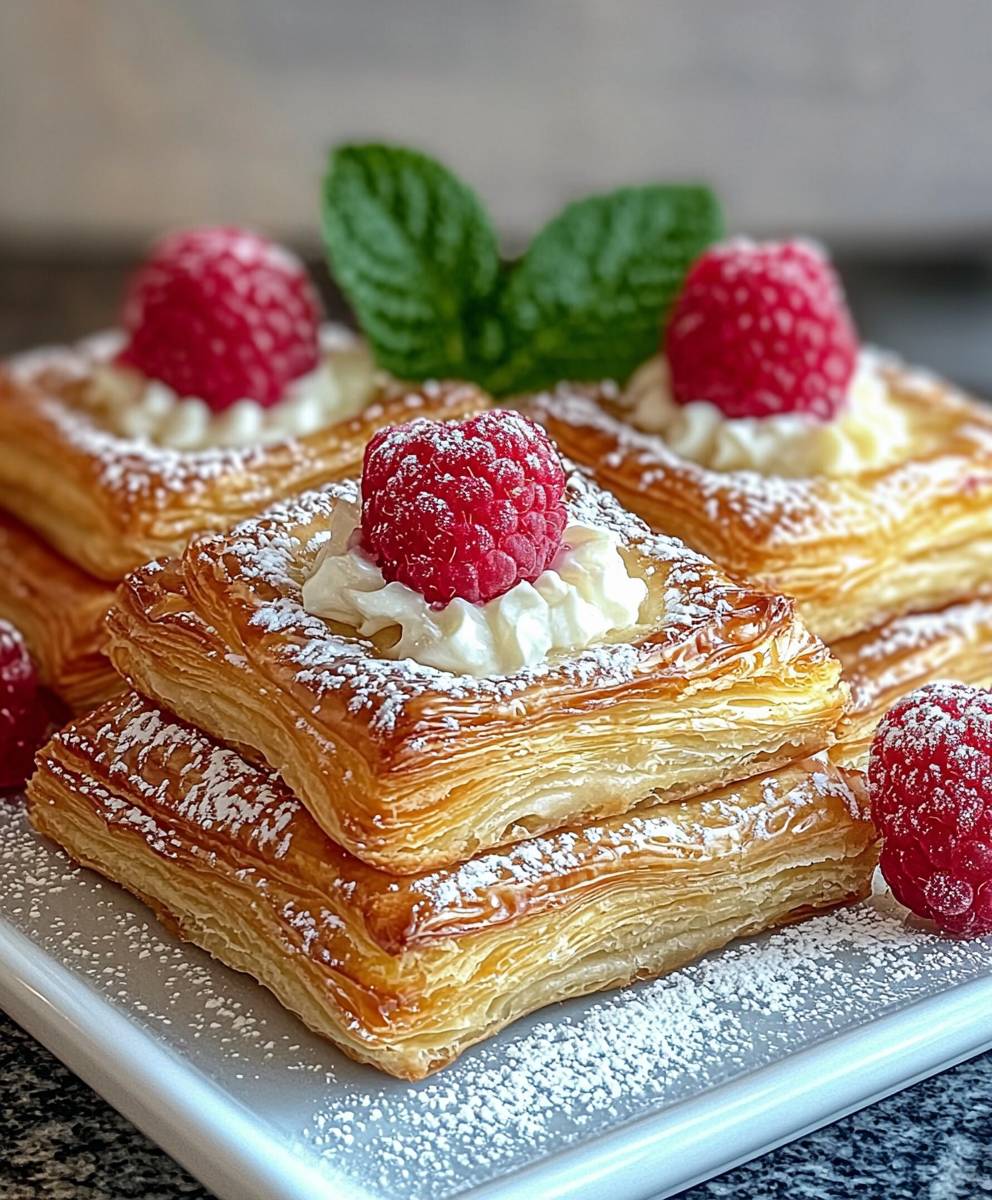
Lemon Raspberry Danish: Just the name conjures images of flaky pastry, tangy citrus, and sweet berry bliss, doesn’t it? Imagine biting into a warm, golden-brown pastry, the delicate layers shattering to reveal a creamy lemon filling studded with bursts of juicy raspberries. This isn’t just a breakfast treat; it’s an experience!
The Danish pastry, or “wienerbrød” as it’s known in Denmark, has a fascinating history. Ironically, it wasn’t actually invented by the Danes! It’s believed that Austrian bakers, brought to Denmark during a bakery strike in the mid-19th century, introduced the technique of layering dough with butter to create these incredibly light and airy pastries. The Danes, however, perfected the art, adding their own unique fillings and flavors, and the rest, as they say, is history.
What makes a Lemon Raspberry Danish so irresistible? It’s the perfect balance of flavors and textures. The buttery, flaky pastry provides a satisfying crunch, while the creamy lemon filling offers a bright, tangy counterpoint. The raspberries add a touch of sweetness and a delightful burst of fruity flavor. It’s a treat that’s both elegant and comforting, perfect for a special occasion or a simple weekend brunch. Plus, while it may seem intimidating to make, with the right recipe and a little patience, you can easily create these delectable pastries in your own kitchen. Get ready to impress your friends and family with this delightful Lemon Raspberry Danish recipe!

Ingredients:
- For the Dough:
- 2 1/4 cups (281g) all-purpose flour, plus more for dusting
- 1/4 cup (50g) granulated sugar
- 1 teaspoon salt
- 1/2 cup (1 stick, 113g) unsalted butter, very cold and cut into small cubes
- 1 cup (240ml) ice water
- 1 teaspoon lemon zest
- For the Cream Cheese Filling:
- 8 ounces (227g) cream cheese, softened
- 1/4 cup (50g) granulated sugar
- 1 large egg yolk
- 1 teaspoon vanilla extract
- 1 tablespoon lemon juice
- For the Raspberry Filling:
- 1 cup (125g) fresh raspberries
- 1/4 cup (50g) granulated sugar
- 1 tablespoon lemon juice
- 1 teaspoon cornstarch
- For the Lemon Glaze:
- 1 cup (120g) powdered sugar
- 2-3 tablespoons lemon juice
- 1/2 teaspoon lemon zest
- For Egg Wash:
- 1 large egg
- 1 tablespoon milk or water
Preparing the Dough:
- Combine Dry Ingredients: In a large bowl, whisk together the flour, sugar, salt, and lemon zest. Make sure everything is evenly distributed. This ensures a consistent flavor throughout the dough.
- Cut in the Butter: Add the cold, cubed butter to the flour mixture. Using a pastry blender or your fingertips (work quickly to prevent the butter from melting), cut the butter into the flour until the mixture resembles coarse crumbs. You should still see small pieces of butter throughout these are crucial for creating flaky layers.
- Add Ice Water: Gradually add the ice water, one tablespoon at a time, mixing gently after each addition. Mix until the dough just comes together. Be careful not to overmix; you want to avoid developing too much gluten, which can make the dough tough. The dough should be slightly shaggy.
- Form a Rectangle: Turn the dough out onto a lightly floured surface. Gently pat it into a rectangle, about 8×12 inches.
- First Fold: Fold the dough into thirds, like you’re folding a letter. This is called a book fold. Wrap the dough tightly in plastic wrap and refrigerate for at least 30 minutes. This allows the gluten to relax and the butter to firm up, which is essential for creating those beautiful layers.
- Second Fold: After 30 minutes, remove the dough from the refrigerator. Place it on a lightly floured surface with the short end facing you. Roll the dough into a rectangle again, about 8×12 inches. Repeat the book fold, wrap in plastic wrap, and refrigerate for another 30 minutes.
- Third Fold: Repeat the rolling and folding process one more time. This third fold is what really develops the layers in the dough. Wrap the dough in plastic wrap and refrigerate for at least 1 hour, or preferably overnight. The longer chilling time allows the dough to fully relax and the butter to firm up, resulting in a flakiest pastry.
Preparing the Fillings:
- Cream Cheese Filling: In a medium bowl, beat the softened cream cheese and sugar together until smooth and creamy. Add the egg yolk, vanilla extract, and lemon juice. Beat until well combined. Set aside.
- Raspberry Filling: In a small saucepan, combine the raspberries, sugar, and lemon juice. Cook over medium heat, stirring occasionally, until the raspberries break down and the mixture thickens slightly, about 5-7 minutes. In a small bowl, whisk together the cornstarch and 1 tablespoon of cold water to create a slurry. Add the cornstarch slurry to the raspberry mixture and cook for another minute, or until the filling is thickened. Remove from heat and let cool completely. Cooling the filling prevents it from melting and making the dough soggy during baking.
Assembling and Baking the Danishes:
- Preheat Oven: Preheat your oven to 375°F (190°C). Line a baking sheet with parchment paper.
- Roll Out the Dough: Remove the dough from the refrigerator and place it on a lightly floured surface. Roll the dough into a large rectangle, about 12×18 inches, and about 1/8 inch thick. The thinner you roll the dough, the flakier your danishes will be.
- Cut into Rectangles: Using a sharp knife or pizza cutter, cut the dough into 12 equal rectangles.
- Add Fillings: Place the rectangles on the prepared baking sheet, leaving some space between each one. Spoon a generous tablespoon of the cream cheese filling onto the center of each rectangle, spreading it slightly. Top with a tablespoon of the cooled raspberry filling.
- Create the Danish Shape: To create the classic Danish shape, you can either fold two opposite corners of each rectangle towards the center, pinching them together to secure. Alternatively, you can make slits along the sides of each rectangle and fold the strips towards the center, overlapping them slightly. There are many variations, so feel free to get creative!
- Egg Wash: In a small bowl, whisk together the egg and milk (or water) to create an egg wash. Brush the egg wash over the exposed dough of each danish. This will give them a beautiful golden-brown color and a slight sheen.
- Bake: Bake for 20-25 minutes, or until the danishes are golden brown and the filling is set. Keep a close eye on them, as baking times may vary depending on your oven.
- Cool: Remove the danishes from the oven and let them cool on the baking sheet for a few minutes before transferring them to a wire rack to cool completely.
Preparing the Lemon Glaze:
- Combine Ingredients: In a small bowl, whisk together the powdered sugar, lemon juice, and lemon zest until smooth. Add more lemon juice, one teaspoon at a time, until you reach your desired consistency. The glaze should be thick enough to coat the danishes but thin enough to drizzle easily.
- Glaze the Danishes: Once the danishes are completely cool, drizzle the lemon glaze over the top. You can use a spoon or a piping bag for a more precise application.
- Serve: Let the glaze set for a few minutes before serving. These Lemon Raspberry Danishes are best enjoyed fresh, but they can be stored in an airtight container at room temperature for up to 2 days.
Conclusion:
This Lemon Raspberry Danish recipe isn’t just another pastry; it’s a burst of sunshine and sweet-tart perfection that will elevate your brunch game or satisfy your afternoon cravings. The flaky, buttery layers of the pastry, combined with the tangy lemon cream cheese filling and the juicy pop of fresh raspberries, create a symphony of flavors and textures that’s simply irresistible. I truly believe this is a must-try recipe for anyone who appreciates a little bit of indulgence. But don’t just take my word for it! The beauty of this recipe lies in its versatility. Feel free to experiment with different variations to suit your taste. For a richer, more decadent experience, try adding a layer of almond paste beneath the cream cheese filling. Or, if you’re feeling adventurous, swap out the raspberries for other berries like blueberries, blackberries, or even sliced strawberries. A sprinkle of chopped pistachios or slivered almonds on top adds a delightful crunch and visual appeal. Serving suggestions are endless! This Lemon Raspberry Danish is fantastic served warm, straight from the oven, with a dollop of whipped cream or a scoop of vanilla ice cream. It’s also delicious at room temperature, making it perfect for picnics or potlucks. Pair it with a cup of freshly brewed coffee or a glass of chilled lemonade for the ultimate treat. For a more elegant presentation, dust the danish with powdered sugar or drizzle it with a simple glaze made from powdered sugar and lemon juice. And if you’re looking to impress your guests, consider making individual danishes instead of one large one. Simply cut the pastry dough into smaller squares or rectangles, fill them with the lemon cream cheese and raspberries, and bake until golden brown. These mini danishes are perfect for parties or special occasions. You can even get creative with the shapes and sizes! I’ve poured my heart into perfecting this recipe, and I’m confident that you’ll love it as much as I do. It’s surprisingly easy to make, even for beginner bakers, and the results are absolutely stunning. The aroma alone, as it bakes in the oven, is enough to make your mouth water. So, what are you waiting for? Gather your ingredients, preheat your oven, and get ready to embark on a baking adventure. I promise you won’t be disappointed. This Lemon Raspberry Danish is a guaranteed crowd-pleaser that will have everyone asking for seconds. I’m so excited for you to try this recipe! Once you’ve had a chance to bake it, please come back and share your experience in the comments below. I’d love to hear about any variations you tried, any tips or tricks you discovered, and, of course, how much you enjoyed it. Your feedback is invaluable and helps me to continue creating delicious and easy-to-follow recipes for you. Happy baking! Print
Lemon Raspberry Danish: A Delicious & Easy Recipe
- Total Time: 65 minutes
- Yield: 12 danishes 1x
Description
Flaky, homemade danishes filled with creamy cheese and sweet-tart raspberry filling, topped with a bright lemon glaze.
Ingredients
- 2 1/4 cups (281g) all-purpose flour, plus more for dusting
- 1/4 cup (50g) granulated sugar
- 1 teaspoon salt
- 1/2 cup (1 stick, 113g) unsalted butter, very cold and cut into small cubes
- 1 cup (240ml) ice water
- 1 teaspoon lemon zest
- 8 ounces (227g) cream cheese, softened
- 1/4 cup (50g) granulated sugar
- 1 large egg yolk
- 1 teaspoon vanilla extract
- 1 tablespoon lemon juice
- 1 cup (125g) fresh raspberries
- 1/4 cup (50g) granulated sugar
- 1 tablespoon lemon juice
- 1 teaspoon cornstarch
- 1 cup (120g) powdered sugar
- 2–3 tablespoons lemon juice
- 1/2 teaspoon lemon zest
- 1 large egg
- 1 tablespoon milk or water
Instructions
- Combine Dry Ingredients: In a large bowl, whisk together the flour, sugar, salt, and lemon zest.
- Cut in the Butter: Add the cold, cubed butter to the flour mixture. Using a pastry blender or your fingertips (work quickly), cut the butter into the flour until the mixture resembles coarse crumbs.
- Add Ice Water: Gradually add the ice water, one tablespoon at a time, mixing gently after each addition. Mix until the dough just comes together. The dough should be slightly shaggy.
- Form a Rectangle: Turn the dough out onto a lightly floured surface. Gently pat it into a rectangle, about 8×12 inches.
- First Fold: Fold the dough into thirds, like you’re folding a letter (book fold). Wrap the dough tightly in plastic wrap and refrigerate for at least 30 minutes.
- Second Fold: After 30 minutes, remove the dough from the refrigerator. Place it on a lightly floured surface with the short end facing you. Roll the dough into a rectangle again, about 8×12 inches. Repeat the book fold, wrap in plastic wrap, and refrigerate for another 30 minutes.
- Third Fold: Repeat the rolling and folding process one more time. Wrap the dough in plastic wrap and refrigerate for at least 1 hour, or preferably overnight.
- Cream Cheese Filling: In a medium bowl, beat the softened cream cheese and sugar together until smooth and creamy. Add the egg yolk, vanilla extract, and lemon juice. Beat until well combined. Set aside.
- Raspberry Filling: In a small saucepan, combine the raspberries, sugar, and lemon juice. Cook over medium heat, stirring occasionally, until the raspberries break down and the mixture thickens slightly, about 5-7 minutes. In a small bowl, whisk together the cornstarch and 1 tablespoon of cold water to create a slurry. Add the cornstarch slurry to the raspberry mixture and cook for another minute, or until the filling is thickened. Remove from heat and let cool completely.
- Preheat Oven: Preheat your oven to 375°F (190°C). Line a baking sheet with parchment paper.
- Roll Out the Dough: Remove the dough from the refrigerator and place it on a lightly floured surface. Roll the dough into a large rectangle, about 12×18 inches, and about 1/8 inch thick.
- Cut into Rectangles: Using a sharp knife or pizza cutter, cut the dough into 12 equal rectangles.
- Add Fillings: Place the rectangles on the prepared baking sheet, leaving some space between each one. Spoon a generous tablespoon of the cream cheese filling onto the center of each rectangle, spreading it slightly. Top with a tablespoon of the cooled raspberry filling.
- Create the Danish Shape: Fold two opposite corners of each rectangle towards the center, pinching them together to secure.
- Egg Wash: In a small bowl, whisk together the egg and milk (or water) to create an egg wash. Brush the egg wash over the exposed dough of each danish.
- Bake: Bake for 20-25 minutes, or until the danishes are golden brown and the filling is set.
- Cool: Remove the danishes from the oven and let them cool on the baking sheet for a few minutes before transferring them to a wire rack to cool completely.
- Combine Ingredients: In a small bowl, whisk together the powdered sugar, lemon juice, and lemon zest until smooth. Add more lemon juice, one teaspoon at a time, until you reach your desired consistency.
- Glaze the Danishes: Once the danishes are completely cool, drizzle the lemon glaze over the top.
- Serve: Let the glaze set for a few minutes before serving. These Lemon Raspberry Danishes are best enjoyed fresh, but they can be stored in an airtight container at room temperature for up to 2 days.
Notes
- Keep the butter as cold as possible throughout the dough-making process. This is crucial for creating flaky layers.
- Don’t overmix the dough, as this will develop the gluten and make the danishes tough.
- Chilling the dough between folds is essential for relaxing the gluten and firming up the butter.
- Make sure the raspberry filling is completely cool before adding it to the danishes to prevent the dough from becoming soggy.
- Get creative with the danish shapes! There are many variations you can try.
- Prep Time: 45 minutes
- Cook Time: 20 minutes


Leave a Comment