

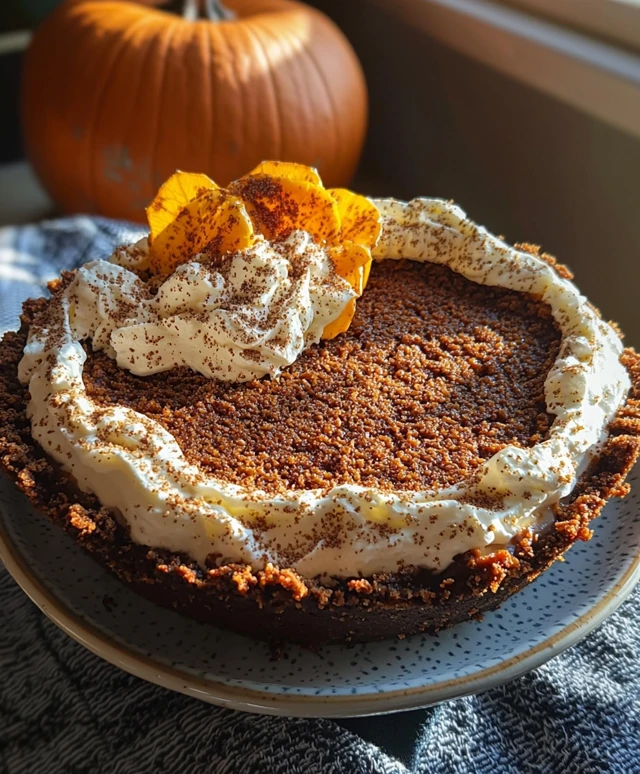
Gingersnap Pumpkin Pie Dessert is a delightful twist on the classic pumpkin pie that brings warmth and spice to your holiday table. As the leaves turn and the air becomes crisp, this dessert captures the essence of fall with its rich flavors and inviting aroma. The combination of gingersnap cookies and creamy pumpkin filling creates a harmonious blend that is both comforting and indulgent.
Historically, pumpkin pie has been a staple in American cuisine since the early settlers, but adding gingersnap cookies to the crust elevates this dish to new heights. People love Gingersnap Pumpkin Pie Dessert not only for its unique taste and texture but also for its convenience; its easy to prepare and can be made ahead of time, allowing you to enjoy more time with family and friends. Whether served at Thanksgiving or any autumn gathering, this dessert is sure to impress and satisfy your guests sweet cravings.

Ingredients:
- 1 ½ cups gingersnap cookie crumbs
- ½ cup unsalted butter, melted
- 1 tablespoon granulated sugar
- 1 can (15 oz) pure pumpkin puree
- 1 cup sweetened condensed milk
- 2 large eggs
- 1 teaspoon vanilla extract
- 1 teaspoon ground cinnamon
- ½ teaspoon ground ginger
- ¼ teaspoon ground nutmeg
- ¼ teaspoon salt
- Whipped cream, for serving (optional)
Preparing the Crust
First things first, lets get that delicious gingersnap crust ready. Its super easy and adds a wonderful flavor to the pie.
- In a medium mixing bowl, combine the gingersnap cookie crumbs, melted butter, and granulated sugar. Stir until the mixture resembles wet sand.
- Press the crumb mixture firmly into the bottom and up the sides of a 9-inch pie pan. Make sure its evenly distributed to create a solid base.
- Preheat your oven to 350°F (175°C). Once the oven is ready, bake the crust for about 8-10 minutes, or until its slightly firm and fragrant. This step helps to set the crust and enhances the flavor.
- Remove the crust from the oven and let it cool while you prepare the filling.
Making the Pumpkin Filling
Now that the crust is cooling, lets whip up that creamy pumpkin filling. Its the star of the show!
- In a large mixing bowl, add the pumpkin puree. Make sure youre using pure pumpkin puree and not pumpkin pie filling, as the latter contains added sugars and spices.
- Next, pour in the sweetened condensed milk. This will give the filling a rich and creamy texture.
- Add the eggs, vanilla extract, ground cinnamon, ground ginger, ground nutmeg, and salt to the bowl. These spices will bring warmth and depth to the flavor.
- Using a whisk or an electric mixer, blend all the ingredients together until the mixture is smooth and well combined. Make sure there are no lumps!
Combining the Crust and Filling
With the crust cooled and the filling ready, its time to bring them together.
- Pour the pumpkin filling into the cooled gingersnap crust. Use a spatula to spread it evenly, ensuring it fills the crust all the way to the edges.
- Tap the pie pan gently on the counter to remove any air bubbles that may have formed in the filling.
- Place the pie in the preheated oven and bake for 40-45 minutes. The filling should be set around the edges but slightly jiggly in the center. It will firm up as it cools.
Cooling and Serving
Once the pie is done baking, its important to let it cool properly to achieve the best texture and flavor.
- Remove the pie from the oven and let it cool on a wire rack for about 1 hour. This allows the filling to set further.
- After it has cooled to room temperature, cover the pie with plastic wrap or aluminum foil and refrigerate for at least 2 hours, or overnight if you can wait! Chilling enhances the flavors and makes it even more delicious.
- When youre ready to serve, slice the pie into wedges. If you like, top each slice with a dollop of whipped cream for an extra touch of sweetness and creaminess.
Tips for the Perfect Gingersnap Pumpkin Pie
Here are some of my favorite tips to ensure your gingersnap pumpkin pie turns out perfectly every time:
- Use Fresh Spices: Freshly ground spices can elevate the flavor of your pie. If you have whole spices, consider grinding them just before use.
- Dont Overmix: When combining the filling ingredients, mix just until combined. Overmixing can incorporate too much air, which may cause the filling
Conclusion:
In wrapping up this delightful journey into the world of Gingersnap Pumpkin Pie Dessert, I can confidently say that this recipe is a must-try for anyone looking to elevate their dessert game. The combination of the spicy gingersnap crust and the creamy pumpkin filling creates a harmonious balance of flavors that is simply irresistible. Not only does it taste amazing, but it also brings a warm, cozy vibe to any gathering, making it perfect for fall festivities or holiday celebrations. For serving suggestions, I recommend topping each slice with a dollop of freshly whipped cream or a scoop of vanilla ice cream to enhance the flavors even further. If you’re feeling adventurous, consider adding a sprinkle of candied ginger or a drizzle of caramel sauce for an extra touch of indulgence. You can also experiment with the spices in the fillingtry adding a pinch of nutmeg or a dash of maple syrup for a unique twist that suits your taste. I truly encourage you to give this Gingersnap Pumpkin Pie Dessert a try. I promise it will not only impress your family and friends but also become a cherished recipe in your collection. Once youve made it, Id love to hear about your experience! Share your thoughts, any variations you tried, or even a picture of your creation. Lets spread the joy of this delicious dessert together! Print
Gingersnap Pumpkin Pie Dessert: A Delicious Fall Treat You Must Try
- Total Time: 130 minutes
- Yield: 8 servings 1x
Description
Enjoy the cozy flavors of fall with this Gingersnap Pumpkin Pie, featuring a crunchy gingersnap crust and a creamy pumpkin filling. Perfect for holiday gatherings or a comforting dessert at home, this pie is sure to impress with its delightful blend of spices and textures.
Ingredients
- 1 ½ cups gingersnap cookie crumbs
- ½ cup unsalted butter, melted
- 1 tablespoon granulated sugar
- 1 can (15 oz) pure pumpkin puree
- 1 cup sweetened condensed milk
- 2 large eggs
- 1 teaspoon vanilla extract
- 1 teaspoon ground cinnamon
- ½ teaspoon ground ginger
- ¼ teaspoon ground nutmeg
- ¼ teaspoon salt
- Whipped cream, for serving (optional)
Instructions
- In a medium mixing bowl, combine the gingersnap cookie crumbs, melted butter, and granulated sugar. Stir until the mixture resembles wet sand.
- Press the crumb mixture firmly into the bottom and up the sides of a 9-inch pie pan. Ensure its evenly distributed to create a solid base.
- Preheat your oven to 350°F (175°C). Once ready, bake the crust for about 8-10 minutes, or until slightly firm and fragrant.
- Remove the crust from the oven and let it cool while you prepare the filling.
- In a large mixing bowl, add the pumpkin puree (ensure its pure pumpkin puree, not pumpkin pie filling).
- Pour in the sweetened condensed milk for a rich and creamy texture.
- Add the eggs, vanilla extract, ground cinnamon, ground ginger, ground nutmeg, and salt. These spices will enhance the flavor.
- Using a whisk or electric mixer, blend all ingredients until smooth and well combined, ensuring no lumps remain.
- Pour the pumpkin filling into the cooled gingersnap crust, spreading it evenly with a spatula.
- Tap the pie pan gently on the counter to remove any air bubbles.
- Place the pie in the preheated oven and bake for 40-45 minutes. The filling should be set around the edges but slightly jiggly in the center.
- Remove the pie from the oven and let it cool on a wire rack for about 1 hour.
- Once cooled to room temperature, cover the pie with plastic wrap or aluminum foil and refrigerate for at least 2 hours, or overnight for enhanced flavors.
- When ready to serve, slice the pie into wedges and top with whipped cream if desired.
Notes
- Use fresh spices for the best flavor.
- Avoid overmixing the filling to prevent incorporating too much air.
- Prep Time: 20 minutes
- Cook Time: 50 minutes


Leave a Comment